Showing posts with label Celebrity. Show all posts

Saturday, August 15, 2026

Young Frankenstein Kemp

I'm getting close to completing the Young Frankenstein series with Inspector Kemp. He represents the Lionel Atwill character of Inspector Keoh. For YF, the Inspector is played by Kenneth Mars

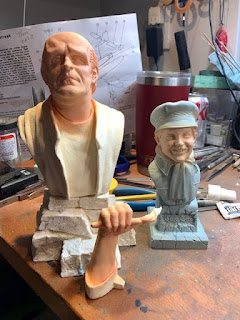
For the kit the likeness is excellent as with the rest of the models. The bust comes in 3 parts - the bust, base and arm. It also comes with some darts and a dart board to replicate the humorous scene.  


 The first step is actually- what colors am I using? I was able to find a colorized version of the movie that shows him in a black hat and a very dark blue uniform. The ornaments on the hat are gold, but silver on the jacket.


My first go round with paint (before I found the images) had him in blue with blue. But you'll at some point the hat changes to black. 

I also jumped back into an old Citadel shad for a base flesh color, and a first highlight. That's where I'll leave him for today. Check back. Thanks for looking. 


Wednesday, July 29, 2026

Young Frankenstein "Froderick"

 "It's Fronkenstein" "You're puttin' me on?" "No..." "Well then why isn't it Froderick Fronkenstein?" "It isn't, it's Fredrick Fronkenstein." 

This time around we have another bust from Pestilence Labs from 1974's Young Frankenstein series - the Doctor. The kit is a pretty simple kit consisting of the 1:4 scale bust, castle base, the "How I Did It" book, and the 2 parts of the collar that flies open during the Act Normal! scene.

I would have to look hard to find any problems but one thing I would have to guess is whys does the Doctor appear to be looking down? I have a theory that I'll keep to myself, as it's an excellent likeness. 


@Pestilence image

To change things up a little I decided to do the base first. It's a simple pile of stones and decided to leave them blend into the overall look - so simple grays and blacks with light gray mortar were used. 

Moving on to the face I added my regular pink/purple mix. While I was waiting for it to dry, I painted the book with some of V's Cavalry Red.  


Adding some various flesh colors I got the color I was happy with.Looking closely at his hair it seemed that he had very dark roots with some bright highlights. It's also quite obvious that they had Wilder in a lot of mascara. Finally I had to look it up to find out he had blue eyes. While that was drying I turned back to the book to add the gold lettering. 


Finally, it shows him in a dark (black?)  tuxedo jacket with a white shirt and collar. Not wanting to use just black and white, I used V's Black Gray, and their Off-white.  Just recently I noticed the buttons on his shirt were dark. I'll have to make that change.  Thanks for looking. 


Friday, July 26, 2024

Young Frankenstein's Igor

This time I'm taking another figure from Pestilence Labs' Young Frankenstein series. It's Marty Feldman as Igor! The kit comes in 4 parts of very clean white resin, plus one plastic container.


The first go round had me use white and brown primer mixed to make a fairly nice looking skin color. Then I put Silly Putty over the face to prime the cloak black. After the black primer had dried, I pulled off the Silly Putty, and for the first time ever (!) the Silly Putty completely took the primer off - right down to the resin. I guess my washing was a little lacking. So again I took some Simple Green (great stuff) and rewashed the face. This time the tan primer stayed on. 


As seen above, somewhere along the lines I also painted a simple stone wall base. From there it was just a matter of giving Igor a few skin highlights, painting the eyeballs, eyebrows, and teeth. Looking it up I found Marty had intense blue gray irises. So I initially painted them a dark blue to get a ring around the edge that he has, and then used V's Azure color to paint in the irises. I mixed a little light gray, and p[ut some small marks to give the iris some dimension. 

While that was drying I took the painted brain, dropped in in the jar and then filled it a bit with some light purple UV resin. This turned out to be a mistake as the brain fit the jar perfectly and some bubbles got stuck. Not being about to do a lot about removing them a just sighed, and continued to fill the jar with more UV resin. With that I was done. Thanks for looking. 


Saturday, June 29, 2024

Frau Blucher Finale

 The idea of this session was to fix the 3 paint pulls along the jawline, and to add highlights/details to the shirt and jumper.

The jaw was actually fairly easy using the stipple method even tho by adding extra layers, it destroyed all the details underneath. 

The leather look (to me) was next. Various jumps in color value gave me what I thought was a decent leather look. The added Agrax Earthshade drew all the colors together.

The shirt was also easy. I used a Sage Green as the base - just to be different. Then V's Pastel Green was a perfect highlight. Then I mixed Ivory with the pastel Green for a 2nd highlight. Finally I added a pearlizing paint to the Ivory for the very high parts of the shirt and I was done with that. 

The final part was looking at the embroidery on the neck and arm cuff. I couldn't find a clear image of her wrist so I painted just what the imprints in the kit gave me. To keep the color going, I used a Green Black for the embroidery.


Taking a good look at the neck showed a different pattern. well, same pattern but colored differently. This was certainly a test for my magnifying visors! Also I noticed the sculptor forgot - left off the little broach she was wearing. ;)


 Once that was done, the final two pieces was a can of Ovaltine, and the joke horse. The producers were able to find the vintage label which I thought was a very nice touch. They also included it both in color and B&W for the people that wanted their model in Grayscale. The horse was simply painted brown, with a black mane and tail.

Once glued on the base I was done (sad note somewhere along the lines the horse was knocked off the kit and was eaten by the carpet monster. If it returns I'll be sure to glue it back on).  


Many producers now give you a CofA. Cool touch IMHO


Sunday, June 23, 2024

Frau Blucher

 The first offering was the Young Frankenstein series was The Monster. The Doctor and Igor was the next too. The latest one was Frau Blucher who seems to have a problem with the horses. And no Blucher is the German word for horse glue as has been mentioned. But reaching blindly in the pile I skipped over the other two and pulled out the Frau. 

The kit comes in 5 parts - the bust, base arm holding a cigar, a can of Ovaltine, and a little model of a horse (the last 3 weren't included in the image). 


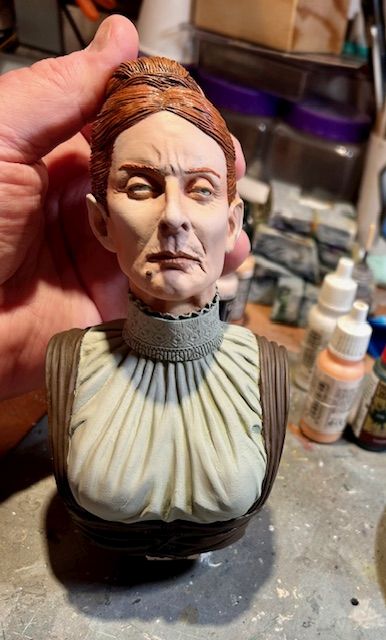
 The first thing I needed to find was a color pic, since I didn't want to paint her as we saw her in the film. I found one - sadly just one, so now I knew what her clothes looked like as well as the color of her hair. It also gives me a clue when I build up The Doctor.


 As usual, the first thing I did was the skin, using my normal techniques. What you see here is the base coat plus some spattering to hopefully bring the skin to life.


 While I was waiting for the bust to dry,  I turned my attention to the base, and since I'm guessing it's part of the castle I just painted the stones gray with splashes of color here and there. 

Getting back to the Frau, I added the 2nd level of skin tones, and then thinking about the white shirt, I just didn't want a big blob of white, so trying something different I turned to V's Sage Green. Planned for later is a Green Gray and then a White at the very tops of the contours. 

I guess I didn't wait long enough for when removing the tape after protecting her face from the shirt green - I had the tape pull off 3 areas around her jaw line. Lots of cursing commenced. I guess I'm getting used to skin errors because I was able to fix it in 2 passes of color. I also put a highlight on her hair.


Adding her final shirt colors as well as putting it all together is next - but that's for the next session. Thanks for looking and check back.

Monday, May 1, 2023

Zuppo Marlon Brando

 I was glad when this kit came along and I was able to add to my classic Hollywood figures and busts. This is Marlon Brando as seen in On The Waterfront. Looking for any color image of the character, I only came up with the colorized movie stills, and  of course he's not wearing the same jacket. So I did my best to assign a color to the different hues of B&W.  Here's a pic of Brando from the movie.


The kit is 1:4 scale and Miguel Zuppo once again does a very nice rendition of the character. In my haste to get started, I didn't get an image of the resin model, so here he is with some primer. 


 I've been watching numerous YouTube videos on how to make skin look more real. I figured I would try them one by one, until I find one that works for me. This one isn't too bad as it consists of spattering the skin with various colors. Applying a little extra Cavalry Brown (which is a dark red) to the eyes and other skin indents, and some dark blue to where a 5 o'clock shadow would be.


After that I mixed some of the skin tone with some Beige Red and misted over the face (leaving the eyes rather dark) until nearly all of the dots were unified with the top color. From there I added more of the basic skin again for the highlights. I then made the Cavalry Brown into a weak wash and added back any skin folds that got covered. In real life Brando has dark brown hair, but I found a still that I liked where they apparently highlighted it. So likewise I added highlights to the hair. In the still he was applying his own "bruise" makeup, so rather than get the chance to ruin a skin I liked I gave him a little bloody mouth. 

The base was just a plain brickwork with a concrete cap, and on the back he has an image of a pigeon and a pistol, which both got painted in. With that I was done. Thanks for looking.


Thursday, January 13, 2022

Young Frankenstein's Monster

 Looking for kits to start the year (besides the Skystreak) I found Mark Warthling's Pestilence Labs Monster from Young Frankenstein, and John Dennett's Tiny Tim. I guess I want to get a head start of next Christmas. But he's for a separate post.

First thing to decide is what color was the Monster. Fortunately the movie being filmed B&W on purpose, and there were plenty of color images available. Where the box are shows a blue-green. He's definitely a blue.


One dilemma I always have for myself is should I paint him up as if the character is real, or as an actor in makeup. I usually go for the former, but this time I went for the later. I got out my flesh triad and went to work.

The blue went over the skin tones. I actually muffed up at this point putting too much blue on, and eliminating all the skin tone. I tried to save it my using my lightest skin ton as the highlight. Worked fairly well.

Then it was time to paint up the clothes. His shirt was a black, and the jacket was a brown. The stone was was painted with 3 colors to add a little extra color to the model.

The kit comes with a broken mug from his scene with the hermit. I was lucky enough to find this screen grab, as I thought I noticed a design on the mug while rewatching the movie. I tried my best to copy it.

Almost done I tackled the fire, and is my typical fire recipe. Remember that fire has to be painted backwards from the usual Base color, shadow, highlight. The lightest (hottest) color appears closest to the source of fuel - his finger in this case. 

The last thing was his eyes. Looking up Peter Boyle's eyes, according to a few statistic websites, I was surprised to find out that his eye color is black! Having a pupil show up against that would be a problem. So I made the irises a dark gray.  I also chose the eyes down as if he's pondering *whats happening to my thumb* look. A little gloss over the eyes, and I was done. Thanks for looking. 


Thursday, November 11, 2021

Marlene Dietrich Finale

 I was ready to call this finished the other day. I took pics and when uploading the to my PC there was something missing. I never added in her eyebrows. I went up to my hobby room, and I gotta be honest and say those two thin lines were the scariest paint stokes for me to date. The model show the scantest line where they go, and even when I drew them in with pencil first - it was still nerve wracking. 

Whew she's done, and this completes my BPMS Pledge for 2021. Thanks for looking.  


Friday, November 5, 2021

Marlene Dietrich part 2

 Back at the hobby desk, and despite not getting as far as I wanted I did make some progress. I finished the painting on the film cans and attached it to a fairly wide Warhammer round base. I feel it has a little more stability that way. Marlene's body is just sitting there, for now, to see how it looks. 

I took another look at the face, and added another layer with some pale flesh. I also did my black eye base, and started her hair. Just holding the head and hat together to see how it looks.  I should finish it up the next session. Check back and thanks for looking.