Showing posts with label TroyMcDevitt. Show all posts

Tuesday, December 2, 2025

McDevitt Werewolf

 When I originally ordered this kit I either didn't pay attention or somehow missed it, but this thing is huge! Having a deep look into Troy McDevitt's offerings it turns out that it is 1/3rd scale. 


 In the same search I found that it was sculpted in 2013 - aah  - nothing like getting to things promptly.

First things first, I found a wolf image that I liked and that I think I could copy. Then it got it's primer coat of black 


The other colors were added. All that's left if finishing the mouth and the eyes. 


Made creepy yellow eyes, and weathered up his teeth, and I was done. Thanks for looking. 


Wednesday, November 22, 2023

The '41 Wolfman

 You can never have to many Wolf-men. 

This one is prom sculptor Troy McDevitt, and it is an awesome rendition of the Lon Chaney Jr. character. The model comes in 4 parts - the head, base, arm and name plate. The resin is perfect. 

 Right out of the box, and test fitting. Looks terrific

Starting to add some base colors -

 
More base colors and starting the highlights.


 Decided on a blue shirt color so I based it with a dark purple to show the shadows, and then epoxied all the parts together. 


Wednesday, November 20, 2019

Godzilla!

I picked this one off the shelf as I saw it as a fast little build.  Sculpted by Troy McDevitt, is a very nice caricature, with one two bubbles on two of the teeth, and seam lines that were nearly invisible.  The part fit very well and only a little bit of Aves was used along the spines, and where the spines met his tail.  After that it got a coat of Vallejo Air NATO Black as a primer.

 I like the NATO Black because to my eyes it looks like there a little green in it, and models don't just look black. After that it got a drybrush of a mid range gray. while that was drying I got out some Ivory and painted the teeth and eyes. Then some Gray Green for the toe and finger nails. I also mixed some of the Gray Green with the Ivory, and painted his gums.

Liking the new Godzilla I had the idea to have his spines light up in that blue white coloring, so sprayed the edges a wide swath of dark blue.
 Leaving the blue to dry , I went back and gave the teeth a was of Nuln Oil. The eyes also got dots of Gory Red.
 From there I went back to the spines, and gave a smaller edging with a light blue. When that dried, I had an even lighter blue that went in a smaller strip along the spines. To finish it off a added dots of white to tallest spines.  To finish him off, his teeth got a dry brushing of Ivory.  Done, nice and easy.   Thanks for looking.


Sunday, May 12, 2019

May 9 Thurs Throwdown

The latest Thursday Throwdown from Mc Devitt Studios Patreon page was Japanese Crab Monkey.  Wow, that was a tuff one. I looked it up and there were images of just regular monkeys sitting in the water eating crabs. So I just went literal. Then I thought of these nature shows where the monkey's eyes are bigger than their bellies and the more food they pick up the more difficulty they have on hanging on to them.  

Thanks for looking. 


Wednesday, April 4, 2018

McDevitt's The Punisher

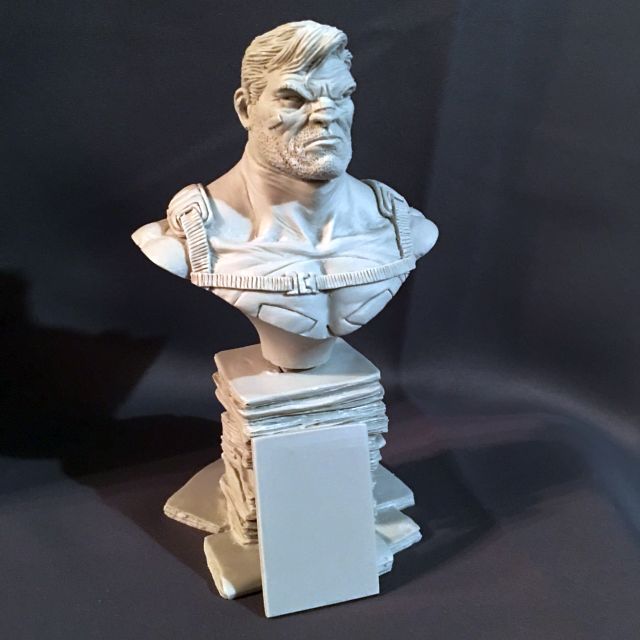
This time around I worked on Troy McDevitt's The Punisher. It is one of his Comics series. Each bust is sitting on a stack of comics having to do with the busts subject. To date Troy has about 10 busts in the series. I recently heard that he has seven more coming out shortly. So if you're a model and/or comix fan, check 'em out. 
The kit comes in three parts - the bust, the stack of comics, and one standing comic book - 

It was very nicely casted with no bubbles and only one fine seam line along the stack of comics.
Things went so smoothly that I only remembered to take a few pics - 
Here the figure is just base coated

Starting to add detail

He had a heavy brow, so he's tilted back to see the eyes
I just kept tweaking the details, until I was happy, then started in on the stack.  In the time it took my to build the model, I had no idea what I did with the decals for the comics. Emailing Troy, he gladly sent me another set. I cut the first one out and had it in the water a number of seconds before I realized that they weren't decals but just cutouts. Doh!! But it made installing them a whole lot easier. I used Tacky Glue, and they went on 1, 2, 3. Once dry I used Army Painter Light Tone to shade the pages of the comics and I was done. Thanks for looking.