Tuesday, September 27, 2016

Flash Gordon Part 4

Haven't spent a lot of time at the hobby desk - BUT I'm almost done with Flash. The following pics show where I'm up to - 
The helmet has been Fututred

Face completed except for gloss on the eyes

The Martian - still not sure if I'm going to use him

The uniform front completed

The uniform from the rear with the cylinders added.
A sneak peak of the next project... or not. ;)


Thanks for looking.

Sunday, September 25, 2016

Flash Gordon Part 3

After all the major subassemblies were done, the next thing up was to get rid of the seam lines. Most parts fit well, and with the Tamiya Thin cement and a little pressure I was able to squeeze the parts together until I saw a little bead of of plastic ooze out. Then a scraping and some fine sanding, the seams for the most part disappeared - 

Now it's time to put everything together -
And start the priming -
I left the Stynylrez primer to dry for a day and then came back with some Silver gray highlighted with White Gray for the outfit. The rings around the joints reminded me of the old outfit Ace Frehley of Kiss first wore -


So I first painted them with Vallejo Metallic's Steel - a lighter color metal will be the highlight -


 Thanks for looking.

Wednesday, September 21, 2016

Flash Gordon Part 2

Diving right in to the kit I put all the major subassemblies together. The first thing I noticed was this huge piece of flash -
Taking that off, it left a big hole in the shoulder of the model -

Evidently, from looking at the other side, that big flipped up piece was part of the epaulet. So the next thing to do is break out the Aves and replace it -
I'll smooth it down more when I get rid of the seam lines in the next step. While I had the Aves out, I added blobs of it to his feet as I plan on creating a new base for Flash. These blobs will let me anchor the figure to the base -
Here he is so far. Thanks for looking.

Monday, September 19, 2016

New Aquisition: Flash Gordon Group Build

This time around I have one kit for you (I have a few more on the way). This is an Atlantis reissue kit of  Flash Gordon.  This purchase was picked up at CultTVMan's webstore in order to take part in a group build of Flash thats on a number of forums on the net including Finescale Modeler, The Clubhouse, and IPMS/USA site to name a few. The build is due by the end of October. So if you're a quick builder there's still time to compete. Find the thread on one of those sites and let 'em know you're in.

Pic #1


X-15D The Decals

Not hearing any opinion on whether the wrinkled decals would work out, I decided to just go with them.  It seems that upon closer look, only the larger decals were affected. Most of them finally settled down with multiple coats of Micro Sol.  In the end most turned out looking ok. Here are a few images:

I am going to give a few coats of Future and since it never  was put into production,  there should be no weathering. All thats left is installing the rear landing skids, and I'm calling this one done.

Tuesday, September 13, 2016

Finishing the Terror Bird

While I'm think about the decals for the X-15D, I decided to finish up the Terror Bird. It's been in a 90% finished for a while now, so it's time to get it done. 
For earlier build notes see here:
Part 1
Part 2

I'll pick up the build story with the bird primed -
While I'm waiting for it to dry I turn my attention to the base and get that primed and put some paint on it - 

Looking closer I decided that I didn't want to molded in grass etc, so those were dremeled off. I then took weeds from the garden, let them dry out and used them on the base - 


The bird is dry, and I get some paint on it. I followed an image I had of a different Terror Bird, but the paint scheme will work -

Putting it all together, I see, the base needs a little more color. So I took some olive green, made it into a wash and hit some of the grass plants. I then added detail to the bird, included some pigments on its feet that put the bird in the environment. Then added screws thru the the bottom of the bas and up thru the feet I was finished. Thanks for looking.


Friday, September 9, 2016

X-15D Part 2

I got a little more done, but also ran into a snag.
First the good news. I took the Dremel to the cockpit area and was successful in getting the windows cut out. I was going to go all the way thru but decided against it at the last minute - 

Next, I primed in the Stynylrez black primer and then highlighted the panels in the white primer. It's sort of the opposite of preshading the panel lines - 

And finally used V's Black Gray over the craft. Reading the instructions (Huh?) I saw that the nose was white, so white it is.  I also hit the landing gear wells white too (not pictured). The below image also shows the plane with a good layer of Future on it  - 
I still have to paint part of the bottom a Titanium color.

The bad news is that I didn't use Future to coat the decals. I used Krylon Gloss, and they wrinkled. Bad. Looking at them this morning they aren't as bad, and since they're sealed I was going to go ahead and try them, and snug them down with Micro Sol. What do you all think?  
Thanks for looking.


Wednesday, September 7, 2016

X-15D Delta Wing

Moving right along, I did an eenie, meenie to pick the next kit out of my stash. The winner was Fantastic Plastic's x-15D.  From their site:
The X-15 rocket-powered spaceplane was arguably the most important -- and famous -- X-plane of the Cold War Era.  Prior to the X-15 program's abrupt cancellation in 1968, the Air Force was drafting ambitious plans for the aircraft, including a "next generation" X-15-D that would test the limits of hypersonic flight (Mach 5+) using an exotic new hydrogen-fueled scramjet engine.  

Unfortunately, the X-15-D never made it past the drawing board.  Had the program been allowed to continue, the X-15-D would have no doubt added further luster to the X-15's sterling legacy.
 Fantastic Plastic retired the kit in 2015, but you never know. They will bring kits out of retirement for a limited time, often. So if you want one keep your eyes open and on their site. 


The kit is 1/72 scale and comes in 20+ pieces of odorless blue resin. It also comes with a pretty extensive decal sheet.  The kit was very clean and I just had to remove a few leftover pour plugs. No big deal.  I was a little confused at first at how the fuselage went together. I've been building these experimental 1/72 planes and they are very small. So in my head this too, was small; not the case. Once I figured that the sections go end to end (and not side to side) the building went rapidly. They had a few tabs molded in to guide the parts together and give a gluing surface. I added a few more out of strip styrene and had the main parts together in no time.


 The cannards and the folded part of the wings went on next. I filled a few gaps, as I went so hopefully when I prime, I won't have much clean up to do. 
Next I built the landing gear and rear skids. The front strut cleaned up nicely and then I added the two wheels. The back skids were one piece each and was a little rougher. Then on the instructions I read that if the post of the skids were made from metal tubing, it would be stronger. So that's what I did. While I was at it, I took some more styrene and created new skids. The posts were clipped metal paper clips. You can see those new parts to the left of the plane -


The next thing I'm thinking about is the windows. The kit gives decals to cover the ovals that are the windows. They look nice, but I am considering dremelling out the ovals and when finished add the Kristal Klear to make the windows more glass like.


Another angle. More coming up, thanks for looking.

Tuesday, September 6, 2016

A Gorgon Sister - The Scorpion

This time around I took Greenwell Studios Gorgon Sister out of the stash to work on. I tried looking for info about Greenwell, but apparently they have disappeared. Too bad, they had good kits.  If I remember correctly, there was 3 or 4 different Gorgon busts.
Anyway, after it's cleaning, I primed it in the usual way - 
At this point I actually left it for a few weeks. I kind of liked that way it looked in the black and white. But then I decided put put paint on it. Here it is base coated - 
As with a lot of my base coats, the colors never last. I always end up changing my mind. At first I started with a darker skin thinking Mediterranean, but then I always make busts paler. Here she is with the finished colors - 
My original idea for a dark Scorpion headress changed as too much detail would be lost. Then I've been seeing mini painters do a terrific job at painting lenses/gems etc... so I decided to make the large circle on the front a gem. I need work on doing them. ;)  It was also my first time at trying a marble pattern. Turned out ok...
Here she is from other angles. Thanks for looking - 


Heinkel He-178: Finishing Up

... And then disaster struck!
When we last left off I was ready to gloss the plane to put some weathering along the panel lines. I took some of the Vallejo gloss clear, put it in the airbrush and sprayed. I came out in a pebbly like pattern. I sprayed more thinking the dots of gloss would merge and form one uniform coat. Didn't happen. But my big mistake was thinking "Well, there's gloss on it, I'll move ahead with the weathering." 
I put some of Citadel's Nuln Oil on it  and it acted as if you put a wash on any Flat paint. It was terrible.  And not only that, since it was supposed to be gloss, I just sprayed over the canopy. Arrrgh! The canopy now looks frosted!
Luckily I was able to take a Q-tip and some water and get most of it off. Cant be said for the rest of it. In some spots a scrubbed so hard I revealed the primer. I lightly sanded the pebbly coating off, and now it was time for  a complete repaint. 
When repainting, I used V's Metallics Steel, instead of V's Model Color Steel. You would think it would be the same color, but no. The Metallics is a lot darker. Which in this case is good as it separates the two metallic colors. 
Do I care about color accuracy? Not at this point. I just want it done.  So here it is - Taa Daa  ;)
Thanks for looking.


Sunday, September 4, 2016

New Aquisitions

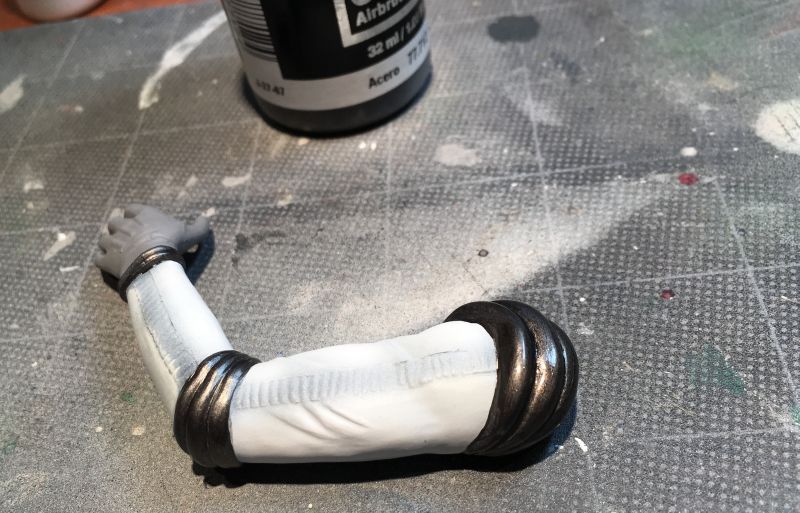
A number of kits arrived these past few weeks. The first package arrived from Megahobby. I ordered the Vallejo Face paint set, and also the newly re-released Retriever Rocket.  Looking at the Rocket there's is one piece that was broken, but it's a clean break and will be a simple fix. The rest of the kit is very nicely done. There's a little flash, but nothing to worry about. One thing I will have to think about is unless I missed it, there's no flight deck. So I can either cobble one together out of another kit, or paint over the windows so no one can see in. As of now, I'm leaning towards build a flight deck.


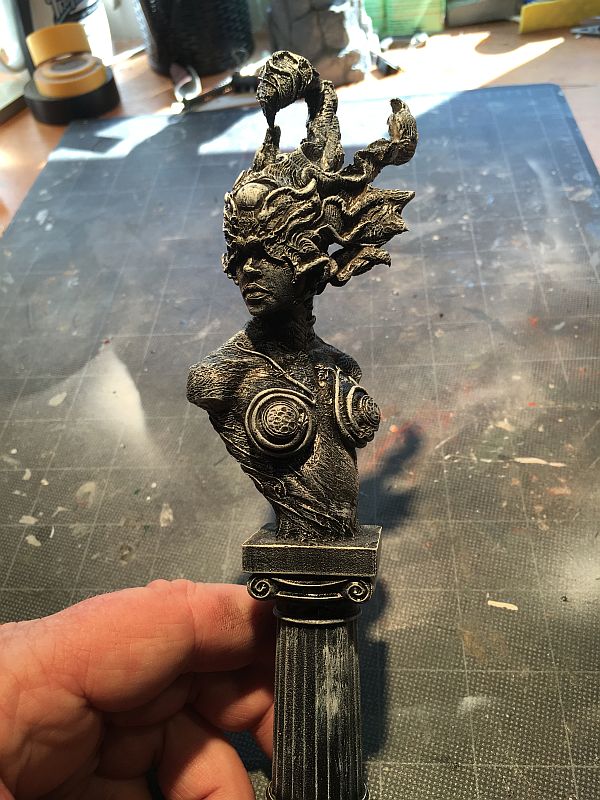
Next was a pre painted statue of Medusa. Medusa is one of my favorite characters in mythology, and whenever I can pick a Medusa up I will  (I have a few waiting to be built). ;)

This one came from Dellamorte Co., doing business on Etsy.  They actually have a number of interesting prepaints. Unless I'm thinking about a different Co., I thought one of the options besides prepaint was a plain resin cast. No more if they ever did. The one I picked up was the larger of two versions and it's in a nice art deco type faux bronze. I've yet to make up my mind if I will leave it as is or paint it up differently.

Next up is another favorite movie character. It's Val Kilmer as Doc Holiday from Tombstone. This bust comes from CGS Military Figures and it a 1/9th bust. The title is aptly called "I'm Your Huckleberry."
I was so interested in seeing it, and I put it together even tho I'm not ready to paint it up. I left his gun(in holster) off so I could make painting easier. But he is depicted tapping on the gun handle.
I can only hope they also produce a Kurt Russell as Wyatt Earp and a Powers Boothe as Curly Bill. My wife is also in love with Sam Elliott, so a Virgil Earp would be a treasure on her desk. ;)

Lastly, I received the Star Duster from Fantastic Plastic. I have a separate review of that one.   Thanks for looking.