Showing posts with label MVT. Show all posts

Thursday, August 25, 2016

Finishing Up The Howling

This time around it's time to put paint on Eddie. Once again, the lighting on the set was very dramatic and it was hard to tell what color Eddie was. That and the fact that there were man werewolves in the movie and I have a hard time keeping everyone straight. So I went with a generic gray, and more brown on the face and hands. I also painted the eye a beige, in prep for making them a piercing yellow. Here's the start -


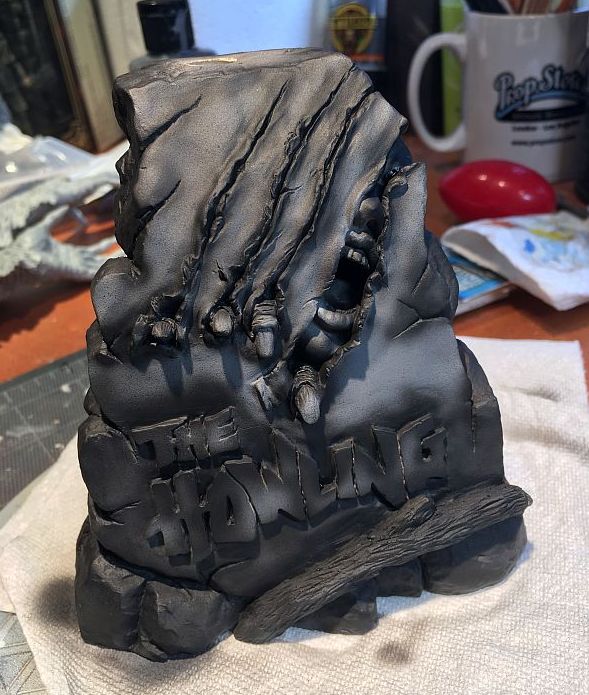
I basically did my usual, and make the deepest recesses darker and the highlight brighter. So here he is all finished and on it's base -
With some dramatic lighting


I think this time I missed on the seams. Using the Aves, I got carried away with the fur and didn't keep the direction in mind. Also in places I made the fur tufts too small for the surround fur. Oh well. It's a nice 2 footer model.  Thanks for looking.

The Howling part 2

I spent a few nights finishing up The Howling bust.  I think were I left off was I was just about to attach the arms to the figure - 

For the first time in a while I turn to Aves (rather than the Vallejo putty) to blend the furry seams together. I then glued the arms to the body and primed  - 

 While that was drying I turned my attention to the base and started in - 


I then looked online and found the poster I needed to copy - 

and came up with this -and then filled in the red color -


I also added a little color to the back


Tuesday, August 16, 2016

The Howling's Eddie the Mangler

Despite my saying it's time to move away (temporarily)  from the horror kits, Eddie has been sitting on my night stand with no nose etc...  Ok, I thought let me, at least, put his together.  Sculpted my Mark Van Tine and casted by Gillman Productions, Eddie comes in about 8 pieces of gray and cream resin. There are no bubbles or flash to be seen.
The parts were key and went together easily. IIRC there was only one join that needed more than a tiny bit of putty to close off.  Here's where I am so far - - 


Every once in a while you get a part where Mark has doodled on. ;)


 Thanks for looking!

Sunday, July 31, 2016

Sir John's Secret

2010's Wolfman gave us Benicio Del Toro as Lawrence Talbot returning to England after his brother turns up dead. It's also a reuniting with his father, Sir John, played by Anthony Hopkins. But John has a secret ...

The kit, sculpted by Mark Van Tine and casted by Gillman Prods.,  is excellently done in 2 parts (the bust and the base). There's no flash or bubbles to be found. 

I kinda remembered what Sir John looked like from the movie, but it was rather difficult to find photos that weren't screen grabs where the colors were affected by other lighting on stage. The most popular one had the whole image in a sort of yellow light. This was no good. 
I finally found "behind the scenes" pics which show a costume in natural light - - 

With these images it was time to go to work. Firstly there was a light seam hidden in the fur. It took about a half hour to clear that away and make it disappear--

 
the kit right out of the box and the base just stuck on.


The seam removed and fur replaced with Vallejo Plastic Putty

The removed seam on the other side...

The base has detail all the way around

Very cool. The sculptor signed it for me!

I then move fwd with the new way I prime kits - painting them black and then heavily drybrushing in white. The reasoning behind this is when you thinly apply color, it will automatically give you two tones--

Primed B&W

First coat of brown

Agrax Earthshde was added
 In the movie, Sir John is an older man with gray hair so when he turns in to a Wolfman he keep his gray hair. So after painting the highlights and shadows of the fur, the final step was to highlight certain parts of his body with Vallejo's Light Gray. Being a coward I always wait until the end to do the eyes. A quick search told me Anthony Hopkins has blue eyes, and I saw nothing in writing letting me know he was wearing contacts. So blue eyes it is - - 


It was obvious that the based was on a wooden block. So rather than hiding that, I brought out the wood grain, but kept the block old looking. The pentagram was painted Vallejo's Old Gold and highlighted with Brass. The scratches were painted with Cavalry Brown, which is actually a deep red, and then put some V's Gloss over it to make it stand out a bit. I also created a "shadow in the pentagram with the same Cavalry Brown.  That did it. I'm done. :)   Thanks for looking.