Showing posts with label Vampire. Show all posts

Thursday, August 28, 2025

Barnabas Collins

 This all started out when I re-discovered the 60's series Dark Shadows on Amazon Prime TV.  I remember seeing some of it as a kid, but I also remember my Mom telling me it was a monster show. So after seeing a few shows and not seeing any monsters, off I went to Magilla Gorilla or some other show...

I was probably into the series about 5 or 6 episodes when all of a sudden I see that Jeff Yagher had just released a Barnabas Collins in 1/4 scale. There was nothing else I could do except pick one up. 

The kit comes in 5 parts - the bust the coffin base his arm/hand, and two pieces for the cane; the stick part in wooden dowel and the wolf's head topper in resin. All cast flawlessly by Gillman.  


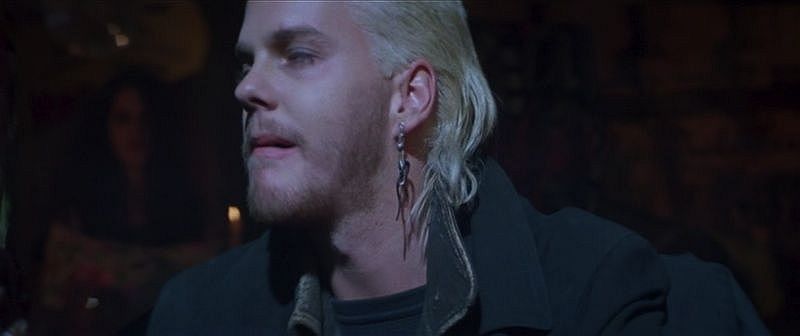
Starting off the usual way, primed in black and then sponged on the white highlight. After that I was at the point in the series where the show switched over from B&W to color.  I also noticed for most of the time, even when he was biting necks (tho you never see it - oops spoilers) he remained a regular skin color. Only well into the seasons did someone think that he could be made creepier with fancy lighting. So since his fangs aren't shoeing in the kit, I'll give him a normal flesh tone. 


Next I had seen on YT that guys were painting texture to mimic clothing by reducing the psi of the air brush to almost nothing and have the paint "spit" out of the brush. So I lowered mine to 9 or 10 psi and then tried it on my cloth. I learned that when you first hit the trigger the "spit" comes out in dots too large for the scale. So the thing to do is open the air over the rag and you can with nearly no mess move the a/b over the part you want to paint.  Any too big dots can be eliminated right away with a wet paintbrush at the ready. After covering the face paint with Silly Putty I just spit away...

I noticed after the fact as see in the kit image that his arm can go a few ways into the socket. Looking at so many episodes where his portrait is hanging in Collinswood's foyer, I placed his arm where the ring is front and center. 


 While the figure was drying I turned my attention to the coffin and cover. I wanted it very simply, so I mimicked wood, with a bronze handle and then just used gloss black for the covering. The pic shows midway thru the painting. 


 The last things was a similar spitting technique - I thought I'd press my luck - to do his outer coat, and to paint his cane. For that, believe it or not, the best chrome I've found is Rustoleum's Brite Metallic. Another vampire put to bed for the day... ;)

Sidebar- I also discovered that Collinswood is a real place in Newport RI. It's a private mansion so if you searching out filming locations like I do - remember their privacy 


Thursday, October 15, 2020

MFTW Vampira

 I think this is the first kit where I got it about 90% done, set it aside - for like 2 years - and now just finished it.  Its about a 1/6th scale kit from Monsters from the Woods.  It was rough in a few spots, but for the most part it was pretty good. 

 The majority of the figure was in good shape, and the portrait was a pretty good likeness of Maila Nurmi.

The hands were the first sign of trouble...

These were supposed to be the sleeve ends. I couldn't make out where they were supposed to go exactly, so I tossed them and made new ones out of Aves.

Portrait done.


Next it was on to the base. This thing is/was HUGE. It looks like the ground and some tombstones were set on a large frame.  Way to big - with lots of empty space.  The model had a separation from about the ankles down, and that all was attached to the base.  I cut the dress loose from the base and tossed the base. From there I glue two pieces of foam, one on another. When that was dry I added some Sculpt-A-Mould to make the ground.  It was here that I put it aside to dry, and somehow it went outta sight - outta mind.

It wasn't until this Halloween season that my wife took it out of "wherever" and set it up as a display. Huh?  Here it is still with the white base.  I quickly snatched it off out table and from it to my hobby desk. I painted the tombstones, and the ground and then added grass.  When that was dry I was finally done, and now it's back on display for Halloween.  The only problem that continues is that the sleeve strips keeps breaking off. One cant help but to grab and hold it like an "Oscar," breaking the sleeves. I think I'll just leave well enough alone.  Thanks for looking. 


Tuesday, March 5, 2019

Nosfer-Galactu

This kit was sculpted and cast by Ken Kidwell, and is approx. 1/4 scale. There was no real seam lines, or flash and just a few pinholes to address.

First thing when I have a head with no hair is do the squiggle pattern all over. In this case I had just bought a new airbrush and just couldn't get my little tight lines. Needless to say after this session, I went and ordered the same one I used to have, and when that came, this one went in the bottom drawer.

The next session I added some light skin tone to a white Gray, and added his sickly skin. After that purple, and sepia wash was added to the creases. His eyes were totally filled in with the Game Color Hexed Lichen.

While the head was drying, I tried another experiment. Here I painted gloss black over the costume, and when that was dry I over painted with Vallejo Metallics Chrome.  When that dried the next step was shooting some Army Painter Purple Tone and then some Red Tone down the center.  Turned out well if I do say so myself. 

A few touch ups here and there including trying once again to paint a gem on his suit. Came out just ok...
After that I called it done. Thanks for looking. 


Friday, May 26, 2017

Lost Boys David - part 3

Part 1
Part 2
 We start off this final session with paint to his leather jacket. As soon as I put the first bit of it down I realized it was the wrong color. But decided lets see what happens - Bob Ross' Happy accidents and all...

While I'm thinking about it, I turn once again to the base. I add a variety of colors to what looks like 2 broken logs some dirt and rocks. Then decided for whatever reason (?) it needed a little purple on the rocks -


Nope. After a few coats of Citadel's Nuln Oil, I decide the Vallejo Orange Brown base for the leather jacket isn't going to work. So I go back to my old standby V's Leather Brown (Doh).
A coat of Nuln Oil later and it looks like what I want - dark - but not black or gray - 
 
A little hard to see but the scratch built earring is in place

 Jumping back to the base, I added some clumps of grass to the dirt areas. Then I get a brainstorm and decided to create the Chinese food carton of worms/noodles. Unless provided, none of my models have title cards. So I decided to try and make one. Since the model is from a movie I decided to somehow try to incorporate into clap board to the title card. I print out a few sizes of the logo, and spray them with a Satin Poly to seal the ink. I pick what I think is the best size, and then start cutting styrene. Nothing super accurate, just so people will recognize what it is. What a pain in the you know what to do the stripes simply with just the Tamiya tape I had on hand.  IMHO it turned out ok - 
Looking it over, I think I'm done. As always, I could tinker with it forever, but at some point I have to abandon it. ;)  Thanks for looking.

A little hard to see but I added 0.01 solder to mimic the threads from the missing button


Thursday, May 25, 2017

Lost Boys David - part 2

Getting into the kit, the first thing I tackled was to add pant legs to cover up the boots. I have no idea how to sculpt fabric, or leather in this case, so I just went for it  - 

Next was to shave off the extra buttons and the feather earring - 
After a quick priming, it was time to move on to accurizing the coat. I worked on one side by taking the second button off, and converting the top most one to some sort of silver badge. It looks like one of those pins that was popular  in the 80s, but with the image peeled off - 
The other side I also took off a button and converted another to a watch body. As mentioned, the medal was wrong, but close enough. 
Then in a detail crazy moment, I noticed there was no holes in the button for the thread. Not having a drill bit small enough to drill in 4 holes per button, I managed to get 2 holes per button - 
Then I decided it was time to put a little paint to the face. I started with a mid tone, knowing that it needs to be more pale. Keifer in the movie, with the help of the lighting was very pale. I also started painting his outfit. David looks to be dressed completely in black. But I know whats not the right thing to do. Straight black leaves you no where to go. So his shirt was done in Vallejo's Black Gray. You can't see it yet, but the overcoat will be done in V's German Gray - 
If you look closely at the knee from the above image, you can see it's still very rough. So it was time to get the Tamiya putty and try to level off some of the rough areas - 
This is where we will leave it for today.  Thanks for looking. 

Tuesday, May 23, 2017

Lost Boys David- Part 1

This kit has been in my stash so long, I no longer know who I got it from or anything about it. All that I remember was got got it with a Wolfman kit from someone selling in the Members Swap and Sell on The Clubhouse. 
Subsequently I did find out that it was produced in 1996, edit: and sculpted by Shawn Nagle, which answers why it was rather rough. 
The kit came in 4 parts - the body, 2 hands, and the base. The resin was a brown/orange color. I don't know whether that was the color of the resin, or just that the resin aged. I've seen some older kits turn that color.


The face sort of looks like Keifer Sutherland - not great, but not terrible. But looking at screen grabs from the movie, I found a number of discrepancies. Firstly as you may be able to make out in the above pic, he's wearing boots. All the screen grabs I've seen, he is wearing boots, but they are under the pants.


So the top edge of the boot will be cut off and shaved down. My rookie sculpting skills will come into play to make the pants extend down to the top of his boots. 
 
Then I got a nice pic of a prop replica of his coat. The model has 4 buttons on each side of the overcoat. Umm, no. 
On the prop, the right side had only the 2 bottom buttons, the third one up is missing, and top one is replaced with some sort of metal badge.  The left side had the same 2 bottom buttons, then the third button was replaced with a watch that was attached to the coat backward. In place of the top button was a medal. The medal was there, tho not exactly accurate. Close enough. The errant buttons need to be cut off and the other pieces need to be sculpted on.
There is a leather jacket under the topcoat. The model has it with a zipper. I couldn't find any clear pics to indicate whether it had one or not. The prop replica says no, but I couldn't find any other clear images.  I'm not a sculptor and figured I already had too much to do, so I left the zipper. 

Finally, David wore two different earrings at different points in the movie. The one he wore the most looked like a few folds of wire with a short length of fabric or leather in the bottom fold  (the other was an earring with a tiny knife on the end). 
The model, had what looked like a short length of jewelry with a feather on the end. I thought, could that be a knife? No, it was a feather. So it was cut off. 

We'll see this work in part 2. Thanks for looking.