Showing posts with label Flash. Show all posts

Friday, July 20, 2018

Flash Gordon's Rocketship Finale

I was further along than I thought. Seems when I sat down for my latest session, all I had to do is glue the cockpit area the the rest of the fuselage.  They were butt jointed so I had to  match the center window with the center fin on the back. I was done. Thanks for looking. 


Monday, October 3, 2016

Finishing Flash Gordon

Ok, all done.  
But picking up from where we left off last it was just a matter of getting his head on his shoulders and then tackling his helmet. Finally the base was done.

I was glad I checked as I was going to put the head on and then put the bubble helmet together and just simply slip it over his head. Nope won't fit. So, the head went on and then the back part of the helmet was fixed onto his shoulders.  There has been talk of what to do with the seam line.  Some have bought an aftermarket helmet. Others simply said they are not going to worry about it. I fell in the not worrying about it category. But what I did was put a black edge on the front part. I had previously taken a little piece of lead wire (from Bass Pro Shops, I think)  and put a dot of PVA glue on the tip. This will mimic a microphone. I then attached the front piece to the back part.
Looks good but there's no real support of the microphone. It just sorta sits there inside the helmet. The blackened edge didn't really show up as I had planned. I needed to do something else.  In the end I too the simple route. I took another length of the solder wire - which is incredibly flexible - and curved it around the outside of the helmet from where the microphone was to where the helmet met the neck ring. A touch of superglue wicked the glue along the length of wire. I then took a file and VERY gently sand the tip so that it looks like it's angling into the helmet. Some black paint finished off the illusion. 
Next I turned my attention to the base. The one that comes with the kit is actually two small bases. One for Flash that has a large crater, and the Martian had a tiny one, with a tiny crater. I didn't like this. But I wanted to include the craters. I cut them off and arranged them on the base -
Those other marks are just where I scored the wood so the Celluclay would lock down. The Celluclay was next -
I made it a little uneven for variation, but had to keep it level enuff for the two figures to stand.  
Once the Celluclay was dry I added some sand around the base - 
Color was next. As It's Mars I added various orangy browns and oranges. Pics of Mars always show few rocks that look black - so I added them in as well - 

The next was how to get Flash to stand on his base. I didn't thing the wires thru the feet would do it - tho it worked for  the Martian. Since Flash is pretty lightweight except for where I put the Aves in his feet, I ended up getting out some magnets and adding them to both the feet and the base. You can see some circles (magnets) in the base.  Once all the magnet glue was dry I added him to the base. I took the supplied sign, chppoed off the feet, added wirelegs and then after a black primeadded two tone lettering. A coat of satin clear on the sign and the model is finished. Here's my Flash Gordon. Thanks for looking -


Tuesday, September 27, 2016

Flash Gordon Part 4

Haven't spent a lot of time at the hobby desk - BUT I'm almost done with Flash. The following pics show where I'm up to - 
The helmet has been Fututred

Face completed except for gloss on the eyes

The Martian - still not sure if I'm going to use him

The uniform front completed

The uniform from the rear with the cylinders added.
A sneak peak of the next project... or not. ;)


Thanks for looking.

Sunday, September 25, 2016

Flash Gordon Part 3

After all the major subassemblies were done, the next thing up was to get rid of the seam lines. Most parts fit well, and with the Tamiya Thin cement and a little pressure I was able to squeeze the parts together until I saw a little bead of of plastic ooze out. Then a scraping and some fine sanding, the seams for the most part disappeared - 

Now it's time to put everything together -
And start the priming -
I left the Stynylrez primer to dry for a day and then came back with some Silver gray highlighted with White Gray for the outfit. The rings around the joints reminded me of the old outfit Ace Frehley of Kiss first wore -


So I first painted them with Vallejo Metallic's Steel - a lighter color metal will be the highlight -


 Thanks for looking.

Wednesday, September 21, 2016

Flash Gordon Part 2

Diving right in to the kit I put all the major subassemblies together. The first thing I noticed was this huge piece of flash -
Taking that off, it left a big hole in the shoulder of the model -

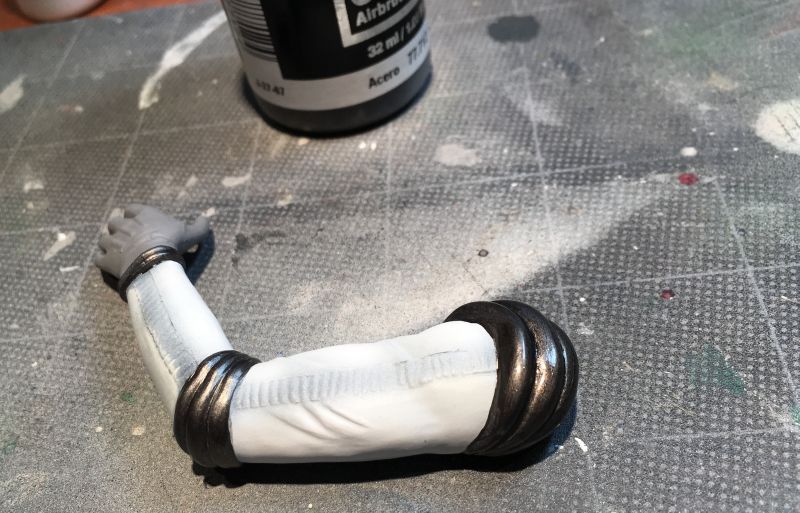
Evidently, from looking at the other side, that big flipped up piece was part of the epaulet. So the next thing to do is break out the Aves and replace it -
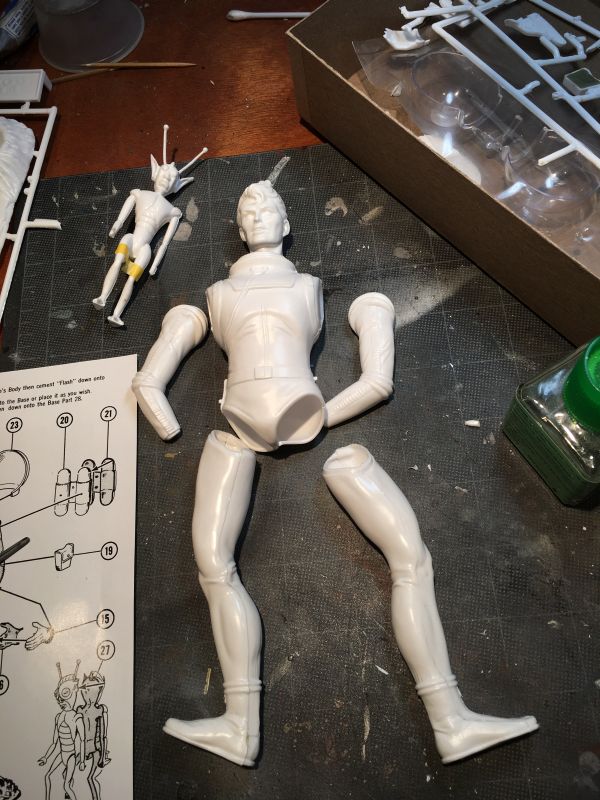
I'll smooth it down more when I get rid of the seam lines in the next step. While I had the Aves out, I added blobs of it to his feet as I plan on creating a new base for Flash. These blobs will let me anchor the figure to the base -
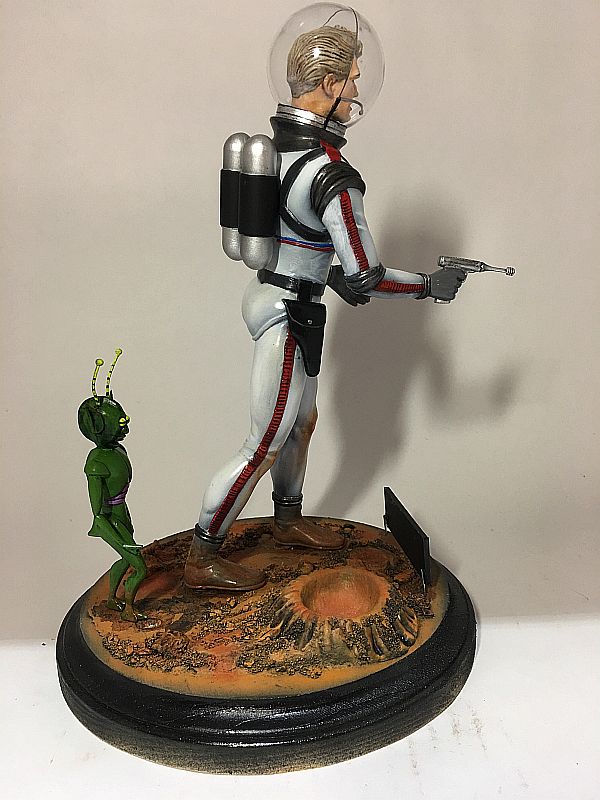
Here he is so far. Thanks for looking.

Monday, September 19, 2016

New Aquisition: Flash Gordon Group Build

This time around I have one kit for you (I have a few more on the way). This is an Atlantis reissue kit of  Flash Gordon.  This purchase was picked up at CultTVMan's webstore in order to take part in a group build of Flash thats on a number of forums on the net including Finescale Modeler, The Clubhouse, and IPMS/USA site to name a few. The build is due by the end of October. So if you're a quick builder there's still time to compete. Find the thread on one of those sites and let 'em know you're in.

Pic #1