Showing posts with label spacecraft. Show all posts

Saturday, November 2, 2024

Tsiolkovsky Moon Rocket Part 2

This session will be a short one.

It took a few rounds of filling and sanding, so now it was time to hit it with some primer to test the  fix. One line doesn't really matter as one of the 3 fins covers it. But the other needs to be as perfect as possible since the final finish with me a metal one. 


Then it was time to install the fins. I've been dealing with resin garage kits long enough so the idea of the fins fitting perfectly first time around would require a miracle.  And I was right. Running our of gel superglue, I was stuck with the fin stuff, and that meant that I had to go nice and slow to prevent runs.

They sort of fit together but there will again be a lot of filling. But nothing I couldn't handle. Once they were all on. I did a quick filling with the Vallejo putty. They spread pretty easily, but there will be a lot of cleaning taking the putty our of the grooves on the fins.  That will be for next time. Thanks for looking and check back.


Friday, November 1, 2024

Willy Ley Orbital Rocket

Late last year at one of my Model Club's Zoom meetings there was mention how expensive kits were when all the aftermarket parts were obtained. someone else wished we could go back and just build a kit without worrying about anything. It was thought up early this year that the Club would have a group build entitled "Build Like An 11 Year Old." Being one of the sponsors of the build I was now on the lookout for a kit that I either built or could have built as a kid in the late '60's - early '70's.  Not long after, I saw in an email blast from CultTVMan, that the Atlantis had the Willy Ley Orbital Rocket available.   According to Scalemates, the original kit was released by Monogram in 1959, and then Atlantis re-popped it in 2024 in the same 1:193 (?) box scale size. 

It arrived at the house not a week after ordering and upon opening the box I was brought back to being a kid again with red, white and blue colors of the plastic. All the flash also brought back memories. 


 The back of the box also had a surprised in that the photos were those of Allen Ury of Fantastic Plastic

Now, how was I going to build like an 11 year old? First thing I thought of was that with the colored plastic, I wouldn't paint it. Remembering back, not having an older brother or dad who built models, I probably wouldn't have known how to fill seams- so I would leave this out too. 

An early problem was that one of the astronauts appeared to be missing. I figured that was fine as what's the chance a little kid would lose a part - pretty good- I thought. So in the main ship I had just one pilot. Bust as you would know it, after the fuselage was glued together, I found the 3rd astronaut on a different sprue covered in flash. Perfect, I thought, as I was prying the fuselage open to get the second pilot into the main vehicle. 

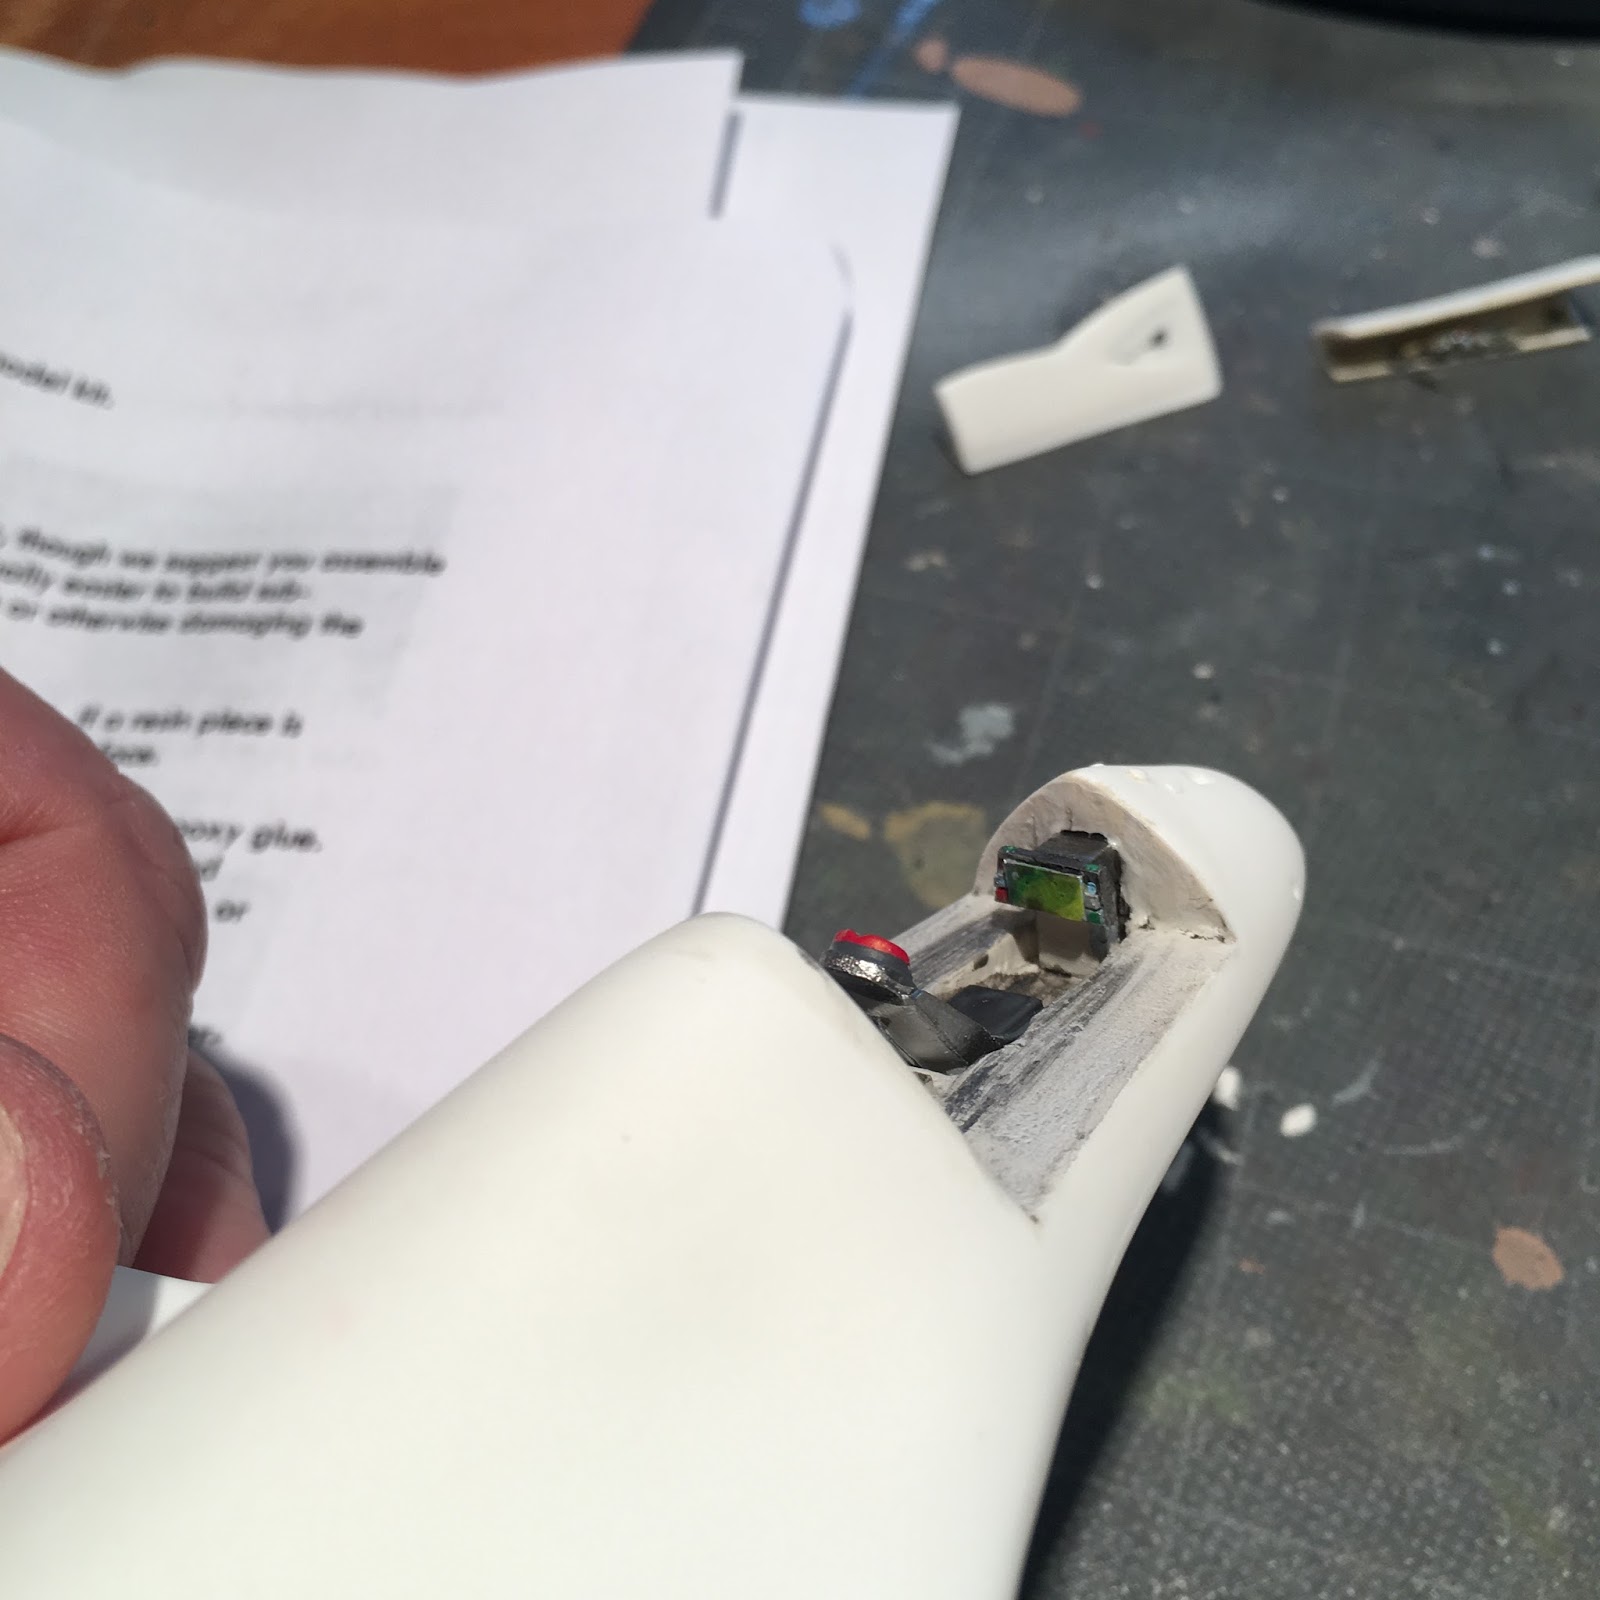
Thinking of the 50s and how the real spacesuits were silver, both pilots were brushed with silver and just a dot of black where their face shields would be. An 11 year old would be aiming, but I just quickly made two dots...


While I had the silver out I also painted the engines with the color.

The rest of the model went together fairly painlessly. With the interior of the second ship more visible and smaller, I smeared around some gray paint in there. I was also at this time I saw where the painting instructions were hiding and discovered that the astronauts were supposed to be in a light green uniform. It was too late for the first two guys, but the 3 pilot was painted with a lime green, a silver helmet, and the black dot.

Now it was time for the decals. I remembered that I wouldn't have know about Micro Set/Micro Sol, so I wouldn't use those either.  Here it was discovered an error on the decal sheet. On the wings of the main ship was two yellow, triangular stripes, one for each wing. I cut them out, dipped them in the water and then realized that they were both for the same side. An 11 year old would have known he couldn't use them, but probably wouldn't have figured that they could be used as stencils and paint the stripes on - at least I wouldn't have thought of it. So I just left them off. After all the decals were on, many stood proudly above the plastic because of all the rivets. So in an effort of trying not to lose them with handling, I gave in and Micro-Sol'd them down ~ -1 point for me. 

With that I glued the two ships together and then to the stand. I came as close as I could to being that 11 year old. My other point loss would be that I wasn't going to search out the Testor's Tube Glue I remember. So I just used the Tamiya Thin that I had. With that, I was done. Thanks for looking. 


Wednesday, September 18, 2024

The Tsiolkovsky Moon Rocket

 Years ago Fantastic Plastic started started a new genre in their store of the classic rockets from the movies, etc...  A number of kits from the line were produced and he manages to release new ones.

But this one I picked up from CultTVMan from Adam Johnson and AJAmodels. From their info sheet: In 1935, Konstantin Tsiolkovsky  was asked by Boris Shumyatsky to assist in writing and designing a moon rocket for a film called "Cosmic Voyage." The films depicts ut's (fromIMDB):  

... 1946, the Soviet space program is undergoing turmoil. Professor Sedikh, who is planning to lead the first manned exploration to the moon, is denounced by his rival Professor Karin as being too old and too mentally unstable for the mission. Professor Sedikh, aided by his assistant Marina and a youth named Andryusha, disregard Prof. Karin's authority and make a successful landing on the moon. Although a few problems occur at the moon, including the discovery of a damaged oxygen tank and Professor Sedikh's becoming trapped under a fallen boulder, the expedition is a success and the cosmonauts return to Moscow.  

\Tsiolkovsky died during the film's production, marking it as his last achievement in life, and his goal of the promise of manned space travel.

The kit is made up of 6 gray resin parts, plus a number (they are still wrapped up) clear acetate pices to make a display stand. Decals are also included.

Starting the build I noticed the first problem. The fuselage parts are well done, but they are mismatched. They are both the same length, but if you line up end to end the 4 circular windows don't match. So the thing to do here is make sure the windows are circles and worry about sanding both ends of the ship later.


With the fuselage fully super glued. It was now time to tackle the seam-line along the length of the craft. To keep things neat I laid down two rows of Tamiya tape and then applied Tamiya Putty to the seam. 


That's all the time I had for this session. Check back when the 3 fins get installed. Thanks for looking. 


Saturday, June 29, 2019

An Idea for my Rocket Garden

One of the problems I've constantly had with my launch vehicle collection is that I would like to have them standing in launch position (rather than laying on their side). But with some of the models, and their very narrow features, the slightest bump would topple them over.

Ive been thinking about how to secure them vertically without having to create a launch platform for each and every one.

Another interest of mine is to build and paint miniatures. Looking at a recent purchase I took special note of the  the base that was included. It was a simple black disk with a lip on the bottom. It hit me that if I add clear upright rods to it, it may hold the rocket in place.

This time I just used the Tamiya Thin glue to attach the posts to the base. In the future I may drill into the base and then add some epoxy on the bottom for extra strength and weight.

This is what the result was -


 It's not going to win any Invention of the Year awards, and there may be something like it already out there - but it serves my purpose. Plus I can vary the  posts to the different diameter rockets I have.

I bought a bunch from GreenStuff World. Tho in Spain, I've dealt with them before and wasn't worried about unreliable deliveries. Different sized bases can be gotten to match the  different diameter vehicles. They can also be had in thin MDF, as well as plastic.

Here's my New Ware Thor Burner II in the stand.  I hope it helps someone else. Thanks for looking.


Friday, November 3, 2017

Glencoe's Retriever Rocket

Rumors of my modeling demise have been greatly exaggerated.  LOL  I've still been building but with the latest Apple iPhone update, it's more difficult to upload images from my phone to the PC. So things have slowed down. But anyway...

Glencoe's Retriever Rocket has been around a while, and while I vaguely remember building it in my youth, I decided to try it again. 


So far the only problem I had, was that out of the box one of the rings had snapped - 

No worries, that should be easy to fix.
The next thing I noticed is that the large "flight deck" windows reveal ... nothing when you look in.  So I had two choices, to create a flight deck or to darken the windows so you can't see in.  I chose the former and started my search  for parts to fill the void. The model box says the kit is 1/72 so I got my casts of a 1/72 pilot and created a few more. My craft will have 3 in there. I also found 3 seats on Megahobby. Looking for 1/72 instruments to busy up the area, I came up empty, so I did the next best thing in getting PE instruments in 1/48.

Starting with the flight deck, once I got the windows in, I then got out my strip styrene to create a back wall, and a floor, and painted it gray. The window part is very thick, so I painted the edge black and then glued the instrument PE to the edge of the window - 
From there the rest of the build was easy - with the exemption of the port hole windows. There was no problem with them, but while cleaning the tab off one, it flew and was promptly swallowed by the carpet monster. 


Once it was all together, the entire interior was very hard to see. While you can see a pilots head in the window, I had the feeling the pilots are too big. I should have used HO (1/87) figures. I also should have painted the flight deck a lighter color so you could see in better. Oh well. 

With building essentially done, I turned to painting. Then I noticed something odd. The paint instructions on the instruction sheet does not match the colors used on the box art. Hmm. I decided to go with what's in the instructions.  I started by applying Rustoleum white paint/primer. There was need to fix some seam lines on the hull, then a repaint.


 The rest of the painting went without incident, and I'm calling this one done. In the finished images, note that the side port hole windows are made with  Microscale Kristal Klear. Thanks for looking. 

 
Hard to see. There's 3 pilots in there.


Thursday, August 3, 2017

New Aquisitions

Checking out my booty from the latest trip to the Nationals. Being my likes are so narrow, I didn't buy any kits myself. But I did pick up a few tools - 
From Top to bottom - red box is a razor saw from UMM, then the next two are a diamond bit file and then a seam scraper from Volks. Below that is a flexible straight edge for scratching seam lines from UMM. Below that is a handle that came with the set of glue applicators (to the right), and some thin CA glue above that. All from Glue Looper. The two items on the left are 2 sable brushes - also from Volks.

During the Real Space Modelers Seminar, which doubles as a Meet and Greet of the members of the Yahoo Space Modelers Group, they have a grab bag giveaway at the end of the meeting. My son won the Airfix LEM and astronauts. But since he only builds armor, he gave them to me - 
Then another man sitting next to me won the Revell Apollo Soyuz Link Up in 1:96 scale. He turns to me and says he already has it, and hands the kit to me.  I'm a scale slave, that's not my scale, but as it's a gift I will build it. 
Finally the mailman dropped off two packages. One before I left and 1 after, The before box is the Galaxy Quest Shuttle. It comes complete with Berellium spheres, and a base. I have an idea for base and will create something  different  - 
Finally my good friend Paul Gill, from Gillman Products held the kit for me mailing it the day before I came home, so it wouldn't be sitting around unattended in front of my house. It's Beetlejuice, Beetlejuice, Beetlejuice!  I comes complete with a resin copy off the Book for the Recently Deceased. Pretty cool!

EDIT:  After I posted, the mail man came with a box from Fantastic Plastic. It's his 1:24th scale Velocipod from the 2004 movie The Incredibles.


Time to get building again! Thanks for looking.


Sunday, July 9, 2017

Worm Hole Exploration Module

This is a 1/72 scale kit from Black Sun Models (BSM). From the entry - 
1/72 replica of the IASA module that got sucked in to a wormhole, propelling Astronaut John Crichton into a distant part of the universe. Features complete interior, optional hedge drive parts, clear vacuformed canopy and ALPS-printed waterslide decals by JBOT. May be built with gear up or down.
As you may or may not know from the name John Crichton is one of the characters from the TV show Farscape.
The model is in about 16 parts and the resin is bubble free, and a few seam lines are easily cleaned off. 
(from Starship Modeler Store)
  The first thing after it's wash, was to prime in white and start adding the cockpit components - 

There are two side panels that are very well detailed. To "busy" it up, I painted in a lot of buttons - 
There are also side windows according to the box art. I saw, after the fact, that there was black decals for these windows. But I didn't know about them til later, and began cutting out the windows - 
The box art
 
 The cutouts will let the observer have a better look at the side panels. Now's the time to install the side panels, and the optional hedge drive engines, and begin painting. It was stated the the hedge drive engines didn't appear until later in the series. Not a huge fan of the show, I just decided to install them.

The top was to be an off white and the bottom a dark gray color - easy enough except that I forgot about the "off" part and painted it Gloss White. 

Then the problems started.  BSM gives you not one or two vac form canopies, but 4 of them. They were Futured, and when cut out, none of them fit. Being all the same, they were all too small. Even when I installed a 2mm piece of styrene (which also meant I needed to do more filling and repaint) it was still a bit too small. 
Installing the landing gear, I realized that I was given two starboard land gear!  With the frustration fairly high at this point I just installed the wrong gear essentially backwards. The next cheap-o plane model I can get my hands on, I'll cannibalize the gear for this model. 
 
Not the kit's fault but I had planned on using Micro Kristal Klear to fill in those side windows. Nope. The space was too big. I had to cut out clear pieces of plastic and install that. 

Taking a deep breath, I weathered the bottom of the craft. Having already glossed the top I finished the model by adding the decals. 

Despite the problems, the model turns out to be a nice "2 foot model". It looks good from 2 feet away. Will it win any awards? No. But it looks nice next to my other single seater space vehicles. Thanks for looking.


Friday, July 29, 2016

Rocketship Galileo

Another in Fantastic Plastic's line of "classic" space ships, the model was based on Robert Heinlein's book. The story goes: 
After World War II, three teenage boy rocket experimenters are recruited by one boy's uncle, Dr. Cargraves, a renowned physicist who had worked on the Manhattan Project, to refit a conventionally powered surplus "mail rocket". It is to be converted to run on a thorium nuclear pile which boils zinc as a propellant. They use a cleared area in a military weapons test range in the desert for their work, despite prying and sabotage attempts by unknown agents.
Upon completion of the modifications, they stock the rocket, which they name the Galileo, and take off for the Moon, taking approximately 3 days to arrive. After establishing a semi-permanent structure based on a Quonset hut, they claim the moon on behalf of the United Nations...

Then the excitement starts...
The model, which was retired a while ago, comes in 9 pieces of blue resin. There are no bubbles or odor and very little flash. 


Putting it together is pretty straight forward and the parts meet up nicely, tho there is room for a little putty work. 


All images show the space ship as white - and by now you know I hate white. To me, white never looks white, and I'm always looking for the "brighter than Sun" white. No such thing. 
So the paint went on over a gray primer - 


Of course there's always little divots that need to be addressed. The added work was done when I dropped the model and snapped off the vertical fin :-P  -


You have two choices for the engine exhaust - a nuclear exhaust (which is what I used) and a chemical exhaust. The landing gear are made up of two skids. A length of styrene rod is included and you must cut the struts to the provided length, then glue to the skids, then to the rocket. 


All in all it was an easy kit to put together. The window and door was simply score marks on the fuselage. I tried the mini painting technique for doing windows/gems - I'll leave it to you whether it worked out (I didn't think so). The exhaust was painted Vallejo Glossy Black and then I used V's new Aluminum metallic paint. That stuff is awesome! 


Anyway there it is. Keep watch of Fantastic Plastic's site as he brings back  certain retired kits for a limited time. So it may be possible to see it available again one day. Thanks for looking.