Showing posts with label Military. Show all posts

Saturday, March 30, 2024

Meng Sherman

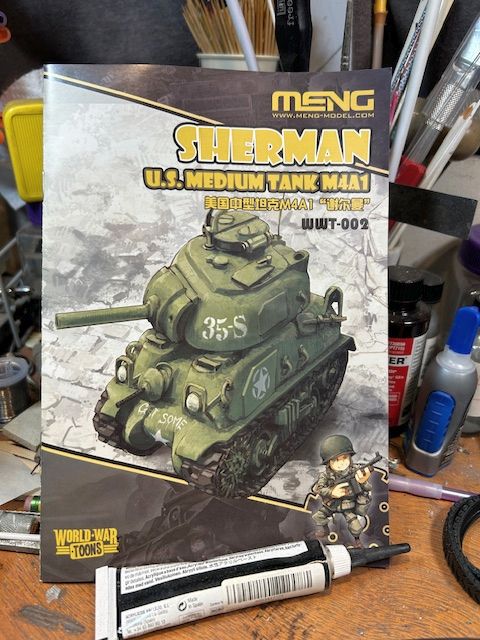
 This time I did something a little different with the Meng Models World War Toons Sherman tank. It's one of those "deformed" type models, like the egg planes. There was no scale listed.


 The biggest bonus to me was that they had the "rubber band" type treads. I couldn't imagine myself sitting there assembling the treads on section at a time. I assembled the major sub-assemblies and then painted it the US Olive Drab green.


 After that I added the decals which went on very nicely. I then added a little weathering ala Night Shift

The base was done with a piece of cut up foam, and the hedgerow  is a plastic aquarium filter material covered in Ground foam. With that I was finished. Thanks for looking. 


Thursday, October 7, 2021

Italeri Autoblinda AB41 Finale

 These past sessions I've been working on the base, making it look like it's in a Mediterranean climate. The Groundwork is foam, sitting on a wood base, and then wrapped with sheet balsa. The wall is foam, and the palm tree is one of those 10 packs from eBay. Thanks for looking. 


 I ordered figures to go with the scene, but as of yet they are a no show. I'll add to this post if and when they get added to the scene.  Thanks for looking.

Saturday, October 2, 2021

Italeri Autoblinda AB41

 Hello, I'm back. I lost the mojo for the longest. But it was an 'out of my comfort zone'  group build from my model club that got me going again.  There was a long time member of the club who was heavily into 1/72 armor. He recently passed away, and  the build simply to build a 1/72 armor kit. Watching my son build his armor kits and watching him tediously put together all those tracks, I decided to try something with wheels. 

What I got was the 1/72 Italeri Autoblinda AB41 from Megahobby. Now I realize 1/72 is small. And I build all 1/72 aircraft, but holy moley this thing was down right tiny!

Even for a tiny vehicle, there was an amazing amount of detail!  The kit also gives you the option for four different versions - two Italian, and two German versions. With all the camouflage I've done from my Luft '46 planes, I decided a nice easy tan Italian car would be the way to go.


Being a big fan of "Uncle Night Shift" despite not doing armor vehicles, I followed his instructions for chipping and painting. All that's left for the vehicle is a mist coat to simulate the dust of the road.

 Being really small, I decided to put it on a little base, so out came the foam. I put down some glue and the sand, but didn't like it. Got out the Vallejo paste, but that's for next time. Thanks for looking.


Monday, March 8, 2021

RS Models Heinkel 112v3

 As I make it plain, I love the prototype, or never made if off the drawing board type plane models. This one was almost the case. Needing a fast plane this He112v3 lost out to the Bf-109s. Not because it was fast enough, but because they were too expensive. You see, the plane had a jet rocket in the tail. While the German's said no, a few were made for other countries. 

This is a resin kit from RS Models and is in my usual 1:72 scale. 


The one dislike I had for the model was most of the parts were put right on the pour block. You had to be REALLY careful when cutting parts off the block.

Once the cockpit was installed and painted (those tiny resin foot pedals were a bear to keep from losing) the fuselage was glued together.

Then came lots of filling and sanding!

I was so afraid I would break the landing gear before getting it off the block!


Then came the primer, and then more filling and sanding. Then tragedy struck. Despite it being a partial jet plane, it only had a wind screen. (?) Somewhere along the lines it was eaten by the dreaded carpet monster!!  Grrr!!


 I tried using the only other vac canopy I had. Wasn't the right shape, but at least there's something there, and I can say it's finished.  

The decals were ok, but needed a long soak to get off the backing paper. I keep complaining about my camera on the phone but this makes me really want to solve the problem. The instructions call for it to be RLM 02. But the phone had other ideas. Edit: I saw a video by ISM and gave hints on improving pics with your phone. So I retook. Anyway, thanks for looking. 


Saturday, July 11, 2020

Mikr Mir's Sam -13

Always on the lookout for the obscure, odd or prototype planes, I found this little gem on the pages of SAMI where the kit was being reviewed.  
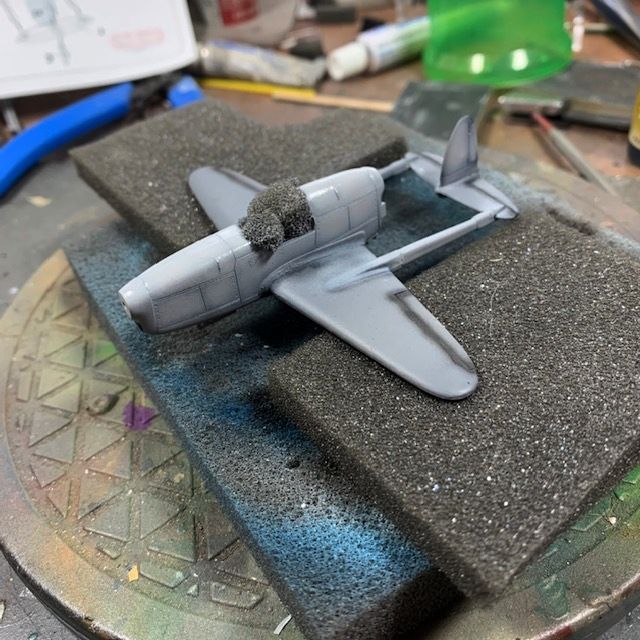
The Sam-13 (Cam-13)  was designed in pre-war Russia, and based around Renault 6 cylinder engines. One prototype was built. But this was destroyed as the Soviets fell back against the German invasion of the eastern front. The design was never revisited.

It came with 2 sprues of gray plastic, one (mostly) clear canopy, a fret of PE, and a small sheet of decals. 

The instructions are the typical exploded views, where the exact location of some parts are hard to determine.  The other issue with the kits was that the plastic was pretty fragile. I broke the back off the seat off twice, by apparently leaning on it too heavily. 

There were no locator pins so the parts wanted to wander until the glue set up. 

It wasn't mentioned but with that rear boom, I didn't want to take any chances, and added Liquid Gravity to keep it from being a tail sitter. 

The horizontal tail fin was a tight fit, and I should have done something about it.  While it was drying, it popped out a little on one side and the glue dried that way. :(  Lesson learned.  Also after folding a piece of semi-large PE it jumped, hit the ground and was eaten. I actually laid on the floor looking for it to no avail. :(


With no specific color call outs I used what I had. The gray was Vs Sky Gray and the blue was RLM 24. I did blacken the panel lines a bit with Vs NATO Black. Sitting the canopy on the plane, I was amazed to see that the canopy was a perfect fit - until it came time to glue it on the the fuselage. What happened? :(

But after adding the landing gear I called it done. Thanks for looking. 


Wednesday, January 15, 2020

MAiM Hammerschlag

This is another kit from deep in the stash. I'm guessing I saw it on FB somewhere, had to have it, and then buried it in The Pile. LOL ;)  It's a 1:24th scale kit from Modern Armies in Scale (MAiM). It's listed on their website under the category "What If '46." 

It's 3D printed and then I'm guessing cleaned, molded and cast as I don't see any grow lines. I'm guess whats supposed to be a fuel tank has a lot of edges rather than circular, but it's so obvious, it had to be on purpose. There's ~20 parts to this kit. 


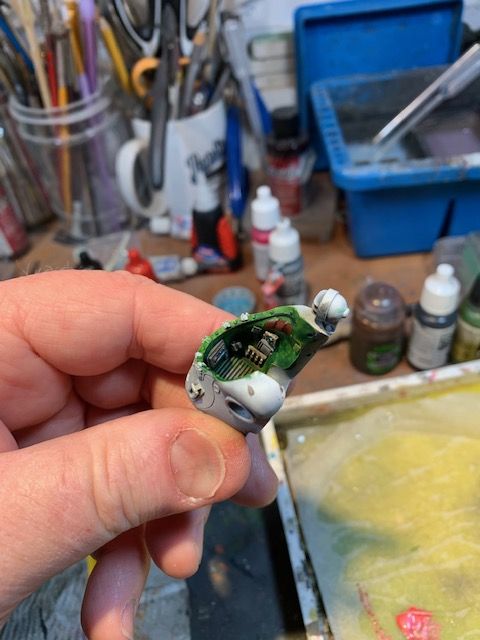
The main body comes in 2 parts and gives you enough room to paint the highly detailed interior.  Being that it was a What If '46, I went with olive green color interior, with a leather seat. 


I started out painting the jumpsuit of the figure a red metallic as it is sort of a futuristic design. But no matter what I did the Scale Color metallic paint just wouldn't go on smoothly.  So the paint was stripped off and here it is in a red primer.

While that was drying I went about trying a method for making smooth plastic exterior look like cast metal. I used some Mr. Dissolved Putty and tapped it on the body with an old brush - small areas at a time.
When it dried, I sanded it down a bit with a Fine sanding sponge. 

Forgetting to take pics I have the finished machine and driver. The mechanical parts are just a dark gray with a Metallic steel dry-brush. The colors are RLM 70 and Vallejo's tan primer.   Tamiya panel liner was used to outline all the panels. I used a technique shown in You Tuber "Nighshift's" videos for weathering the paint. Looked good while I was doing it. But stepping back and looking at it in it's entirety, I think I went a little overboard on such a small  model... Aah well, next time...

The arm and leg joints were balls and sockets, so it wasn't the easiest to line everything up so that the legs and base of gun rest squarely on the desk. Same with aligning the drivers arm (she actually has the cover handle in her hand) to the cover while lining up the cover where it belongs (the two small hinges broke off long ago...) while making her stand squarely on her feet. Take your time and everything lines up. 

Oh, I gave up on the metallics uniform. I went with a dark gray body suit, red leather straps, helmet and boots  and the ray gun was chrome.


Next is a Base. Check back for that and thanks for looking.


Friday, December 20, 2019

D-Day to The Bulge Model Challenge

My local model club - BPMS - announce a model challenge to coincide with the 75th Anniversary of the US's entry into WW2.

Not being a military model guy, I had a hard time decided what I was going to do.  Being figures was my thing, I looked for something that might fit the bill. I found this 90mm Alpine Miniatures kit of a 101st Airborne Screaming Eagles soldier from Last Cavalry.  Doing a quick search I saw that there were there at the Battle of the Ardennes Forest. From a friend building a similar scene with armor vehicles I know that there are many pine trees in the forest, and with that I had the vignette in my head.

I started with the figure, and honestly the box art was of little help. But doing an online search led me to a seller that had a series of 360° view of the model. They didn't call out the colors so I did my best to match them up. 


Because the soldier wasn't dressed for the Ardennes winter, and I would have to use artistic license, I decided to help it look better by adding a bit more red to the soldiers cheeks, nose, and hands to give the illusion he's very cold. 


I found a section of log in Michaels, and two two different sized dowels to represent the trees. This is supposed to be an old growth forest so I took it that the trees would be pretty large.  I cut the dowels at 7in. lengths, which is plenty of room above the soldiers head. They were screwed thru the base and into the dowels from below.  The ground is the Plastic Wood putty, because it dries incredibly fast. 

 I wanted to make a sort of "roof" for the top of the vignette to frame the scene so I have to make a few pine branches.

I started out with 3 or 4 long folds of florist wire and tightly twisted them. 


 After taking it out of the drill I untwisted a few strands to create the smaller branches. Next step was to dip the branches into Mod Podge.

After making sure I only had a thin glue layer at the ends of the branches I pour whats know as Chinchilla Dust over the glued wire. This is sand for... chinchillas... apparently they can't take water and only takes dust baths. It's used here because it is incredibly fine grained and helps maintain the scale look. You buy it in a jug the size you see and one of these jars will last a life time!


The Mod Podge also dries *very* quickly and I was able to glue them into drilled holes at the top of the trees. I did leave one on the forest floor with yellow leaves to busy up ground with a few dead branches. You can see I also added dusted Mod Podge to help simulate some roots for the trees.  The trunk of the trees also got glued and then a dust bath to help simulate the bark.


 Next step was to add the dirt. It's that pre-mixed  stuff you get from miniatures dealers. You can see I also added the "needles" to the pine trees. They are just 2mm static grass tufts grabbed with tweezers and the bottom dunked into Mod Podge.  After dunking, hold the tufts for a few seconds and the Mod Podge will start to skin over. Then push it into place on the branch and the tuft will stay put. They made pretty good needle bunches! Do that a few dozen times, and you have nice pine branches.


Adding a few layers of yellow and brown grasses to the forest floor, it was time to add the snows that was seen in pics of the Ardennes. My soldier didn't have the heavy winter jacket on so I took artistic license and only added a little snow... And with that I was done. Thanks for looking.