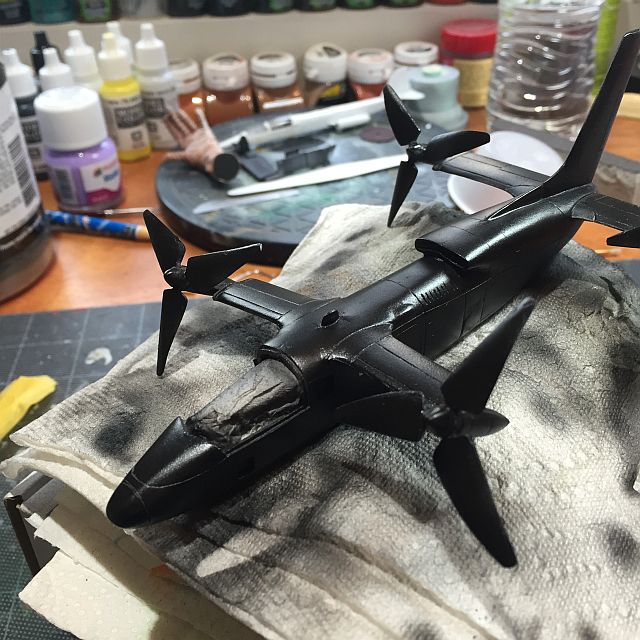
I finally got around to putting the decals on the X-19 and I'm calling this one done. The decals didn't line up exactly with the drawing on the directions. I don't know if some of the decals were too big or the guy drawing the illustration was doing so out of scale. But they went mostly where they belong. ;)
One thing I learned was that I should have left the nacelles with the propellers OFF until the decals were complete ...
One other thing I learned is that I put some of the decals over the windows to get them in place before cutting them. These windows was the Microscale Kristal Clear. Once the wet decal went over the window, the moisture instantly re-wetted the glue and turned it White. OH NO! But not to fear as the water dried that "glass turned clear again. Here's the pics - -
Showing posts with label X-19. Show all posts
Wednesday, November 25, 2015
Sunday, November 8, 2015
A Step closer to Finishing the X-19
Whew we're getting close to the end. I painted a few details on the plane, after redoing the canopy frames, I got those to look - OK. My next step was to paint the transparent green on top of the canopy. Not having ever painted transparent colors, I didn't know what to expect. Spraying it went from not enuff paint to too much in a fraction of a moment. >:-(
I was going to redo it, but with the troubles I had, I decided to leave well enuff alone. Next time, I'll do better. After painting the green and attaching the canopy to the plane all that's left is to add the decals. As a prototype, I can't see it getting really weathered, so I'll just leave it clean.
Saturday, November 7, 2015
X-19 - Moving Along
I got so more time in the hobby room and continued with the X-19. First thing I had to do was get the plane on some sort of base. The easiest thing I could think of was to just insert a rod ino the plane and then have another rod attached to a base. I bought a bag of different size rods at a hobby shop a long time ago, so I went looking about found two the went into each other fairly tightly, those were installed.
Moving along, I wanted to use the new Vallejo Aluminum paint. That needs to be based with some of V's Gloss black primer. It sprayed of effortlessly. This is going too well. Once dry the Aluminum was next. I have to admit that V's metallic paint is terrific. It went on effortlessly with no additional thinner added to the airbrush cup. (I spray at ~ 18-20 psi), and went on nice and smooth.
Finally I had to tackle the canopy. Typical for Anigrand, the frame marking s are barely there - I guess that makes sense for the scale - but Whoo boy they are difficult to mask. On spec I bought some Humbrol Maskol to try. While it went on fine, not being able to see where the edges are, I had a hard time with the lines. The last shot is the canopy painted and masked removed. Its just sitting on top of the fuselage for now. I'm going to need to do some touch ups to get it to look a little more realistic. Here's the pics, and as always -- thanks for looking.
Moving along, I wanted to use the new Vallejo Aluminum paint. That needs to be based with some of V's Gloss black primer. It sprayed of effortlessly. This is going too well. Once dry the Aluminum was next. I have to admit that V's metallic paint is terrific. It went on effortlessly with no additional thinner added to the airbrush cup. (I spray at ~ 18-20 psi), and went on nice and smooth.
Finally I had to tackle the canopy. Typical for Anigrand, the frame marking s are barely there - I guess that makes sense for the scale - but Whoo boy they are difficult to mask. On spec I bought some Humbrol Maskol to try. While it went on fine, not being able to see where the edges are, I had a hard time with the lines. The last shot is the canopy painted and masked removed. Its just sitting on top of the fuselage for now. I'm going to need to do some touch ups to get it to look a little more realistic. Here's the pics, and as always -- thanks for looking.
Thursday, November 5, 2015
More of the X-19 and a Snag
I made it up to the attic and quickly became aggravated. I have been
using those rectangular plastic Chinese take out containers to
hold all the parts of kits I'm building. We'll, one container per model.
So I go in to the container because I wanted to get the landing gear
doors on before I painted. The doors were right out in the open, but ...
one wheel, one landing gear and ... the other is gone. Both the
wheel and gear is gone. Then I look for the front one and that wheel is
gone too. I go to the box where I still have the clear parts and the
decals, and that's all that's in there. CRAP!!
I tear apart my desk, cursing all the way that I never went out to buy more shelves to get the stuff off my desk -- no parts. I crawl underneath the desk - and no parts.
The only thing left for me to do is to show the plane with the landing doors closed. I really don't like that look, b/c to me "The door is closed because the modeler f##ked something up." But now here I am with the doors closed. The first door went on with a little difficulty. It was slightly warped, but once I got it glued in place I was quickly able to even things off with a sanding stick. The other door was put in place and Holy Moley it is TOO warped. I could have taken the part down and did the hot water dip, but in my state of mind I tossed it in the garbage and got out the Aves. I mixed up a ball of it and pushed it into the opening. I went in fine and with a wet finger and toothpick it looked fine. When dry I'll go at it with some wet superfine sandpaper and it will look good.
Same for the front gear. A little press to the edges with the Xact-o knife to insinuate the panel edge and I'm done. Sorry for th blurry pic. Here we have the front door Aves'd closed.
Now I have to let it dry. Which is good b/c it's time for me to get some lunch. Now what to have?
Thanks for looking.
I tear apart my desk, cursing all the way that I never went out to buy more shelves to get the stuff off my desk -- no parts. I crawl underneath the desk - and no parts.
The only thing left for me to do is to show the plane with the landing doors closed. I really don't like that look, b/c to me "The door is closed because the modeler f##ked something up." But now here I am with the doors closed. The first door went on with a little difficulty. It was slightly warped, but once I got it glued in place I was quickly able to even things off with a sanding stick. The other door was put in place and Holy Moley it is TOO warped. I could have taken the part down and did the hot water dip, but in my state of mind I tossed it in the garbage and got out the Aves. I mixed up a ball of it and pushed it into the opening. I went in fine and with a wet finger and toothpick it looked fine. When dry I'll go at it with some wet superfine sandpaper and it will look good.
| The resin door is on the right, the Aves door to the left. |
Same for the front gear. A little press to the edges with the Xact-o knife to insinuate the panel edge and I'm done. Sorry for th blurry pic. Here we have the front door Aves'd closed.
Now I have to let it dry. Which is good b/c it's time for me to get some lunch. Now what to have?
Thanks for looking.
Tuesday, November 3, 2015
Cleaning up My Desk with the C-W X-19
I don't even remember why I pushed X-19 aside. But I think it's time to get back to it. Today I started off easy by dipping the canopy in Future and setting aside under a cover.
Then I turned to installing the props. There must have been a little problem with the mould as the two front nacelles had the locator holes already drilled. The back ones, however, were covered over with resin. I just simply eye balled the location and drilled away.
Monday, August 18, 2014
Back Again and Moving Fwd.
Hey gang (if there's anyone still there). I've been away because I finally got my hobby studio - not finished, but good enuff to work in. Then I had to gather up all my tools and kits, that eventually got spread around the house and set them up in the one spot.
Having just returned from the IPMS Nationals in Hampton, Va I got a renewed energy towards scale modelling. I only picked up 3 kits this time around. Military topics isn't really my thing ( and it's a huge part of the IPMS) and since sci-fi kits are few and far between, I look toward the X-planes. While yes the Luft '46 aircraft are military, if they have an odd enough configuration, I'll also get them.
This time I got Anigrand's M2F2 Lifting body and Orbital sciences X-34 RLV at the Rare Plane Detective table. Over at the MPM table I picked up Planet Models' Blohm and Voss P.170. Talking about an odd plane - this one is it. The links will show what I mean. I also picked up more tools. You can never have enough tools.
When I got home, I found that the Bubble Ship from Oblivion was in the stack of mail. This kit is from Fantastic Plastic. At 1:48 scale it's not the typical scale I stick to, but chance of it being done in 1:72 are slim at best, and I really like the design. So this time I made an exception. ;)
I got all my goodies home and went up to my studio. I had been working on the VZ, when I started working again on the room. So naturally that was the first thing back on my table. I have no idea what happened, but the two props for the plane are gone... gone, gone. No where to be found. Not wanting to slow my newly refreshed enthusiasm and until the two props turn up, I looked at another Anigrand model I had in my stash - the Curtis Wright X-19. The X-19 was supposed to be the prototype for a vertical takeoff transport.
Testing was done in nearby Caldwell, NJ. The first flight of the X-19 took place in November 1963 (other sources give 26 June 1964). It was intended that the X-19 would be developed into a VTOL transport aircraft. However the first X-19 was destroyed in a crash on 25 August 1965, and the program was subsequently cancelled.
From now on, instead of photographing every single step as before, which really slows me down, I'm choosing to build a number of sub-assemblies and then let you see.
Here, I added the weight to the nose so the plane wont be a tail sitter, and added the wing pylons. I put the fuselage halves together and assembled the props to the nacelles.
If you look at the pic closely you you can still see bubbles on the props. This must have been an old kit from an old mould. The parts are chock full of bubbles, slipped moulds and "gouges" that need to be fixed. When I was taking bonsai lessons, my Sensei once said "Don't ruin a good tree trying to make it great." So I'm going my this logic for this plane. I'm not going to sand and fill every single bubble - I've already been working on filling and sanding for hours and hours each session. Who knows how long I could keep going. So I will fill and sand the ones that really stick out, and then I'm calling it a day.
More soon.
Having just returned from the IPMS Nationals in Hampton, Va I got a renewed energy towards scale modelling. I only picked up 3 kits this time around. Military topics isn't really my thing ( and it's a huge part of the IPMS) and since sci-fi kits are few and far between, I look toward the X-planes. While yes the Luft '46 aircraft are military, if they have an odd enough configuration, I'll also get them.
This time I got Anigrand's M2F2 Lifting body and Orbital sciences X-34 RLV at the Rare Plane Detective table. Over at the MPM table I picked up Planet Models' Blohm and Voss P.170. Talking about an odd plane - this one is it. The links will show what I mean. I also picked up more tools. You can never have enough tools.
When I got home, I found that the Bubble Ship from Oblivion was in the stack of mail. This kit is from Fantastic Plastic. At 1:48 scale it's not the typical scale I stick to, but chance of it being done in 1:72 are slim at best, and I really like the design. So this time I made an exception. ;)
I got all my goodies home and went up to my studio. I had been working on the VZ, when I started working again on the room. So naturally that was the first thing back on my table. I have no idea what happened, but the two props for the plane are gone... gone, gone. No where to be found. Not wanting to slow my newly refreshed enthusiasm and until the two props turn up, I looked at another Anigrand model I had in my stash - the Curtis Wright X-19. The X-19 was supposed to be the prototype for a vertical takeoff transport.
Testing was done in nearby Caldwell, NJ. The first flight of the X-19 took place in November 1963 (other sources give 26 June 1964). It was intended that the X-19 would be developed into a VTOL transport aircraft. However the first X-19 was destroyed in a crash on 25 August 1965, and the program was subsequently cancelled.
From now on, instead of photographing every single step as before, which really slows me down, I'm choosing to build a number of sub-assemblies and then let you see.
Here, I added the weight to the nose so the plane wont be a tail sitter, and added the wing pylons. I put the fuselage halves together and assembled the props to the nacelles.
If you look at the pic closely you you can still see bubbles on the props. This must have been an old kit from an old mould. The parts are chock full of bubbles, slipped moulds and "gouges" that need to be fixed. When I was taking bonsai lessons, my Sensei once said "Don't ruin a good tree trying to make it great." So I'm going my this logic for this plane. I'm not going to sand and fill every single bubble - I've already been working on filling and sanding for hours and hours each session. Who knows how long I could keep going. So I will fill and sand the ones that really stick out, and then I'm calling it a day.
More soon.
Subscribe to:
Posts (Atom)