Showing posts with label Concept. Show all posts

Sunday, February 13, 2022

Douglas Sky Streak part 2

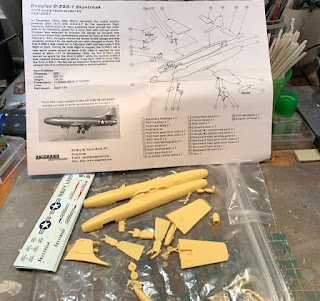
 It's been a while since I had the oomph to get back to the lair, But I got there and did a little more opn the Skystreak. 

My first fully (almost) successful elimination of seam lines on resin I gave a light coat of primer. 

There's a few Euro guys building models on You Tube where they paint a dark primer, and then some white squiggles on top of that which mimics an uneven topcoat spray. So I tried it.


Doing research, I read the color was Insignia Red, the write up also said Tamiya's equivalent was Flat Red. I don't have Tamiya, but Vallejo also has a Flat Red.  After the spray which covered and yet still showed a hint of the squiggle, the color dried... not the right color. So I ended up giving it a mist coat of V's Scarlet (a *tiny* bit more orange). It looked good, but that coat was enough to hide the squiggles. Dang it!!

The next day I came back and added the decals. evidently there is a few versions with both red and white color schemes. Being this is probably one of the oldest kits I have, I wasn't too sure about the decals, so the day before I put some Decal Film over them.  So today I cut them out and added them. Besides coming off the backing paper a little slowly they all came off in one piece. The stars and bars went over a little raised area, and with the film on they were a little thick. Before calling it for the day, I added some setter, to see if they snuggle down. Check back for the result. After that is add the canopy and the wheels and I'll have another done. Thanks for looking.


Wednesday, January 5, 2022

Douglas D-558-1 Skystreak

 The new year starts off with a look back to the NACA days and the aircraft D 558-1 Skystreak built by Douglas. From the website:

The D-558-I "Skystreaks" were among the early transonic research airplanes like the X-1, X-4, X-5, and XF-92A. Three of the single-seat, straight-wing aircraft flew in a joint program involving the National Advisory Committee for Aeronautics (NACA), the Navy-Marine Corps, and the Douglas Aircraft Co. from 1947 to 1953. In the process, the Skystreaks set two world speed records.

This is another very nice albeit old 1:72 resin kit from Anigrand Craftswork.

Not taking any chances of it being a tail sitter I added a lot of the Liquid Gravity beads to most of the open spaces forward of the landing gear.

The cockpit panel was just bare, and there was no decals for one, so I just added my own white dots. I should have looked first as all the instrumentation is black, but no one will be easily able to see it anyway...

The session ends with me closing up the fuselage with probably the best fit I've ever encountered with these smallish resin kit companies. Also on the drill is the seat. I tried something a saw where a tissue is white glued to the seat so it can be manipulated and form folds or creases. In this case it didn't appear to work. I just used one ply from the tissue. I'm thinking the tissue was too thin. Next time I'll try some toilet paper. Who knows- maybe 1:72 is too small to try it?  The final thing in the image is a line of sand color paint. Under the paint is a .5mm tape that will be the seat belts. But that's for next time. Thanks for looking.


Monday, March 8, 2021

RS Models Heinkel 112v3

 As I make it plain, I love the prototype, or never made if off the drawing board type plane models. This one was almost the case. Needing a fast plane this He112v3 lost out to the Bf-109s. Not because it was fast enough, but because they were too expensive. You see, the plane had a jet rocket in the tail. While the German's said no, a few were made for other countries. 

This is a resin kit from RS Models and is in my usual 1:72 scale. 


The one dislike I had for the model was most of the parts were put right on the pour block. You had to be REALLY careful when cutting parts off the block.

Once the cockpit was installed and painted (those tiny resin foot pedals were a bear to keep from losing) the fuselage was glued together.

Then came lots of filling and sanding!

I was so afraid I would break the landing gear before getting it off the block!


Then came the primer, and then more filling and sanding. Then tragedy struck. Despite it being a partial jet plane, it only had a wind screen. (?) Somewhere along the lines it was eaten by the dreaded carpet monster!!  Grrr!!


 I tried using the only other vac canopy I had. Wasn't the right shape, but at least there's something there, and I can say it's finished.  

The decals were ok, but needed a long soak to get off the backing paper. I keep complaining about my camera on the phone but this makes me really want to solve the problem. The instructions call for it to be RLM 02. But the phone had other ideas. Edit: I saw a video by ISM and gave hints on improving pics with your phone. So I retook. Anyway, thanks for looking. 


Wednesday, September 6, 2017

The Sky Flash - Just one More

I thought I was done with the Sky Flash. While cleaning the work area, I discovered the landing gear doors that I never put on.  So I got out the CA glue and installed them. Since I'm really finished, I took out my air field "set" and set up the plane on it - 
Thanks for looking.

Tuesday, September 5, 2017

Sky Flash Finale

We last left off with me ready to smash the model off the wall. I didn't.
Looking at the model the alligatoring clear coat in many places had settled down to just a rough pebbling.  Being the pebbling was very close to the decals I wanted to be ultra delicate so I wouldn't have to redo the decals. I had 3200 sanding sticks and went to work. Not strong enough. I moved to some Ultrafine sanding pads (I forget the number) and once again started in. Even that wasn't budging any of the material. Finally I got out the regular "Fine" pads and started in this seemed to work. After a few minutes of light scrubbing I had the fuselage to where I wanted it. I got a little too close to one of the decals, but some paint fixed the goof.

From there my next step was to mask off where the anti-glare panel - 
Yellow tape is Tamiya, Green tape is Frog tape - good stuff
Using Vallejo's Black and my a/b set to a low psi, the panel went on with no problems.

Now, back to the clear coat. Trying not to repeat the problems, and knowing Future is self leveling, I took a wide brush and brush painted on the Future - 

I'm calling this one done. Thanks for looking

Wednesday, August 30, 2017

The SkyFlash part 3

Getting back to the Skyflash after being a bit ill for a few days, I started by painting the vac form cockpit. Once painted, and glued on, I noticed that I could have sanded the front a little more. It looked cocked backward a bit to me. Oh well, theoretically my next one will be a little better.

Next on the list was to apply the decals. Odd for Anigrand, the decals were a bit thick, and took several applications of Micro Sol onto them to get them to conform to the curved shape of the fuselage.  even after 3 or 4 applications of Micro Sol I still needed to cut the decal where it rode over a panel line. Luckily for me there was just one panel line in the way on each side - 


Having a relapse I left it for a few days, and when I got back to it I wanted to apply a gloss coat over the decals to seal it in before continuing on.
Here's where disaster struck! I sprayed on the gloss and all around the cockpit the paint alligatored!!! WTF! I was so PO'd I just walked away. I really wanted to fling it off the wall. Check back to see if I did fling it, or tried to fix the paint.

Friday, August 18, 2017

Douglas Skyflash (part 2)

Well, I didn't get it finished, but I am still progressing forward.  
I added the landing gear and then realized the wheels were a little wonky. They had to be broken off and realigned to the jet. 

While the wheels were drying, I turned my attention to masking off the canopy. It was then I noticed I never even touched it. So I dipped the canopy in Future. While *that* was drying I went back and had a look at the wheels. Looked good.  Then it suddenly struck me that I never put any weighs in the nose. Oh boy, I hope it's not a tail sitter. Turning it over while half wincing, I gave it a try. Whew, it rested on its wheels - 
Now I turned back to the canopy. Now in the past 3 planes I did, the vac form canopies gave me fits. So I started my cutting, sanding and fitting with some trepidation. After about a half hour, I gave it it's 3rd fitting and Holy Moley, it looks good!
I was very happy and with that fit and decided to not press my luck and call it a session (BTW that piece of dust is not in the paint and easily wiped off). 
Check back for the finale. Thanks for looking.


Wednesday, August 9, 2017

The Douglas Skyflash (part 1)

This kit has been on my desk since the before the IPMS Nationals. I started out to be the easiest short run resin kit I ever worked on. Then when I started messing with seams to get them perfect it became a monster. I should have remembered what I was told years ago "Don't ruin a good (fill in the blank), by trying to make it great..."

But first here's a little history: 
In  the early 1950's, high-speed flight research was being done by different agencies, the NACA's hypersonic research, the Air Force's Project 1226, and the Navy's D-558 program. In 1954, a Langley team from NACA gathered those similar researches from military services and aerospace industries, combined with the Air Force and Navy to launch the new "Project 1226" competition. As the Navy liked to keep in the 'space race' and Douglas was interested in building future manned spaceplanes, the D-558-3 Skyflash (Model 684) design was sponsored by Navy to enter the competition. The D-558-3 was designed to be able to  install whatever rocket engine was selected by NACA, and to be air-launch from a Boeing B-50. In 1955, while the Navy decided to save the development cost and no longer participate,  NACA and the Air Force chose the North American proposal as the winner of the competition. This aircraft became the famed X-15 while the D.558-3 disappeared into the dust of the past. 
Here's the kit box art and parts - 
The cockpit and seat have also been painted
While there is an instrument panel, there is no detail to it. There are no decals for it, so I just added a few dots of white to mimic instruments. It looks like there's not a lot of room in there so this should suffice - 
Not a lot of room seems to have been an understatement  ;)  I also added some Tamiya tape seat belts -
Nose cone added. This is going well - 
The fuselage is mostly complete - Time to fill in the seams.

I applied Tamiya filler for the seams. While I'm waiting I painted the landing gear, wheels, and landing gear doors.

 Added primer to see where I am re: the seam lines. Not bad, but I'll give a few spots a second go round. This is where I took my "Going to the Nationals" break.

Upon my return I looked at it and a few spots still need attention. So I added more filler.  Check back for Part 2. Hopefully seam filling will be done. Thanks for looking.

Monday, March 6, 2017

A New Retro Future Space Suit + Robot

There have been many promises to the Real Space/Concept Space modelers that the Bottle Suit would be released. The Grumman Moon Suit was tested in 1960's.  From astronautix.com :

A favorite of Life magazine in the 1960's, this Grumman / Space General design for extended lunar surface operations allowed the astronaut to withdraw his arms from the flexible manipulators and work within the pressurized 'cabin' of the can enclosing his upper torso and head.

The Suit appeared in Life magazine in April, 1962, and was immediately copied by Mattel for their Major Matt Mason toy line


But as a real scale model either in styrene or resin, there has been none. Until now. ECWID has a number of retro futuristic suits and robots. And they actually have two versions of the Grumman Moon Suit. One of the astronaut standing, the other where he's running.  I picked up the one where the guy is running.

Most of the kit comes in ordorless gray resin, with a few clear resin parts.  There is no flash or bubbles, and the only negative is that the pour plugs are pretty large. But happily they are on the inside of the suit, and once build not easily seen if at all.  It also comes with a set of decals with the number 38 - 


 As you can see by the parts, it should be very easy to build. I can't wait.
While the kit ships from Japan, I added one of the Robots. I picked up the "Prototype Vincent." I didn't open that package so the following pic is from their website.  As the image indicates, the scale is 1:20 - 


Thanks for looking. 


Sunday, November 29, 2015

Blue Gemini Part 2

I managed a few more hours in the hobby room and continued with the Blue Gemini. Taking a good look at the clear parts that are the Gemini doors, I decided they needed a dip in Future.

Wednesday, November 25, 2015

Anigrand's Blue Gemini

Finishing the X-19, and still having some free time I picked out another kit that I thought would go quickly. So I chose Anigrand's 1/72 Blue Gemini. 

From Anigrand's site:   In 1961, after success of the Mercury spacecraft launch, NASA contracted McDonnell to design a larger two-man Mercury mark II for longer periods in orbit. This bigger spacecraft which soon renamed Gemini that require a larger launch vehicle, a Titan II missile. The Titan II was Air Force missile and naturally required close coordination with the Air Force. The Air Force was interested in the Gemini program because it would be ready much earlier than the Dyna-Soar space plane while Russians already had men in orbit possibly carrying nuclear bombs. In 1962, the Air Force had designated the spacecraft as Blue Gemini. It would essentially be an off-the-shelf NASA Gemini vehicle. In January 1963, Air Force and NASA officials went to Pentagon to propose DoD participation in Blue Gemini, but was rejected and cancelled by Secretary of Defense.