Showing posts with label Vehicle. Show all posts

Thursday, December 18, 2025

The Mandalorian Razor Crest

 The Razor Crest from Bandai is a 1/144 scale kit with the highest detail I've seen in such a small(!) kit. From the site: 

The Razor Crest is the trusty transport and living quarters of the mysterious bounty hunter known as The Mandalorian.

Bandai have created a 1/144 scale plastic model kit of this already classic Star Wars ship. So if you are a fan of the show, have some glue, paint and an urge to build a model of Mando's spaceship, this Bandai kit may be what you are looking for.

These Bandai kits are small but have a good level of detail along with Bandai's build quality.

 This is a hard kit to talk about as it was built quite a while ago but then just sat there. I remember the engineering to be terrific and quite usual for Bandai.


 When I got back to the kit, it was ready for a primer coat, and then since I'll be applying a metallic - a gloss black coat. 

When that was dry, it got a coat of VMC silver. I let that dry overnight, and the next day I started weathering. It's pretty normal for Star wars not to be too concerned about continuity. So scuffs and mud you see in one scene doesn't mean they are still there in the next. So preserving the silver for a ship that got it's beatings I left the dirt to a minimum. 


 Next was the yellow-orange markings. There were decals for it, but sitting so long I have no idea where the box or decals went. So it was to give it a shot and just freehand it. From memory I knew it had two slanted lined, but there was other things next to/behind the doors.  Once again looking it up 100 different examples done 100 different ways. So I did my best. 

So the base would have a little something I found an image of his crest - a Mudhorn, printed that out and with matte medium stuck it to the base. With that I was calling another lil kit finished. Thanks for looking. 


Wednesday, December 3, 2025

The Gozanti Cruiser

No one can accuse me of timely building of my models. This little kit, from JPG Models,  was pulled from way deep in the stash. But it's now time to build. From the site: 

The Gozanti Cruiser, also known as the Gozanti-class armed transport or Gozanti-class shuttle, was a class of armored starships used by various factions. The Gozanti-class cruiser was a starship that could act as a freighter and cruiser. It could be modified to accommodate a twin laser turret in a dorsal mount and a heavy laser cannon on its ventral side. The Gozanti also had a loading elevator on the bottom near the nose and docking ports to the side near the cockpit section.[10] The ships had a hyper-drive and three engines.

This model is in 1/350th scale and has fairly clean resin casting.  It comes in 8 parts, and 3 (radar dishes) that look to be styrene. 


 It didn't take too long to clean up the mold lines and the remnants for the pour stubs. Building is straight forward and the main parts went together in less than an hour. Not included in the kit, but added was the wooden block and the clear styrene rod that will be the base. 


 Looking at the images searched for most were just a plain gray or dull metallic exterior. A few others had it looking like the red and white from the Clone Wars era. The image on the packaging is that plus a lot of weathering, which is the way I went. The block I just made flat black and I was done.  As I sort of expected was the little radar domes were all to easy to knock off, and 2 of them were lost to the carpet monster. I'll come up with a replacement. Thanks for looking. 


Friday, January 12, 2024

Terminator 2: HK vehicle

 This happens to be my first ever commission. I met the guy at the local IPMS meeting. After looking over the kit and what had to be done, I gave a price which was accepted. He gave me a lot of leeway to follow the boxart and what others had done.  Here are the pics I passed on to the owner. 


Getting the fuselage together

Building the legs

Adding to the fuselage

Making sure the tail lights stay in place

Strip styrene added to replace panels sanded away


Black gloss add for the metallics


Rustoleum gloss for the base. Worked great!

Tuesday, March 22, 2022

Z-95 Finale

 This final session had me completing the weathering al la Night Shift style, putting the pilot in the seat and securing the canopy. Once again the pilot sat too tall, so I sat him on a coarse sanding sponge and got rid of most of his butt. 

The canopy went on pretty easy with the ledge around the area to aim for.  I found some nondescript decals for the wings and as usual where something has to go wrong - one came off the paper stuck to the model and would not be moved. Rather than scraping it all off I just left it as is.  

The final duty was  to give it all a matte coat. One thing I saw on Jon Bius' channel was to add 'a kiss of tan" to the clear coat. I touched the brush to the Dark Sand dropper bottle and then swirled it in the matte coat in the a/b cup. It barely turned the clear coat a color, but as you can see in the pics it all softly evened out the different colors I used.  With that I was done. Thanks for looking. 


The pilot checking you out

Thursday, March 17, 2022

Z-95 part 2

 This shortened session I went over the parts to see if I was missing anything. The bubble hole in the nose bottom was puttied again, and after some ultra fine sanding, came out terrific.  So it was time to paint. 

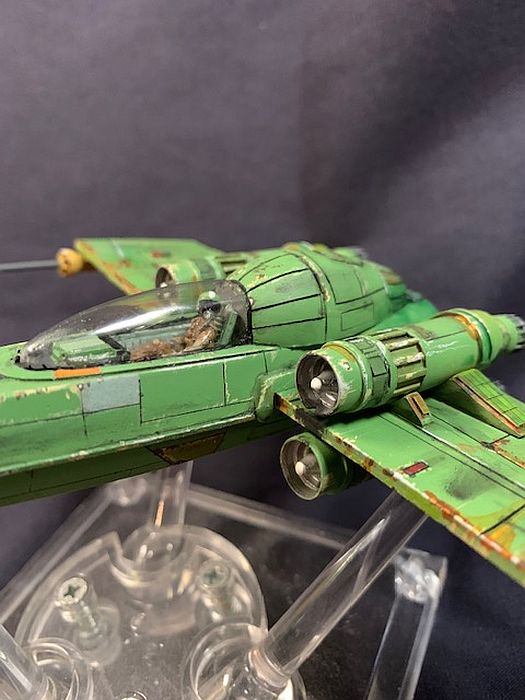
When I looked at the decals, it was showing me that once again I was going to have a white ship with the maroon stripes. Uh, no, not this time. Reading the entry in Wookie-pedia I learned that a lot of unaffiliated groups were still using this outdated craft. So I hit Google images and scrolled thru many pages of Z-95s.The one that caught my eye was a green one from the Star Wars Legion game.  Figuring it was also right around St. Patrick's day, what a better choice for a color. I went into my paint rack and brought out a mid tone green from The Army Painter name Goblin Green. Ahh, an added bonus. While I don't name my ships, this one can be part of the Goblin Squadron! ;) 

Another thing I had to think about was what was I going to do about that wide open cockpit? The only answer was a pilot. So I dug into my Pilot and Ground Crew set, and painted one up. While he doesn't look exactly Star Wars, sitting in a Z-95 he can be. 

Tan suit and green helmet. Nice and easy

I thought I would finish it today, but that didn't happen. Check back next session for the finale. Thanks for looking.


Tuesday, March 15, 2022

Z-95 Headhunter

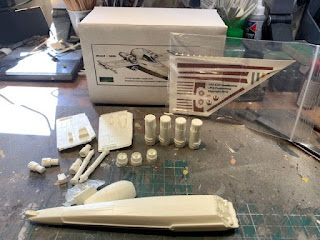
 Another deep dive into my stash brings out JPG Models Z-95 Headhunter. Produced in 1:72 scale in almost 2 dozen parts of white resin and a clear vac canopy. The date on the box is 2010 - - WOW!   Giving the parts a good look, this appears to be another quick build model.


The Z-95 from the website was: 

 An outdated series of starfighter, the Z-95's endurance, adaptability, and large numbers has led to its continued use long after its initial production run had ceased. A multi-purpose starfighter, the Z-95 has spawned countless variants, with individual forces, government, squadrons and owners adding and adapting componentry and systems.

Developed in a cooperative venture between Incom Industries (now the Incom Corporation) and the now-defunct Subpro Corporation, the Z-95 is largely recognized as the premiere starfighter of its era, and the forerunner of the incredibly successful X-wing starfighter.

Most of the kit is perfect, but I have on little ding in one engine, and a different engine part looks like it got gouged some how. No worries I filled the gouged area with Tamiya putty and then when dry, sanded away. 

I had to think a little bit about the guns. It seems I just had to butt joint glue the tips to the mid part and then into the rear. Having those ting butt joints seemed like I was asking for trouble. So in my stash of styrene was a wire rod coated in styrene. Stripping the styrene off part of it it was small enough on one end to fit into the tip and fit equallt well with the styrene part into the rear. 

The was a small hole in the very front of the fuselage(on the bottom). So that also got some putty. While that was drying I glued the dash in place as well as the generator housing behind the cockpit. Toward the end of the session I gave it all a shot of primer, and will give it a once over. But that's for next time. Thanks for looking.


Wednesday, December 8, 2021

Bossk's Hounds Tooth Finale

 This session I tried my best to finish this ship off.   First step was the mist coating to make the ship look less than a giraffe.  BTW the base came from Starship Modeler. I picked up a few a while back for any "just in cases." ;)

Next step was to gloss the ship and put down the decals. Being they were for a garage kit, I figured the inking would be on one large film, so I cut the decals as close to the design as possible.  They were very thin but pretty strong - else I would have lost the "teeth" decal.

After that came the weathering. I wanted to make it look used but not too busted up. So the panels were more or less lightly stained rusted with 2 different colors.  I hit the entire model with a flat coat, and then gloss in the very large front windows.  With that, I was done. Thanks for looking. 


Upside down


Bossk's Hounds Tooth part 2

 This session the plan was to start the paint work. Lots of little details in the aft section. 

Looking at other images this ship comes in all colors from yellow the brown. I first saw it as a sort of rusty color.  I started out splitting the difference on the colors. 


I had picked up these Aztek Dummy masks from CultTVMan a while ago, and thought they would be the right touch to busy up these large plain panels.

The first go-round I kept the colors fairly similar. After that I went darker and darker. But not to worry a mist coat will sit them down on the ship nicely.


 Check back.

Friday, December 3, 2021

Bossk's Houndstooth


 For those who haven't taken their deep dive into Star Wars, Bossk was the "LizardMan" alongside the other bounty hunters in The Empire Strikes Back. 

From JPG's Facebook pages 

"The Hounds Tooth, or YV-666, is the Bounty Hunter Bossk’s ship. As seen in various video games and comic books, the most popular being Shadows of the Empire.

Scale is 1:144 to compliment the other .JPG Productions ships, The Outrider, and the Moldy Crow. This line of “Underworld ships” will continue with other future additions.

Consisting of 9 resin cast and 3D printed parts, plus stainless steel mounting rods for the wings, the FX-7 measures ~12” (30.5cm) high and ~ 9.5" (24cm) wide wingspan, ~2” (5cm) wide main body."


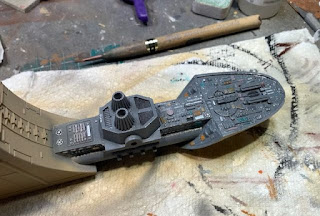
My first oops was when I tried to saw this pour plug off. I guess I leaned too hard and snapped the end off the ship... Got it glued on fairly well. The filler will do the rest.


Two rods were used to attached the engine area to the fuselage. Only problem there was the fuselage is hollow, and I easily drilled into the open area.

Just had to see it with some color on it.


More soon. Check back and thanks for looking.


Thursday, November 11, 2021

Galaxy Quest Shuttle Finale

 For the last session, I added some Satin poly over the decals, and then when dry I added a few burn marks to the front of the shuttle. I didn't notice this is the movie, but a visitor was at Goblin Valley State Park, UT when a helicopter delivered the Shuttle, and it definitely shows burn marks on it. 


Here's the dio finished. Thanks for looking. 


Tuesday, November 9, 2021

Galaxy Quest Shuttle part 2

 I took a look at the project, and since it wasn't going to have figures (I still haven't found the ones I wanted), the dio looks a little dumb with all the now wasted space. Time to redo the base. This time I took a 6" diameter base, added a few layers of cork sheets, ripped off some of the foam rocknd glued it to the new one. Looks better.


 Next up was painting the windows. I saw a tutorial about painting windows once and it involved creating a gradient where the darkest color was up top and it got lighter toward the bottom I airbrushed some MIG NASA bluie after a bit of masking, and then added a few drops of the darkest blue I had to the cup, and just shot the upper left corner. It worked out pretty well. 

Then came the decals. They looked pretty poor as they weren't solid. But once down on the craft, they looked fine. 


 It should be able to finish it all up next time. Thanks for looking.