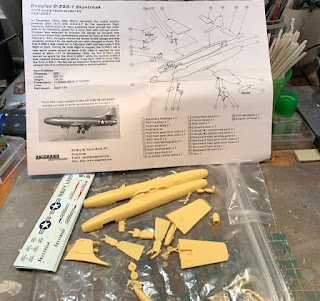
Looking for kits to start the year (besides the Skystreak) I found Mark Warthling's Pestilence Labs Monster from Young Frankenstein, and John Dennett's Tiny Tim. I guess I want to get a head start of next Christmas. But he's for a separate post.
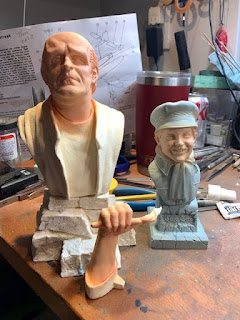
First thing to decide is what color was the Monster. Fortunately the movie being filmed B&W on purpose, and there were plenty of color images available. Where the box are shows a blue-green. He's definitely a blue.

One dilemma I always have for myself is should I paint him up as if the character is real, or as an actor in makeup. I usually go for the former, but this time I went for the later. I got out my flesh triad and went to work.

The blue went over the skin tones. I actually muffed up at this point putting too much blue on, and eliminating all the skin tone. I tried to save it my using my lightest skin ton as the highlight. Worked fairly well.
Then it was time to paint up the clothes. His shirt was a black, and the jacket was a brown. The stone was was painted with 3 colors to add a little extra color to the model.

The kit comes with a broken mug from his scene with the hermit. I was lucky enough to find this screen grab, as I thought I noticed a design on the mug while rewatching the movie. I tried my best to copy it.

Almost done I tackled the fire, and is my typical fire recipe. Remember that fire has to be painted backwards from the usual Base color, shadow, highlight. The lightest (hottest) color appears closest to the source of fuel - his finger in this case.
The last thing was his eyes. Looking up Peter Boyle's eyes, according to a few statistic websites, I was surprised to find out that his eye color is black! Having a pupil show up against that would be a problem. So I made the irises a dark gray. I also chose the eyes down as if he's pondering *whats happening to my thumb* look. A little gloss over the eyes, and I was done. Thanks for looking.