Tuesday, August 27, 2024

Medusa

Always looking to add to my Medusa collection. This time we have one that was sitting in the stash for so long that I no longer remember the producer or any other info. I tried doing a search but - no joy. If anyone recognizes it, please let me know...

 It came in 3 parts - the bust the snakes and the base. It was a nearly flawless casting - a few faint seam lines but nothing really worth noting. 


Started off with adding some flesh tones, and decided her outfit would be red. While that was drying a drybrushed the base and then added some green tint. 


Finally I addressed the elephant in the room and tackled the snakes. I didn't want them all to be the same color. There are so many sculpted in there, that I was afraid it would look like one big blob.  After getting them all colored in, they seemed too bright. So out came the Citadel Agrax Earthshade wash (brown) and dulled them down a bit. I added the black wash to the deepest recesses for that effect. 


Finally, I tidied up a few areas, and added a little more color to the base, and I was done. Thanks for looking.


My obligatory size comparison with soda...;)


Friday, July 26, 2024

Young Frankenstein's Igor

This time I'm taking another figure from Pestilence Labs' Young Frankenstein series. It's Marty Feldman as Igor! The kit comes in 4 parts of very clean white resin, plus one plastic container.


The first go round had me use white and brown primer mixed to make a fairly nice looking skin color. Then I put Silly Putty over the face to prime the cloak black. After the black primer had dried, I pulled off the Silly Putty, and for the first time ever (!) the Silly Putty completely took the primer off - right down to the resin. I guess my washing was a little lacking. So again I took some Simple Green (great stuff) and rewashed the face. This time the tan primer stayed on. 


As seen above, somewhere along the lines I also painted a simple stone wall base. From there it was just a matter of giving Igor a few skin highlights, painting the eyeballs, eyebrows, and teeth. Looking it up I found Marty had intense blue gray irises. So I initially painted them a dark blue to get a ring around the edge that he has, and then used V's Azure color to paint in the irises. I mixed a little light gray, and p[ut some small marks to give the iris some dimension. 

While that was drying I took the painted brain, dropped in in the jar and then filled it a bit with some light purple UV resin. This turned out to be a mistake as the brain fit the jar perfectly and some bubbles got stuck. Not being about to do a lot about removing them a just sighed, and continued to fill the jar with more UV resin. With that I was done. Thanks for looking. 


Tuesday, July 23, 2024

Cycle of Life part 2

 Continuing on with this vignette the first thing that needed to be tackled was the warpage on the horse's necks - 


From there, the painting could be started. As for Death, I wanted him in the dark and ghostly colors. For Life the bright colors were the plan.


Getting to the ghostly part, I had seen a few times where the Citadel people had used a green/turquoise color effectively as a ghost color. They used Nihilakh Oxide, But I didn't have time to wait for a mail order. So a quick trip to Hobby Lobby led me to 2 colors. All I had to do is choose the best look on the model.


I moderated the green some by desaturating the color with the lightest gray color I had, then added a little white on top to make a highlight. 

Then it was just a matter of attaching the wings, and then adding her figure to Death's base and we were done.  Thanks for looking.


I was really happy with her face, so zoomed in a little.


Monday, July 1, 2024

Ouroboros Cycle of Life

 I came across this kit in my secondary pile of To Do models. On the box it had a date of 2017, so it has to be at least that old. The name of the Co. which produced it was Blood Keep Miniatures.  But it doesn't really matter as when I first re-found the kit I looked it up and it is no longer in operation.  I did see that who I think is the sculptor as an STL of the kit available. You can see his work at ArtStation.


 The kit came in 11 parts of nicely cast resin.  The only problems problems with with the kit are two pieces (cleanly) snapped off the main parts. The other problem was the Death's head and the heads of the two horses were warped. Well, Death's Head was fine the middle horse was slightly off kilter, but the outside horse was off and shows a step in the one image.  


The above part showed the death book which had snapped off, and shows the hand with the hourglass that had to be attached. Thankfully I found an image I could enlarge to see how the parts exactly went together. 


For the "Life" art of the sculpt, another snapped off part ended up being part of her flowing cloak. These images helped me find it. Both arms and the 3 cherubs also had to be super-glued to the main body.


 I had to be careful where the left arm glue on as it also has to rest on top of that hourglass. I was hoping that it wasn't a case of it coming from a 3D design with the tolerances so tight that it would be a nightmare to have everything fit. No. Luckily I also used the gel type superglue that gave me a little extra time to match everything up. 


With that done it was in mostly 2 large sub assemblies with only his scythe, and her wings to add on. But first I have to fix that horses neck. But that's for next time. Thanks for looking and check back.

Saturday, June 29, 2024

Frau Blucher Finale

 The idea of this session was to fix the 3 paint pulls along the jawline, and to add highlights/details to the shirt and jumper.

The jaw was actually fairly easy using the stipple method even tho by adding extra layers, it destroyed all the details underneath. 

The leather look (to me) was next. Various jumps in color value gave me what I thought was a decent leather look. The added Agrax Earthshade drew all the colors together.

The shirt was also easy. I used a Sage Green as the base - just to be different. Then V's Pastel Green was a perfect highlight. Then I mixed Ivory with the pastel Green for a 2nd highlight. Finally I added a pearlizing paint to the Ivory for the very high parts of the shirt and I was done with that. 

The final part was looking at the embroidery on the neck and arm cuff. I couldn't find a clear image of her wrist so I painted just what the imprints in the kit gave me. To keep the color going, I used a Green Black for the embroidery.


Taking a good look at the neck showed a different pattern. well, same pattern but colored differently. This was certainly a test for my magnifying visors! Also I noticed the sculptor forgot - left off the little broach she was wearing. ;)


 Once that was done, the final two pieces was a can of Ovaltine, and the joke horse. The producers were able to find the vintage label which I thought was a very nice touch. They also included it both in color and B&W for the people that wanted their model in Grayscale. The horse was simply painted brown, with a black mane and tail.

Once glued on the base I was done (sad note somewhere along the lines the horse was knocked off the kit and was eaten by the carpet monster. If it returns I'll be sure to glue it back on).  


Many producers now give you a CofA. Cool touch IMHO


Sunday, June 23, 2024

Frau Blucher

 The first offering was the Young Frankenstein series was The Monster. The Doctor and Igor was the next too. The latest one was Frau Blucher who seems to have a problem with the horses. And no Blucher is the German word for horse glue as has been mentioned. But reaching blindly in the pile I skipped over the other two and pulled out the Frau. 

The kit comes in 5 parts - the bust, base arm holding a cigar, a can of Ovaltine, and a little model of a horse (the last 3 weren't included in the image). 


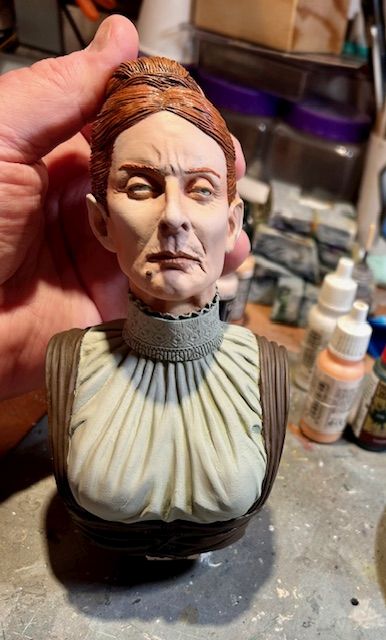
 The first thing I needed to find was a color pic, since I didn't want to paint her as we saw her in the film. I found one - sadly just one, so now I knew what her clothes looked like as well as the color of her hair. It also gives me a clue when I build up The Doctor.


 As usual, the first thing I did was the skin, using my normal techniques. What you see here is the base coat plus some spattering to hopefully bring the skin to life.


 While I was waiting for the bust to dry,  I turned my attention to the base, and since I'm guessing it's part of the castle I just painted the stones gray with splashes of color here and there. 

Getting back to the Frau, I added the 2nd level of skin tones, and then thinking about the white shirt, I just didn't want a big blob of white, so trying something different I turned to V's Sage Green. Planned for later is a Green Gray and then a White at the very tops of the contours. 

I guess I didn't wait long enough for when removing the tape after protecting her face from the shirt green - I had the tape pull off 3 areas around her jaw line. Lots of cursing commenced. I guess I'm getting used to skin errors because I was able to fix it in 2 passes of color. I also put a highlight on her hair.


Adding her final shirt colors as well as putting it all together is next - but that's for the next session. Thanks for looking and check back.

Tuesday, June 4, 2024

TROG!

 Anthropologist Dr. Brockton (Joan Crawford) unearths a troglodyte (an Ice Age 'missing link" half-caveman, half-ape) and manages to domesticate him - until he's let loose by an irate land developer (Michael Gough) to go on a rampage and kidnap a little girl. Crawford's last feature film. 

This 1970 low budget film, which I've never seen has been declared so bad that it's actually entertaining. The budget was so low that Ms. Crawford had to supply her own wardrobe, and was rumored that the costume for the Trog  was actually 1/2 the monkey suit from 2001 A Space Odyssey. That was the reason he was half ape, half man, because they only found half the suit. 

The 1:8 scale model, sculpted by Michael Berglund, and comes comes to us from Escape Hatch Hobbies. The model is in 10 clean parts and are 3 D printed. Once again, in my eagerness to get started I forgot to take a before pic of the parts. Here he is all super glued together.


The parts fir very well, but they do need a little filler. Here I used to last of my Milliput - 


The next job was to fill the holes meant to drain out the excess resin from the 3D printer. Here I used Aves to fill the holes. The reason was to provide a spot to insert pins to hold the figure onto the base. 


Speaking of the base here's the rock base and bolder that's about to be thrown. 


Looking towards the models, there's very few images of the entire monster. Here's what I found - 


Painting the figure, the colors are fairly easy to follow. The only change I made is to me, his face is on the gray side. So I matched a little closer to his arms and legs. 


The last image shows him just about done. All that was left was gluing the bolder into his hands - it dry fit perfectly for me until I had glue on the rock. :/    I added dirt and static grass to the base and then I was done. Thanks for looking.