Thursday, January 13, 2022

Young Frankenstein's Monster

 Looking for kits to start the year (besides the Skystreak) I found Mark Warthling's Pestilence Labs Monster from Young Frankenstein, and John Dennett's Tiny Tim. I guess I want to get a head start of next Christmas. But he's for a separate post.
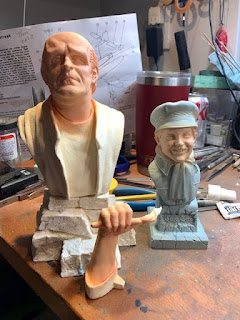
First thing to decide is what color was the Monster. Fortunately the movie being filmed B&W on purpose, and there were plenty of color images available. Where the box are shows a blue-green. He's definitely a blue.


One dilemma I always have for myself is should I paint him up as if the character is real, or as an actor in makeup. I usually go for the former, but this time I went for the later. I got out my flesh triad and went to work.

The blue went over the skin tones. I actually muffed up at this point putting too much blue on, and eliminating all the skin tone. I tried to save it my using my lightest skin ton as the highlight. Worked fairly well.

Then it was time to paint up the clothes. His shirt was a black, and the jacket was a brown. The stone was was painted with 3 colors to add a little extra color to the model.

The kit comes with a broken mug from his scene with the hermit. I was lucky enough to find this screen grab, as I thought I noticed a design on the mug while rewatching the movie. I tried my best to copy it.

Almost done I tackled the fire, and is my typical fire recipe. Remember that fire has to be painted backwards from the usual Base color, shadow, highlight. The lightest (hottest) color appears closest to the source of fuel - his finger in this case. 

The last thing was his eyes. Looking up Peter Boyle's eyes, according to a few statistic websites, I was surprised to find out that his eye color is black! Having a pupil show up against that would be a problem. So I made the irises a dark gray.  I also chose the eyes down as if he's pondering *whats happening to my thumb* look. A little gloss over the eyes, and I was done. Thanks for looking. 


Wednesday, January 5, 2022

Douglas D-558-1 Skystreak

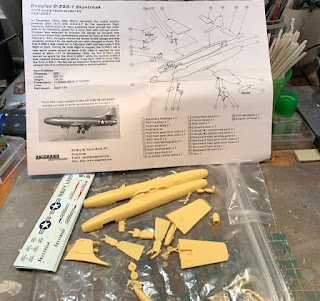
 The new year starts off with a look back to the NACA days and the aircraft D 558-1 Skystreak built by Douglas. From the website:

The D-558-I "Skystreaks" were among the early transonic research airplanes like the X-1, X-4, X-5, and XF-92A. Three of the single-seat, straight-wing aircraft flew in a joint program involving the National Advisory Committee for Aeronautics (NACA), the Navy-Marine Corps, and the Douglas Aircraft Co. from 1947 to 1953. In the process, the Skystreaks set two world speed records.

This is another very nice albeit old 1:72 resin kit from Anigrand Craftswork.

Not taking any chances of it being a tail sitter I added a lot of the Liquid Gravity beads to most of the open spaces forward of the landing gear.

The cockpit panel was just bare, and there was no decals for one, so I just added my own white dots. I should have looked first as all the instrumentation is black, but no one will be easily able to see it anyway...

The session ends with me closing up the fuselage with probably the best fit I've ever encountered with these smallish resin kit companies. Also on the drill is the seat. I tried something a saw where a tissue is white glued to the seat so it can be manipulated and form folds or creases. In this case it didn't appear to work. I just used one ply from the tissue. I'm thinking the tissue was too thin. Next time I'll try some toilet paper. Who knows- maybe 1:72 is too small to try it?  The final thing in the image is a line of sand color paint. Under the paint is a .5mm tape that will be the seat belts. But that's for next time. Thanks for looking.


Tuesday, December 21, 2021

Christmas Carol's Bob Crachit Finale

 I started out this session by painting the hair. On TV it shows up very dark. I hit it with the darkest brown I had, Then highlighted it when dry. Ugh. Too light. Then 3 coast of Citadel's Nuln Oil got it back to a decently dark color. 

For the clothes, I had the colors I wanted picked out - White shirt, red tie, green vest with brass button, and black piping, and then a brown jacket. It went along well. for the vest I added a little design in a light green and ten went a little lighter for the 2n'd highlight. The jacket I decided to make a tweed jacket. A dark brown was the base coat. A lighter brown stippled with one of my ruined brushes started the tweed look. Finally, I used V's English Uniform, which is a lighter brown but with a lot of green in it was stippled on and this gave me the tweed color I was used to seeing. Only problem was that it dried a satin. I found a bottle of Anti Shine that The Army Painter put out and it dulled the jacket down quite a bit. 

I'm still trying to get my clear coats straight. When I spray gloss, I want gloss. When I was matte - I want completely flat - not almost satin, not even egg shell. I want flat. Any discoveries will be reported. 

A simple gray stone base was painted with a white cut out and Bob's name in red. To finish it off, A let it snow on the base. Thanks for looking. 


Sunday, December 19, 2021

Christmas Carol's Bob Crachit

 I'm calling it close for this year's Christmas model. It's Bob Crachit from Christmas Carol sculpted by John Dennett's MoonDevil Studio.  A typically nice kit in 1/5 scale. It's 2 parts of purplish resin - the bust and the base.  As with the Scrooge bust from a few years ago, it's based on the 1951 film. 


Since the film was done in B&W, I had to look fro movies posters to see how the characters were imagined. I found two images of Bob - one with a blue tie/scarf, and one with red.  Thinking there's nothing Christmas-sy about blue, I went with the red one. Plus the red tie sort of ties in with Scrooge's red scarf.


As usual I started off with the face. All images show him fair skinned with dark hair so here we go. Besides the red tie, I'm planning for a white shirt, green vest and a brown jacket, with hopefully some texture on it to make it look tweed. We'll see about that. But that's for next time.


Muroc's X-36

 This kit has to be one of the oldest I won. I bought it at one of the first IPMS  Nationals that I went to.  Muroc Models is based in the Mojave Desert and produces resin kits and decals for display models. Many products cover experimental aircraft from the area.

From a website: 

 The X-36 is a 28-percent scale representation of a theoretical advanced fighter aircraft configuration. The Boeing Phantom Works (formerly McDonnell-Douglas) in St. Louis, MO, built the X-36, in a cooperative agreement with NASA Ames Research Center, Moffett Field, CA. It was designed to fly without the traditional tail surfaces common on most aircraft. Instead, a canard forward of the wing is utilized, in addition to split ailerons and an advanced thrust-vectoring nozzle for directional control. The X-36 is unstable in both the pitch and yaw axes; therefore, an advanced, single-channel digital fly-by-wire control system, developed with some commercially available components, stabilizes the aircraft.

 The kit was very well done, albeit very delicate. 


HA. Just noticed that the image on the box matches the size of the kit. Here it is with the landing gear installed. They wont on effortlessly, but again are delicate. I accidentally snapped the front wheel off without even noticing. Thankfully it didn't roll away and went back on easily.


The paint is one, but I had to be very careful not to make it too thick to fill in the panel lines.


The panel lines are very well done, but oddly there were not lines to indicate the bottom of the cockpit "window."  There is a little pitot tube attached to the instruction page with tape. But it was so small, I didn't see it until way after the fact. Here I attached one with the thinnest stretched sprue I think I ever done. ;)


The decals are on. I did have a little trouble at the start. With their age, I wasn't sure if they would shatter on the kit or not, so I tried two X-36 markings on the bottom. I didn't know until I started sliding the decal that apparently each letter/number was separate. I recovered the "X" and the hyphen, but the 3 got turned in reverse, and when I tried to flip it, it went into a ball that I couldn't undo. It would look dumb just to have the one, so the bottom has not decals. Then could the X-36 with the symbols on the top? I circumvented finding out by putting a coat of decal film over the line. They easily slid off in one piece.


Just about done. The pitot tube is so delicate that I decided I want to glue the craft down to some sort of vignette, hopefully protecting it. I found the image below and decided that was the image to duplicate. Looking through the offering I couldn't find any sort of 1/72 civilians to what I came up with (on Amazon) was 200 architectural figures for less than $10. I'll try to pick out 3 and finish off the scene. But that's next time. Thanks for looking.

The inspiration


Wednesday, December 8, 2021

Bossk's Hounds Tooth Finale

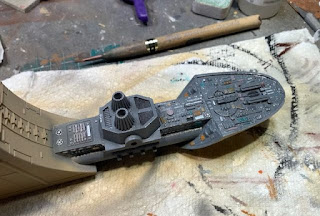
 This session I tried my best to finish this ship off.   First step was the mist coating to make the ship look less than a giraffe.  BTW the base came from Starship Modeler. I picked up a few a while back for any "just in cases." ;)

Next step was to gloss the ship and put down the decals. Being they were for a garage kit, I figured the inking would be on one large film, so I cut the decals as close to the design as possible.  They were very thin but pretty strong - else I would have lost the "teeth" decal.

After that came the weathering. I wanted to make it look used but not too busted up. So the panels were more or less lightly stained rusted with 2 different colors.  I hit the entire model with a flat coat, and then gloss in the very large front windows.  With that, I was done. Thanks for looking. 


Upside down


Bossk's Hounds Tooth part 2

 This session the plan was to start the paint work. Lots of little details in the aft section. 

Looking at other images this ship comes in all colors from yellow the brown. I first saw it as a sort of rusty color.  I started out splitting the difference on the colors. 


I had picked up these Aztek Dummy masks from CultTVMan a while ago, and thought they would be the right touch to busy up these large plain panels.

The first go-round I kept the colors fairly similar. After that I went darker and darker. But not to worry a mist coat will sit them down on the ship nicely.


 Check back.