Thursday, August 13, 2020

Northrup Nuclear Powered Flying Wing.

 Another oldie but goodie is Fantastic Plastic's Northrup Nuclear Powered Flying Wing.

From their site:

In the mid-1950s, the U.S. Air Force flirted seriously with the idea of producing long-range strategic bombers powered by atomic energy.  The main advantage of such a weapon would be its ability to stay aloft for weeks at a time, thus serving as the aerial counterpart to the Navy's fleet of nuclear-powered submarines.

Jack Northrop, America's number-one proponent of "flying wing" aircraft, proposed several configurations for such an atomic-powered bomber.  The most exotic of these was an asymmetrical design that positioned the cockpit at the end of the port wing.  (German engineers had proved that asymmetrical designs were  completely airworthy more than a decade before.)  This configuration, while highly unconventional, had the advantage of putting the flight crew as far away from the nuclear reactor as possible while minimizing weight. 

None of Northrop's concepts got farther than the concept stage.

The kit comes in  15 white resin parts and a clear resin canopy. A nice set of decals is also included. 

This kit came deep out of the stash as the date on the instructions says 2007! The first thing I noticed was that one side of the wing was warped.  So after it received its wash, I boiled a pot of water, took it off the heat and dipped the wing. I only took a few seconds for the wing to become pliable and what I do is press it to the flat bottom of the sink and then turn on the cold water.  Now we're back in action.

Somewhere along the way there is an engine section that needs to be glued on. Being that was already done way back whenever, it was time to look at the jet nozzles. Eight need to be glued on and FP gives you another 3 in case of mistakes. I like that. ;) They come individual and you need to sand a small tab off the bottom. After, they they were just butt jointed to the fuselage. the next was the two vertical wings. They will also need a little sanding so they will mate up nicely. Finally, the cockpit pod needed to be attached. I dremeled out the slot a little bit so the tab went all the way, and a little Vallejo putty made a nice join. That was it, the model was built.


The jet is featured in it's wheels up position with no landing gear, so that's one less thing to worry about. There is also no features in the cockpit so I will tint the glass and just glue it in place. Since the jet never existed in real life the two color options mentioned was for a metalized body, or the typical gray upper and white lower color as the bombers of the day had.  But that's for next time. Thanks for looking.

Friday, August 7, 2020

Ae 607 and LRV Update

Wow, what a few weeks it's been Between the incoming Tropical storm coming up the east coast and then after the storm had gone by, we THEN had on and off brown and black outs for days. Ugh.  But in between I did make it to the hobby desk. 

The Ae607 continued to fight me to the very end but I declared victory.  This is the last time I quickly look that the parts fit - paint both halves -  only to find out that when the times comes, they really don't. Turns out the front needed just as much sanding down as did the cockpit area and the rear by the exhaust. 

Once the parts fit and glued down, then it came time to repair the paint job.  I think in the end it became a decent 3ft. model. 


Another one that turned into a fight was the LRV. In the end I had to rip the entire interior out. I was just tied of having to sand away most of it because the fit was perfect - no one will see inside anyway. 

I got the two  halves together after sanding away a bit of where the fuselage meets the wings. Then the slot where the starboard vertical fin goes was about 1/2 the size of the port one (which fit perfectly) and I needed to take a dremel and then some files to it to get the opening to accept the fin. 

The top and the bottom are together but you can see I'm still having problem with the g d white color. I needed to sand out a spot visible in the middle of the top and after 3 or 4 coats it's still visible! I think I'm about to go to the hardware store and get some serious can of white paint!  But at least the fins are on and the small gaps filled in nicely. Check back to see if I get this painted or does it get bounced off the wall.  Thanks for looking.


Wednesday, July 29, 2020

Ae 607 part 2

All big plans to make head way on this kit, until I got stopped dead. But first the good news.  I picked a color pattern using RLM 81 and 82.
I painted the entire topside in a lightened 82. Then it took some silly putty to create the thin lines. I had my first bit of trouble here. I made all the silly putty "islands", and then evened the out the spaces in between with a coffee stirrer. Once I started painting on the 81, I noticed that the paint was moving away from the edges! One coat...two coats... three coats. WTF. Finally it looked not bad. Was it the Silly Putty? I never saw that reaction before.
After the 81 dried I took some RLM 65 and free handed the stripes wither side of the 81. This by the way was the same color I painted the underside.

I sprayed on some V gloss, and then without thinking and letting the gloss dry, I started washing the very well done panel lines with V's dark gray wash - - which immediately made the gloss to start coming up.  I bit the bullet and just wiped off what I could. It's only the one color - I would have been throwing it off the wall if I did that to the topside - and decided to call it a day. 

Somewhere in between those steps I free handed canopy.  Here's a pic of the topside and the canopy. Thanks for looking.


Monday, July 27, 2020

Blohm & Voss Ae 607

After working on the Sam-13, I was in the mood for another prototype vehicle.


The Ae 607 was a jet-powered flying wing design conceived by Blohm & Voss in 1945. As it was conceived only shortly before the end of World War II there is not a great deal of available information on it, and for many years it was not included in the known list of late-war Luftwaffe development projects.

This was another of my

All the parts comes on 2 gray sprues, plus one clear one for the canopy. It's very well detailed.


Like most planes this kit also starts with the  cockpit and the intake and exhaust ports. 

  The cockpit gets installed along with the ports and the landing gear bays. Just to be on the safe side I added some Liquid Gravity pellets.


Finally, a small size cockpit that actually fits in it's intended spot...

Trying the top of the fuselage on for size I noticed one big problem. Gluing everything into the bottom, you noticed a curve in the parts. Only when I tried the top on and things not fitting that I realized, yes the interior is curved, but the top is flat!  A lot of dremeling ensued.  The plastic need to be taken down - a lot, and I went thru in two spots, but thankfully the cockpit tub was thick enough that nothing was seen.

After the dremeling, I took a break and assembled and painted the landing gear and wheels. 

The top goes on and the painting starts next time. Thanks for looking.

Friday, July 24, 2020

LRV part 2


Session two was extremely short. Most of the session was me sanding that one hatch to get it a little more level. I didn't want it to completely blend in, but wanted it a bit closer.

After that I painted the bottom black and top white. But as has been my eternal problem, white never seems to be white with me - just some sort of light gray. As with my other white vehicles, after a number of coats, I gave up and it is white "enough."

Also painted white are the top fins and the separate pod.
The final for today was adding the the two nozzles after painting them gunmetal and gluing them to the top of the craft.  More later. Thanks for looking. 


Thursday, July 16, 2020

Lenticular ReEntry Vehicle (LRV)

This is another throw back kit from Fantastic Plastic that I dug deep into my stash to pull out. The date on the instructions says 2008!  It's been out of production since 2011, but if you pay attention to the site, older models can come back for a brief engagement at any time. 

The LRV from FP's site:
In the early 1960s, the U.S. Air Force purportedly began development of a modified flying saucer-like airframe for use as a spaceborne nuclear weapons platform.  Dubbed the "Lenticular Re-Entry Vehicle" (LRV).  To be launched atop either a Saturn-like multi-stage rocket or one of the nuclear-powered rockets then under development, the LRV with its crew of four was to be launched into a 300-nautical-mile-high orbit where it would wait in "Fail Safe" mode for several weeks before either launching its nuclear weapons at the Soviet Union/China/North Korea or returning to earth.  Landing would be via controlled re-entry and a glide landing on a dry lake bed.

Although this "Black Budget" project may never have gotten beyond the design stage, there is some physical evidence that prototype vehicles were indeed test-flown in the 1960s.  One such intriguing piece of evidence is a strange "honeycomb" cross-section of an exploded disc recovered near Brisbane, Australia in 1966.

The kit is 1/72 scale is molded in 22 gray resin parts. Certain parts do need a little clear up but nothing that's out of the ordinary.  

The first step was to build the missile bay. Being it's inside means I have to paint it first. 


 After all that I decided I didn't like the option of have the bay open with the shuttle pod half out of the ship, so I did the dumb thing and closed it all in.  Here it is with the shuttle pod.

The closed door is  mostly fits well, but did need a little putty in 2 corners. It also needs a little more sanding to be flush with the ship's surface. But that's for next time. Thanks for looking.


Saturday, July 11, 2020

Mikr Mir's Sam -13

Always on the lookout for the obscure, odd or prototype planes, I found this little gem on the pages of SAMI where the kit was being reviewed.  
The Sam-13 (Cam-13)  was designed in pre-war Russia, and based around Renault 6 cylinder engines. One prototype was built. But this was destroyed as the Soviets fell back against the German invasion of the eastern front. The design was never revisited.

It came with 2 sprues of gray plastic, one (mostly) clear canopy, a fret of PE, and a small sheet of decals. 

The instructions are the typical exploded views, where the exact location of some parts are hard to determine.  The other issue with the kits was that the plastic was pretty fragile. I broke the back off the seat off twice, by apparently leaning on it too heavily. 

There were no locator pins so the parts wanted to wander until the glue set up. 

It wasn't mentioned but with that rear boom, I didn't want to take any chances, and added Liquid Gravity to keep it from being a tail sitter. 

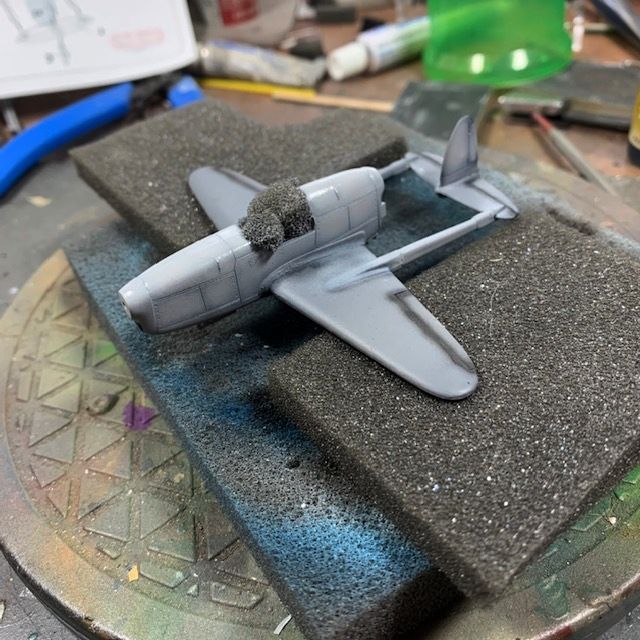
The horizontal tail fin was a tight fit, and I should have done something about it.  While it was drying, it popped out a little on one side and the glue dried that way. :(  Lesson learned.  Also after folding a piece of semi-large PE it jumped, hit the ground and was eaten. I actually laid on the floor looking for it to no avail. :(


With no specific color call outs I used what I had. The gray was Vs Sky Gray and the blue was RLM 24. I did blacken the panel lines a bit with Vs NATO Black. Sitting the canopy on the plane, I was amazed to see that the canopy was a perfect fit - until it came time to glue it on the the fuselage. What happened? :(

But after adding the landing gear I called it done. Thanks for looking.