This time around I have a quick, easy to do little figure.
I got this from a Kickstarter campaign that offered a number of small busts of the classic monsters.
In KS I chose the wolfman (can never have too many werewolves) and a Mr. Hyde. The wolfman looks to be a take off of the Oliver Reed wolfman.
After a wash, the wolfman got a once over looking for seams. Then he got a primer coat and then a base coat in a dark brown.
The painting went so smoothly that I didn't think to stop and take pics along the way. So here's the finished mode. Thanks for looking.
Friday, November 3, 2017
Glencoe's Retriever Rocket
Rumors of my modeling demise have been greatly exaggerated. LOL I've still been building but with the latest Apple iPhone update, it's more difficult to upload images from my phone to the PC. So things have slowed down. But anyway...
Glencoe's Retriever Rocket has been around a while, and while I vaguely remember building it in my youth, I decided to try it again.
So far the only problem I had, was that out of the box one of the rings had snapped -
No worries, that should be easy to fix.
The next thing I noticed is that the large "flight deck" windows reveal ... nothing when you look in. So I had two choices, to create a flight deck or to darken the windows so you can't see in. I chose the former and started my search for parts to fill the void. The model box says the kit is 1/72 so I got my casts of a 1/72 pilot and created a few more. My craft will have 3 in there. I also found 3 seats on Megahobby. Looking for 1/72 instruments to busy up the area, I came up empty, so I did the next best thing in getting PE instruments in 1/48.
Starting with the flight deck, once I got the windows in, I then got out my strip styrene to create a back wall, and a floor, and painted it gray. The window part is very thick, so I painted the edge black and then glued the instrument PE to the edge of the window -
From there the rest of the build was easy - with the exemption of the port hole windows. There was no problem with them, but while cleaning the tab off one, it flew and was promptly swallowed by the carpet monster.
Once it was all together, the entire interior was very hard to see. While you can see a pilots head in the window, I had the feeling the pilots are too big. I should have used HO (1/87) figures. I also should have painted the flight deck a lighter color so you could see in better. Oh well.
With building essentially done, I turned to painting. Then I noticed something odd. The paint instructions on the instruction sheet does not match the colors used on the box art. Hmm. I decided to go with what's in the instructions. I started by applying Rustoleum white paint/primer. There was need to fix some seam lines on the hull, then a repaint.
The rest of the painting went without incident, and I'm calling this one done. In the finished images, note that the side port hole windows are made with Microscale Kristal Klear. Thanks for looking.
Glencoe's Retriever Rocket has been around a while, and while I vaguely remember building it in my youth, I decided to try it again.
So far the only problem I had, was that out of the box one of the rings had snapped -
No worries, that should be easy to fix.
The next thing I noticed is that the large "flight deck" windows reveal ... nothing when you look in. So I had two choices, to create a flight deck or to darken the windows so you can't see in. I chose the former and started my search for parts to fill the void. The model box says the kit is 1/72 so I got my casts of a 1/72 pilot and created a few more. My craft will have 3 in there. I also found 3 seats on Megahobby. Looking for 1/72 instruments to busy up the area, I came up empty, so I did the next best thing in getting PE instruments in 1/48.
Starting with the flight deck, once I got the windows in, I then got out my strip styrene to create a back wall, and a floor, and painted it gray. The window part is very thick, so I painted the edge black and then glued the instrument PE to the edge of the window -
From there the rest of the build was easy - with the exemption of the port hole windows. There was no problem with them, but while cleaning the tab off one, it flew and was promptly swallowed by the carpet monster.
Once it was all together, the entire interior was very hard to see. While you can see a pilots head in the window, I had the feeling the pilots are too big. I should have used HO (1/87) figures. I also should have painted the flight deck a lighter color so you could see in better. Oh well.
With building essentially done, I turned to painting. Then I noticed something odd. The paint instructions on the instruction sheet does not match the colors used on the box art. Hmm. I decided to go with what's in the instructions. I started by applying Rustoleum white paint/primer. There was need to fix some seam lines on the hull, then a repaint.
The rest of the painting went without incident, and I'm calling this one done. In the finished images, note that the side port hole windows are made with Microscale Kristal Klear. Thanks for looking.
![]() |
| Hard to see. There's 3 pilots in there. |
Wednesday, October 18, 2017
Gran'Pa Munster
Gran'pa was gotten on eBay. I actually bought his Zombo kit. I guess Gran'pa wasn't selling or whatever, anyway he was added to the box. There was no scale listed, but the model is 4.5" tall, and looking it up Al Lewis was 6ft. That makes it a 1/16 scale kit.
Finding an image of Gran'pa in color wasn't as hard as I thought, considering the show, to save money, was filmed in B&W.
The color of his face tho was a bit of a problem. Some images show him, like Herman, to have a greenish tint to the face. Other's have it in a blue gray cast. I went with the blue gray. After all why would a vampire be green?
One little easter egg I added was that I found a picture of Gran'Pa without his jacket, as you might imagine they only made up his face and hands. His arms were regular flesh color. On the model there's a little gap in his gloves so I put a dot of regular flesh color to give that fact a nod.
Next was to move on to the base. I didn't want anything elaborate so I ened up with a square of styrofoam, and added wood to the sides. The I got some coffee stirrers and laid them down at a bit of an angle (for interest). The sides were stained with an Espresso stain, while the floor was stained with some Spanish Oak that I had on hand.
At Jersey Fest, there was a seminar on making bases. I didn't attend because I sort of know how bases go. But someone videoed the talk and put it on You Tube. I watched it there, and the speaker used a product I never heard of - SmoothOn Free Form Air two part epoxy. So I bought some.
My verdict on the epoxy is still up in the air. Taking each part out of its container feels like a light and airy Play Dough. But as you begin to mix it, it starts to feel wet and VERY sticky!
I had another piece of foam that I planned to put the FF Air on, and then roll one of the roller stencils from Green Stuff World to create a rocky background.
Trying to get the FF Air onto the foam was very tough. The speaker used water to keep the stickiness down. But there's a fine line between "not sticky" and mud. I was prolly 2 or 3 steps onto the mud side when I gave up on the roller. Annoyed now, I just drew lines in the epoxy and I didn't even care that the lines weren't straight and even.
Getting the foam wall covered was completed, but it looked to bland. It needed something else. I had a few pieces of model "lumber", so i roughed some up to form 2 beams. I stained it with Citadels Agrax Earthshade, and just jammed it into the epoxy.
The epoxy dried to the touch in a few hours and I started painting and staining the wall with Vallejo paints and stains. I also sculpted a little bat and glued it to the beam. I was glad to be finished.
Thanks for looking.
Finding an image of Gran'pa in color wasn't as hard as I thought, considering the show, to save money, was filmed in B&W.
The color of his face tho was a bit of a problem. Some images show him, like Herman, to have a greenish tint to the face. Other's have it in a blue gray cast. I went with the blue gray. After all why would a vampire be green?
One little easter egg I added was that I found a picture of Gran'Pa without his jacket, as you might imagine they only made up his face and hands. His arms were regular flesh color. On the model there's a little gap in his gloves so I put a dot of regular flesh color to give that fact a nod.
Next was to move on to the base. I didn't want anything elaborate so I ened up with a square of styrofoam, and added wood to the sides. The I got some coffee stirrers and laid them down at a bit of an angle (for interest). The sides were stained with an Espresso stain, while the floor was stained with some Spanish Oak that I had on hand.
At Jersey Fest, there was a seminar on making bases. I didn't attend because I sort of know how bases go. But someone videoed the talk and put it on You Tube. I watched it there, and the speaker used a product I never heard of - SmoothOn Free Form Air two part epoxy. So I bought some.
My verdict on the epoxy is still up in the air. Taking each part out of its container feels like a light and airy Play Dough. But as you begin to mix it, it starts to feel wet and VERY sticky!
I had another piece of foam that I planned to put the FF Air on, and then roll one of the roller stencils from Green Stuff World to create a rocky background.
Trying to get the FF Air onto the foam was very tough. The speaker used water to keep the stickiness down. But there's a fine line between "not sticky" and mud. I was prolly 2 or 3 steps onto the mud side when I gave up on the roller. Annoyed now, I just drew lines in the epoxy and I didn't even care that the lines weren't straight and even.
Getting the foam wall covered was completed, but it looked to bland. It needed something else. I had a few pieces of model "lumber", so i roughed some up to form 2 beams. I stained it with Citadels Agrax Earthshade, and just jammed it into the epoxy.
The epoxy dried to the touch in a few hours and I started painting and staining the wall with Vallejo paints and stains. I also sculpted a little bat and glued it to the beam. I was glad to be finished.
Thanks for looking.
Wednesday, September 27, 2017
Bob Burns as Kogar
I was in the need to do something a little quicker than the standard resin kits. So I pulled out Moebius' styrene kit of Kogar.
The kit comes in a tan styrene, and gives you an option for 3 heads. One is to use the gorilla head for Kogar himself. The second is a likeness of Bob Burns, who is an avid Hollywood memorabilia collector and the man in the gorilla suit. The third is another gorilla head (named Tracy) , but it is made to have a propeller beanie on as seen in the live action TV series of Ghostbusters.
I chose to make a tribute to Burns by using the human head. A curved arm will also allow me to add the gorilla head as a mask.
Since this was to be a quick build I didn't worry too much about the seams, tho I made sure there was no gaping holes. The toughest to fix was in and around that curved arm.
The head I had done in the same way I do all of my people. I start dark and work my way towards light. Burns had gray hair so I started with a darker color -
When the body looked complete I added some color -
Turning to the base. I wanted a wooden bottom, and then to use the foliage that was pressed into the plastic. I found this wacky pre-chewed brush in Michaels and it's just the thing to mimic woodgrain -
Then to just add the greens-
I wasn't too happy with that, so I got out my make shift grass applicator and went to work. I think the mistake I made was to paint the base that dark green color when all I had was the light green fibers. Oh well. Live and learn -
Time to put Bob in the suit. I found a pic online that shows him without the mask and he has the black around the eyes and a hood. So I added the black eyes, but didn't want him to have the hood on - I thought it made the whole thing too dark- but it would solve the nasty seam across the head.
In the end I made a hood out of Aves, and just draped it around his neck, and painted it black. I added a little dark brown to the fur to give some color and then while the fur was sprayed with a matte coat, I painted around the eyes, mouth, hands, feet and chest a satin to match what I saw in the image. I was calling this done.
Thanks for looking.
The kit comes in a tan styrene, and gives you an option for 3 heads. One is to use the gorilla head for Kogar himself. The second is a likeness of Bob Burns, who is an avid Hollywood memorabilia collector and the man in the gorilla suit. The third is another gorilla head (named Tracy) , but it is made to have a propeller beanie on as seen in the live action TV series of Ghostbusters.
I chose to make a tribute to Burns by using the human head. A curved arm will also allow me to add the gorilla head as a mask.
Since this was to be a quick build I didn't worry too much about the seams, tho I made sure there was no gaping holes. The toughest to fix was in and around that curved arm.
The head I had done in the same way I do all of my people. I start dark and work my way towards light. Burns had gray hair so I started with a darker color -
When the body looked complete I added some color -
Turning to the base. I wanted a wooden bottom, and then to use the foliage that was pressed into the plastic. I found this wacky pre-chewed brush in Michaels and it's just the thing to mimic woodgrain -
Then to just add the greens-
I wasn't too happy with that, so I got out my make shift grass applicator and went to work. I think the mistake I made was to paint the base that dark green color when all I had was the light green fibers. Oh well. Live and learn -
Time to put Bob in the suit. I found a pic online that shows him without the mask and he has the black around the eyes and a hood. So I added the black eyes, but didn't want him to have the hood on - I thought it made the whole thing too dark- but it would solve the nasty seam across the head.
In the end I made a hood out of Aves, and just draped it around his neck, and painted it black. I added a little dark brown to the fur to give some color and then while the fur was sprayed with a matte coat, I painted around the eyes, mouth, hands, feet and chest a satin to match what I saw in the image. I was calling this done.
Thanks for looking.
Sunday, September 24, 2017
New
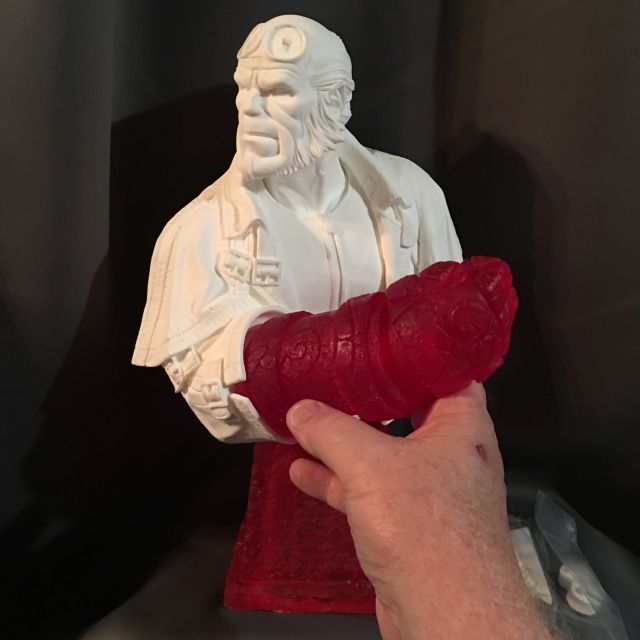
This post is the after Jersey Fest article. Ooh boy, I went a little mad this year. It started off with one producer, who wanted to be there but couldn't because of Hurricane Irma, gave an "I can't make it" model sale. From him I picked up a Hellboy and Abe Sapien bust. When I got them I realized they were HUGE! Parts of them were also cast in a translucent resin to aid in lighting. I may just light them up.
At JerseyFest, it really was like a kid in a candy shop. But knowing I had the two kits above coming, I *tried* to calm myself.
Walking around I stopped at John Dennett and Paul Gill's tables. From John, he sold out of the "Take Me to Your Leader" kit-
but I did get his Ghoul -
From Paul's table I got the new Pennywise kit from the remake of IT -
Then in walking around I stopped at Goodfellas Resin, and picked up their terrific "Dragon Mother" bust. I like it because for whatever reason, many producers feel the need to have Daenery's kit in some stage of nudity. While I'm not a prude how many naked girls can you have on your model shelves...
At Troy McDevitt's table I picked up his mini Punisher bust from his comic book collection. The kits comes with stickers of comic books that correspond to each character. They fill up the blank spots on the stack base.
And finally there was a woman there with multiple casts of just two kits - a plaque that I don't remember, and an alien bust. You can never have too many aliens...
Thanks for looking.
At JerseyFest, it really was like a kid in a candy shop. But knowing I had the two kits above coming, I *tried* to calm myself.
Walking around I stopped at John Dennett and Paul Gill's tables. From John, he sold out of the "Take Me to Your Leader" kit-
but I did get his Ghoul -
From Paul's table I got the new Pennywise kit from the remake of IT -
Then in walking around I stopped at Goodfellas Resin, and picked up their terrific "Dragon Mother" bust. I like it because for whatever reason, many producers feel the need to have Daenery's kit in some stage of nudity. While I'm not a prude how many naked girls can you have on your model shelves...
| The gap you see is for a lock of hair, not shown |
At Troy McDevitt's table I picked up his mini Punisher bust from his comic book collection. The kits comes with stickers of comic books that correspond to each character. They fill up the blank spots on the stack base.
And finally there was a woman there with multiple casts of just two kits - a plaque that I don't remember, and an alien bust. You can never have too many aliens...
Thanks for looking.
Thursday, September 21, 2017
Paleocraft Elasmotherium
The newest entry to my prehistoric zoo, is the Elasmotherium from Paleocraft.
From wiki:
Oddly enough, the kit went so smoothly that I took no WIP pics. I just used various brown colors, washed the recesses with Citadel's Agrax Earthshade, and finally giving the highlights a topcoat of a tan flesh color.
Thanks for looking.
From wiki:
Also known as the Giant Rhinoceros of Siberia, is an extinct genus of rhinoceros endemic to Eurasia during the Late Pliocene through the Pleistocene, documented from 2.6 Ma to as late as 29,000 years ago in the Late Pleistocene.[2][3] Three species are recognised. The best known, E. sibiricum, was the size of a mammoth and is thought to have borne a large, thick horn on its forehead. Theories about the function of this horn include defence, attracting mates, driving away competitors, sweeping snow from the grass in winter and digging for water and plant roots.[citation needed] Like all rhinoceroses, elasmotheres were herbivorous. Unlike any others, its high-crowned molars were ever-growing. Its legs were longer than those of other rhinos and were adapted for galloping, giving it a horse-like gait.The model was a typical Paleocraft offering - excellently detailed, in a bubble free, odorless resin. There was a little flash here and there in the thick fur, but took little time to clean it up.
| An Xacto knife shows the size comparison |
Thanks for looking.
Jack Torrance - The Shining
This time we have Jack Torrance from The Shining from the studios of Gillman Productions. This is one of my favorite movies and really enjoyed painting up Jack.
This was a simple kit of only 2 parts - the bust/base, and the arms/axe. The resin was bubble free and only a little clean-up of a small seam line in the hair.
At last years Jersey Fest, I attended a demo of doing skin tones. First thing mentioned was to use a red primer instead of the gray or black (or white) as it gives a glow to the upper layers of the skin. So I gave it a shot. I may have used a too dark a shade, but it's what I had -
While that was drying I took a look at the axe/hands. and added some base color to the hands -
Back to the bust I painted the hair and beard scruff. Later on I will dry brush the skin color over the scruff to tone it down a bit -
The big challenge for me was to try the flannel shirt for the first time. I took a long bristled, series 7 size#1 and went to town drawing the lines. Some of the lines were engraved in giving me a template for the rest. If I were to do it again, I think I would use a gray rather than white for those stripes. despite being white on the shirt -
It was definitely too bright. And I wasn't about the ruin the whole thing trying to dull the white down. So I have this-
Turning back to the axe, in the film the axe is obviously brand new. But my thoughts was that if it was there at the hotel, it would have been older and well worn, if nothing else from the accumulating dust and grime. So I chose to darken the wood up a bit -
I adjusted the skin color a bit, painted his head wound, and then attempted to add the corduroy pleats to the jacket and then called it done. Thanks for looking.
This was a simple kit of only 2 parts - the bust/base, and the arms/axe. The resin was bubble free and only a little clean-up of a small seam line in the hair.
At last years Jersey Fest, I attended a demo of doing skin tones. First thing mentioned was to use a red primer instead of the gray or black (or white) as it gives a glow to the upper layers of the skin. So I gave it a shot. I may have used a too dark a shade, but it's what I had -
| The base color added, but you can see primer color |
Back to the bust I painted the hair and beard scruff. Later on I will dry brush the skin color over the scruff to tone it down a bit -
The big challenge for me was to try the flannel shirt for the first time. I took a long bristled, series 7 size#1 and went to town drawing the lines. Some of the lines were engraved in giving me a template for the rest. If I were to do it again, I think I would use a gray rather than white for those stripes. despite being white on the shirt -
It was definitely too bright. And I wasn't about the ruin the whole thing trying to dull the white down. So I have this-
Turning back to the axe, in the film the axe is obviously brand new. But my thoughts was that if it was there at the hotel, it would have been older and well worn, if nothing else from the accumulating dust and grime. So I chose to darken the wood up a bit -
I adjusted the skin color a bit, painted his head wound, and then attempted to add the corduroy pleats to the jacket and then called it done. Thanks for looking.
Subscribe to:
Posts (Atom)