I got a little more done, but also ran into a snag.
First the good news. I took the Dremel to the cockpit area and was successful in getting the windows cut out. I was going to go all the way thru but decided against it at the last minute -
Next, I primed in the Stynylrez black primer and then highlighted the panels in the white primer. It's sort of the opposite of preshading the panel lines -
And finally used V's Black Gray over the craft. Reading the instructions (Huh?) I saw that the nose was white, so white it is. I also hit the landing gear wells white too (not pictured). The below image also shows the plane with a good layer of Future on it -
I still have to paint part of the bottom a Titanium color.
The bad news is that I didn't use Future to coat the decals. I used Krylon Gloss, and they wrinkled. Bad. Looking at them this morning they aren't as bad, and since they're sealed I was going to go ahead and try them, and snug them down with Micro Sol. What do you all think?
Thanks for looking.
Friday, September 9, 2016
Wednesday, September 7, 2016
X-15D Delta Wing
Moving right along, I did an eenie, meenie to pick the next kit out of my stash. The winner was Fantastic Plastic's x-15D. From their site:
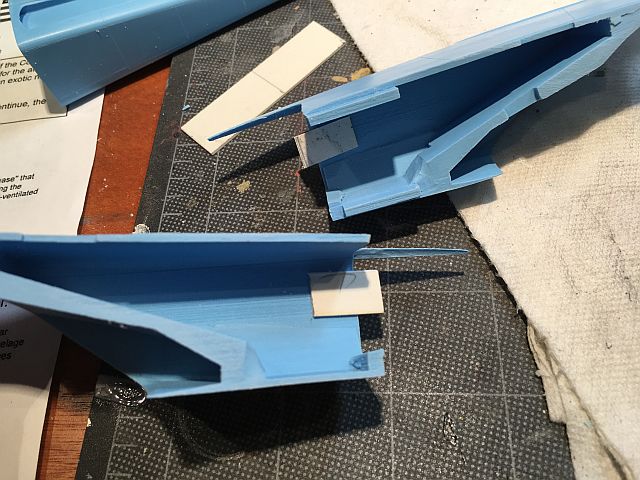
The kit is 1/72 scale and comes in 20+ pieces of odorless blue resin. It also comes with a pretty extensive decal sheet. The kit was very clean and I just had to remove a few leftover pour plugs. No big deal. I was a little confused at first at how the fuselage went together. I've been building these experimental 1/72 planes and they are very small. So in my head this too, was small; not the case. Once I figured that the sections go end to end (and not side to side) the building went rapidly. They had a few tabs molded in to guide the parts together and give a gluing surface. I added a few more out of strip styrene and had the main parts together in no time.
The cannards and the folded part of the wings went on next. I filled a few gaps, as I went so hopefully when I prime, I won't have much clean up to do.
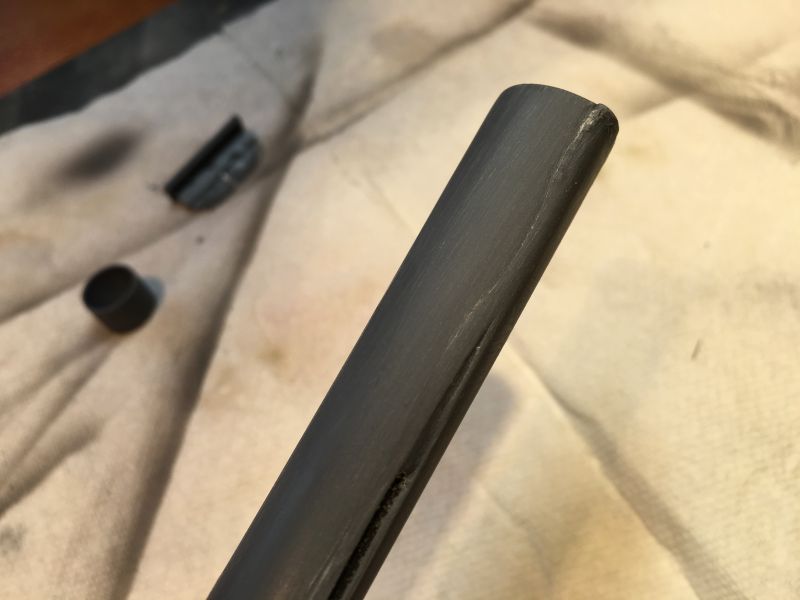
Next I built the landing gear and rear skids. The front strut cleaned up nicely and then I added the two wheels. The back skids were one piece each and was a little rougher. Then on the instructions I read that if the post of the skids were made from metal tubing, it would be stronger. So that's what I did. While I was at it, I took some more styrene and created new skids. The posts were clipped metal paper clips. You can see those new parts to the left of the plane -
The next thing I'm thinking about is the windows. The kit gives decals to cover the ovals that are the windows. They look nice, but I am considering dremelling out the ovals and when finished add the Kristal Klear to make the windows more glass like.
Another angle. More coming up, thanks for looking.
The X-15 rocket-powered spaceplane was arguably the most important -- and famous -- X-plane of the Cold War Era. Prior to the X-15 program's abrupt cancellation in 1968, the Air Force was drafting ambitious plans for the aircraft, including a "next generation" X-15-D that would test the limits of hypersonic flight (Mach 5+) using an exotic new hydrogen-fueled scramjet engine.Fantastic Plastic retired the kit in 2015, but you never know. They will bring kits out of retirement for a limited time, often. So if you want one keep your eyes open and on their site.
Unfortunately, the X-15-D never made it past the drawing board. Had the program been allowed to continue, the X-15-D would have no doubt added further luster to the X-15's sterling legacy.
The kit is 1/72 scale and comes in 20+ pieces of odorless blue resin. It also comes with a pretty extensive decal sheet. The kit was very clean and I just had to remove a few leftover pour plugs. No big deal. I was a little confused at first at how the fuselage went together. I've been building these experimental 1/72 planes and they are very small. So in my head this too, was small; not the case. Once I figured that the sections go end to end (and not side to side) the building went rapidly. They had a few tabs molded in to guide the parts together and give a gluing surface. I added a few more out of strip styrene and had the main parts together in no time.
The cannards and the folded part of the wings went on next. I filled a few gaps, as I went so hopefully when I prime, I won't have much clean up to do.
Next I built the landing gear and rear skids. The front strut cleaned up nicely and then I added the two wheels. The back skids were one piece each and was a little rougher. Then on the instructions I read that if the post of the skids were made from metal tubing, it would be stronger. So that's what I did. While I was at it, I took some more styrene and created new skids. The posts were clipped metal paper clips. You can see those new parts to the left of the plane -
The next thing I'm thinking about is the windows. The kit gives decals to cover the ovals that are the windows. They look nice, but I am considering dremelling out the ovals and when finished add the Kristal Klear to make the windows more glass like.
Another angle. More coming up, thanks for looking.
Tuesday, September 6, 2016
A Gorgon Sister - The Scorpion
This time around I took Greenwell Studios Gorgon Sister out of the stash to work on. I tried looking for info about Greenwell, but apparently they have disappeared. Too bad, they had good kits. If I remember correctly, there was 3 or 4 different Gorgon busts.
Anyway, after it's cleaning, I primed it in the usual way -
At this point I actually left it for a few weeks. I kind of liked that way it looked in the black and white. But then I decided put put paint on it. Here it is base coated -
As with a lot of my base coats, the colors never last. I always end up changing my mind. At first I started with a darker skin thinking Mediterranean, but then I always make busts paler. Here she is with the finished colors -
My original idea for a dark Scorpion headress changed as too much detail would be lost. Then I've been seeing mini painters do a terrific job at painting lenses/gems etc... so I decided to make the large circle on the front a gem. I need work on doing them. ;) It was also my first time at trying a marble pattern. Turned out ok...
Here she is from other angles. Thanks for looking -
Anyway, after it's cleaning, I primed it in the usual way -
At this point I actually left it for a few weeks. I kind of liked that way it looked in the black and white. But then I decided put put paint on it. Here it is base coated -
As with a lot of my base coats, the colors never last. I always end up changing my mind. At first I started with a darker skin thinking Mediterranean, but then I always make busts paler. Here she is with the finished colors -
My original idea for a dark Scorpion headress changed as too much detail would be lost. Then I've been seeing mini painters do a terrific job at painting lenses/gems etc... so I decided to make the large circle on the front a gem. I need work on doing them. ;) It was also my first time at trying a marble pattern. Turned out ok...
Here she is from other angles. Thanks for looking -
Heinkel He-178: Finishing Up
... And then disaster struck!
When we last left off I was ready to gloss the plane to put some weathering along the panel lines. I took some of the Vallejo gloss clear, put it in the airbrush and sprayed. I came out in a pebbly like pattern. I sprayed more thinking the dots of gloss would merge and form one uniform coat. Didn't happen. But my big mistake was thinking "Well, there's gloss on it, I'll move ahead with the weathering."
I put some of Citadel's Nuln Oil on it and it acted as if you put a wash on any Flat paint. It was terrible. And not only that, since it was supposed to be gloss, I just sprayed over the canopy. Arrrgh! The canopy now looks frosted!
Luckily I was able to take a Q-tip and some water and get most of it off. Cant be said for the rest of it. In some spots a scrubbed so hard I revealed the primer. I lightly sanded the pebbly coating off, and now it was time for a complete repaint.
When repainting, I used V's Metallics Steel, instead of V's Model Color Steel. You would think it would be the same color, but no. The Metallics is a lot darker. Which in this case is good as it separates the two metallic colors.
Do I care about color accuracy? Not at this point. I just want it done. So here it is - Taa Daa ;)
Thanks for looking.
When we last left off I was ready to gloss the plane to put some weathering along the panel lines. I took some of the Vallejo gloss clear, put it in the airbrush and sprayed. I came out in a pebbly like pattern. I sprayed more thinking the dots of gloss would merge and form one uniform coat. Didn't happen. But my big mistake was thinking "Well, there's gloss on it, I'll move ahead with the weathering."
I put some of Citadel's Nuln Oil on it and it acted as if you put a wash on any Flat paint. It was terrible. And not only that, since it was supposed to be gloss, I just sprayed over the canopy. Arrrgh! The canopy now looks frosted!
Luckily I was able to take a Q-tip and some water and get most of it off. Cant be said for the rest of it. In some spots a scrubbed so hard I revealed the primer. I lightly sanded the pebbly coating off, and now it was time for a complete repaint.
When repainting, I used V's Metallics Steel, instead of V's Model Color Steel. You would think it would be the same color, but no. The Metallics is a lot darker. Which in this case is good as it separates the two metallic colors.
Do I care about color accuracy? Not at this point. I just want it done. So here it is - Taa Daa ;)
Thanks for looking.
Sunday, September 4, 2016
New Aquisitions
A number of kits arrived these past few weeks. The first package arrived from Megahobby. I ordered the Vallejo Face paint set, and also the newly re-released Retriever Rocket. Looking at the Rocket there's is one piece that was broken, but it's a clean break and will be a simple fix. The rest of the kit is very nicely done. There's a little flash, but nothing to worry about. One thing I will have to think about is unless I missed it, there's no flight deck. So I can either cobble one together out of another kit, or paint over the windows so no one can see in. As of now, I'm leaning towards build a flight deck.
Next was a pre painted statue of Medusa. Medusa is one of my favorite characters in mythology, and whenever I can pick a Medusa up I will (I have a few waiting to be built). ;)
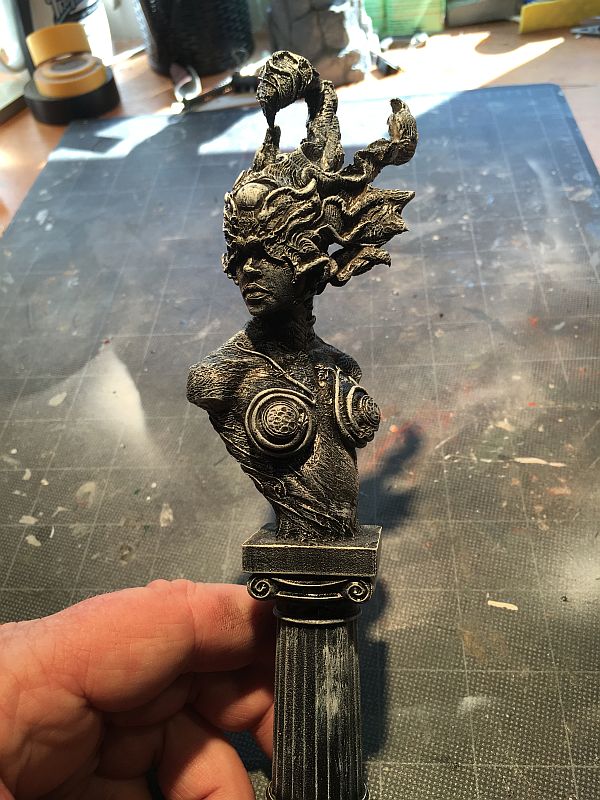
This one came from Dellamorte Co., doing business on Etsy. They actually have a number of interesting prepaints. Unless I'm thinking about a different Co., I thought one of the options besides prepaint was a plain resin cast. No more if they ever did. The one I picked up was the larger of two versions and it's in a nice art deco type faux bronze. I've yet to make up my mind if I will leave it as is or paint it up differently.
Next up is another favorite movie character. It's Val Kilmer as Doc Holiday from Tombstone. This bust comes from CGS Military Figures and it a 1/9th bust. The title is aptly called "I'm Your Huckleberry."
I was so interested in seeing it, and I put it together even tho I'm not ready to paint it up. I left his gun(in holster) off so I could make painting easier. But he is depicted tapping on the gun handle.
I can only hope they also produce a Kurt Russell as Wyatt Earp and a Powers Boothe as Curly Bill. My wife is also in love with Sam Elliott, so a Virgil Earp would be a treasure on her desk. ;)
Lastly, I received the Star Duster from Fantastic Plastic. I have a separate review of that one. Thanks for looking.
Next was a pre painted statue of Medusa. Medusa is one of my favorite characters in mythology, and whenever I can pick a Medusa up I will (I have a few waiting to be built). ;)
This one came from Dellamorte Co., doing business on Etsy. They actually have a number of interesting prepaints. Unless I'm thinking about a different Co., I thought one of the options besides prepaint was a plain resin cast. No more if they ever did. The one I picked up was the larger of two versions and it's in a nice art deco type faux bronze. I've yet to make up my mind if I will leave it as is or paint it up differently.
Next up is another favorite movie character. It's Val Kilmer as Doc Holiday from Tombstone. This bust comes from CGS Military Figures and it a 1/9th bust. The title is aptly called "I'm Your Huckleberry."
I was so interested in seeing it, and I put it together even tho I'm not ready to paint it up. I left his gun(in holster) off so I could make painting easier. But he is depicted tapping on the gun handle.
I can only hope they also produce a Kurt Russell as Wyatt Earp and a Powers Boothe as Curly Bill. My wife is also in love with Sam Elliott, so a Virgil Earp would be a treasure on her desk. ;)
Lastly, I received the Star Duster from Fantastic Plastic. I have a separate review of that one. Thanks for looking.
Labels:
CGS,
Dellamorte,
Fantastic Plastic,
Glencoe,
New,
plastic,
resin,
Vallejo
Fantastic Plastic Space Angel Starduster
From Fantastic Plastic's site:
Just got my kit in the mail yesterday and quickly opened it. Just an initial look, and I've been buying FP kits since the beginning, but I'm sorry to say that this has to be the worst kit I've seen from them. :(
It's upsetting as this is the first real negative review I've ever given. I guess a bright side could be the decals because they look good, but then again I haven't used them yet.
The main fuselage mold looks like it slipped and has a lip almost the entire length, and when I started sanding a myriad of pinholes appeared.
The canards feel more like a rubbery toy plastic than the resin that I'm used to. Like others have said in a different forum, I'll prolly have to make my own.
In honesty if I didn't start to mess with it, it would have been the first one I would send back.
There is another build of another kit casted by Masterpiece and he's illustrated the same complaints. In the future, unless Masterpiece gets their act together I will avoid kits they've casted.
"Space Angel" was an animated sci-fi series produced by Cambria Studios. Set several hundreds years in the future, the show chronicled the adventures of Captain Scott McCloud, aka "Space Angel," Electronic/Communications expert Crystal Mace and Scottish Gunner/Engineer Taurus, all whom crewed the Interplanetary Space Force rocket "Starduster.
The Starduster itself was an elegant three-winged tail sitter distinguished by its bulging eye-like cockpit windows, mid-fuselage canards and massive tail. Weapons included both nose and tail-mounted cannons. The Starduster flew via conventional rocket technology with no consideration of faster-than-light travel."
Just got my kit in the mail yesterday and quickly opened it. Just an initial look, and I've been buying FP kits since the beginning, but I'm sorry to say that this has to be the worst kit I've seen from them. :(
It's upsetting as this is the first real negative review I've ever given. I guess a bright side could be the decals because they look good, but then again I haven't used them yet.
The main fuselage mold looks like it slipped and has a lip almost the entire length, and when I started sanding a myriad of pinholes appeared.
The canards feel more like a rubbery toy plastic than the resin that I'm used to. Like others have said in a different forum, I'll prolly have to make my own.
In honesty if I didn't start to mess with it, it would have been the first one I would send back.
There is another build of another kit casted by Masterpiece and he's illustrated the same complaints. In the future, unless Masterpiece gets their act together I will avoid kits they've casted.
Friday, September 2, 2016
Heinkel He-178 part 2
More progress was made on this plane. The first thing done this session was to mask off the areas to be metal and apply the metallic colors. The instructions call for 2 different metallics. They recommend a "polished" metal and a "natural" metal. They had "H" designations to the colors. Since I use Vallejo, I chose White Aluminum and Steel. To my eye, the colors still looked too close, so I will add a thinned layer of Smoke to the natural metal color.
Pulling off the masking tape, I looked up the conversion for RLM 2 (I think I said it was 4 earlier, sorry) and it turns out to be V's Green Gray.
After that I once again turn to my Metallics set and brushed on some burnt metal to the exhaust port.
While this model has it's problems and will definitely be a "2 footer"*, it's not looking too bad.
Feeling ambitions, I took some of my 1.5mm tape and created seat belts. I did this because test fitting the canopy, you could see right in and it looked a little bland. The 1.5 is still too wide, but it will do for now.
I didn't take a pic of it yet, but also during this session I added the canopy. I didn't fit correctly, but I just creatively painted it to make it blend in. Thanks for looking.
* A "2 footer" is a model that will look OK from 2 foot away, don't look closely. ;)
Pulling off the masking tape, I looked up the conversion for RLM 2 (I think I said it was 4 earlier, sorry) and it turns out to be V's Green Gray.
After that I once again turn to my Metallics set and brushed on some burnt metal to the exhaust port.
While this model has it's problems and will definitely be a "2 footer"*, it's not looking too bad.
Feeling ambitions, I took some of my 1.5mm tape and created seat belts. I did this because test fitting the canopy, you could see right in and it looked a little bland. The 1.5 is still too wide, but it will do for now.
I didn't take a pic of it yet, but also during this session I added the canopy. I didn't fit correctly, but I just creatively painted it to make it blend in. Thanks for looking.
* A "2 footer" is a model that will look OK from 2 foot away, don't look closely. ;)
Subscribe to:
Posts (Atom)