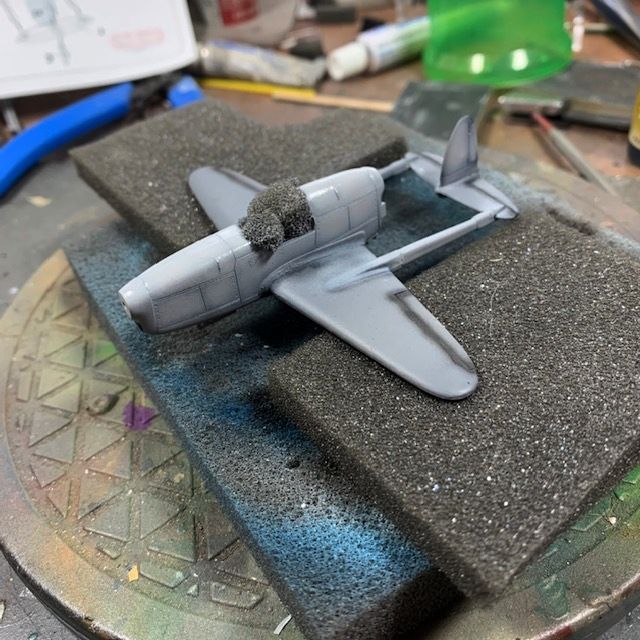
Session two was extremely short. Most of the session was me sanding that one hatch to get it a little more level. I didn't want it to completely blend in, but wanted it a bit closer.
After that I painted the bottom black and top white. But as has been my eternal problem, white never seems to be white with me - just some sort of light gray. As with my other white vehicles, after a number of coats, I gave up and it is white "enough."
Also painted white are the top fins and the separate pod.
The final for today was adding the the two nozzles after painting them gunmetal and gluing them to the top of the craft. More later. Thanks for looking.
This is another throw back kit from Fantastic Plastic that I dug deep into my stash to pull out. The date on the instructions says 2008! It's been out of production since 2011, but if you pay attention to the site, older models can come back for a brief engagement at any time.
The LRV from FP's site:
In the early 1960s, the U.S. Air Force purportedly began
development of a modified flying saucer-like airframe for use as a
spaceborne nuclear weapons platform. Dubbed the "Lenticular
Re-Entry Vehicle" (LRV). To be launched atop either a Saturn-like
multi-stage rocket or one of the nuclear-powered rockets then under
development, the LRV with its crew of four was to be launched into a
300-nautical-mile-high orbit where it would wait in "Fail Safe" mode
for several weeks before either launching its nuclear weapons at
the Soviet Union/China/North Korea or returning to earth. Landing
would be via controlled re-entry and a glide landing on a dry lake bed.
Although this "Black Budget" project may never have gotten beyond
the design stage, there is some physical evidence that prototype
vehicles were indeed test-flown in the 1960s. One such intriguing
piece of evidence is a strange "honeycomb" cross-section of an
exploded disc recovered near Brisbane, Australia in 1966.
The kit is 1/72 scale is molded in 22 gray resin parts. Certain parts do need a little clear up but nothing that's out of the ordinary.
The first step was to build the missile bay. Being it's inside means I have to paint it first.
After all that I decided I didn't like the option of have the bay open with the shuttle pod half out of the ship, so I did the dumb thing and closed it all in. Here it is with the shuttle pod.
The closed door is mostly fits well, but did need a little putty in 2 corners. It also needs a little more sanding to be flush with the ship's surface. But that's for next time. Thanks for looking.
Always on the lookout for the obscure, odd or prototype planes, I found this little gem on the pages of SAMI where the kit was being reviewed.
The Sam-13 (Cam-13) was designed in pre-war Russia, and based around Renault 6 cylinder engines. One prototype was built. But this was destroyed as the Soviets fell back against the German invasion of the eastern front. The design was never revisited.
It came with 2 sprues of gray plastic, one (mostly) clear canopy, a fret of PE, and a small sheet of decals.
The instructions are the typical exploded views, where the exact location of some parts are hard to determine. The other issue with the kits was that the plastic was pretty fragile. I broke the back off the seat off twice, by apparently leaning on it too heavily.
There were no locator pins so the parts wanted to wander until the glue set up.
It wasn't mentioned but with that rear boom, I didn't want to take any chances, and added Liquid Gravity to keep it from being a tail sitter.
The horizontal tail fin was a tight fit, and I should have done something about it. While it was drying, it popped out a little on one side and the glue dried that way. :( Lesson learned. Also after folding a piece of semi-large PE it jumped, hit the ground and was eaten. I actually laid on the floor looking for it to no avail. :(
With no specific color call outs I used what I had. The gray was Vs Sky Gray and the blue was RLM 24. I did blacken the panel lines a bit with Vs NATO Black. Sitting the canopy on the plane, I was amazed to see that the canopy was a perfect fit - until it came time to glue it on the the fuselage. What happened? :(
But after adding the landing gear I called it done. Thanks for looking.
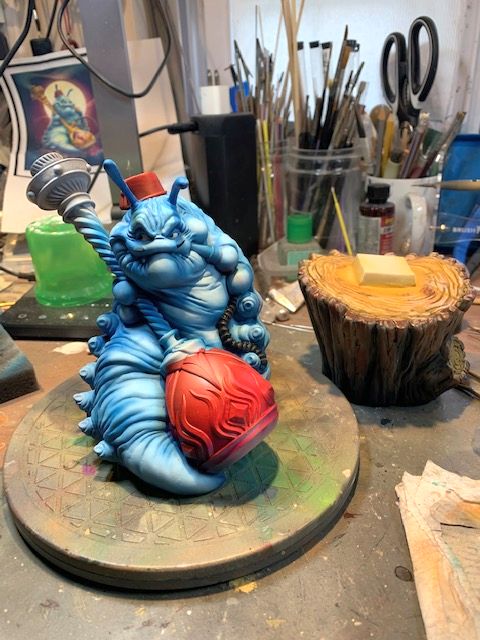
After a week or two of laziness, I got myself into the studio and finished off the Caterpillar.
First up was finishing off the highlights on the hookah. Then I re-adjusting the highlights on the caterpillar itself. I thought I finished up by using V's Metal Varnish on the hookah, and V's satin on the Caterpillar. Then I noticed that I didn't do those eye looking things on it's back. So I got out the Gloss Black and finished those. I was really tempted to make them look like eyes, but I thought that might be *too much.*
I epoxied it to the base and I was done. Thanks for looking.
This was a kit that caught my eye for being different, even tho it's featured in a story and an animated movie. ;)
This caterpillar is from Creepy Tables, and comes in two sizes - 22cm and 15cm. I chose the 22cm version. It is a limited edition and I have either 30 or 36 (hard to read the handwriting) out of 200. It's still being offered so I guess there are a few left at the time of this writing. It comes in 6 pieces of resin, that is very nicely done. FAINT seam lines were seen in one or two places and probably could easily go unnoticed.
 |
| Here's what you get |
Here the parts were assembled - tho the caterpillar was just rested on the stump. Will glue them together at the end - and primed. The connection between the top and bottom parts of the hookah needed extra attention.
Following the color image that came with the kit, I started airbrushing the blues on the body.
More messing with the light and dark blues, and filled in the body of the hookah. On the image it's made to look transparent. I'm not able to copy that so I just made 2 levels of a purple red into a red, and then a pale red reflective highlight. I used the same red colors for his fez.
Wanting to paint the decoration on the hookah gold, I added the gloss black.
The wood stump also got my regular wood treatment of black then gray and dark brown. Going way out on a limb I added a stylized wood grain to the top as practice since it can't be seen, and then on the cut branch on the front of the stump. Check back for the gold trim, jewels, and the final details.
Thanks for looking.
It's almost embarrassing to admit that this is another one that's been in my stash for a long time. I'm guessing that 90% of my stash has been there a long time (blush).
But anyway this is a nice quick project. Sculpted by Kent Kidwell, it's a one piece kit with lots of details for the size.
Going from memory I remember a lot of brown dirt in the movie, so I started with a red earth primer.
I have too many earth tone paints in my collection and wanted the worm to be a little different at least, from the ground. So the colors of both changed a number of times. But it all went along pretty fast - 2 or 3 hours and I was calling this one done. Thanks for looking.
This is another nice little bust I saw on the New Announcements group on FB. It's approximately 200mm and sculpted by Joaquin Palacios for Epica Tales.
The model comes in three resin pieces - the bust, the arm, and the column base. You need to supply your own rod connecting the bust to the base. She also comes with her own sticker. It's an excellent sculpt and cast with no bubbles or seams apparent.
Thinking Middle eastern I used a flesh that was a little darker than normal. I also gave her dark hair. One other thing is I goofed while drilled the hole for the rod. The bottom cut is a lot more steep than other busts, and in a Aves and a second try.
It was right at this point of the build when one morning I heard a bang coming from the attic. I went up to investigate to find somehow a Starling had gotten in. Of course it flew around and landed on the desk knocking the model over and of course breaking the little knife she's holding off. A bird in the house must be bad luck as I don't know whether the bird or the carpet monster ate it, but it's never been seen again. I'll have a cut another out of sheet styrene.
I've seen some that give her an almost completely transparent top. I
wanted to try something close (never done it before), but maybe not as far as some other take
it. I started out by covering all the surrounding skin with Silly Putty.
Where the cloth pulled tight I only misted the off white color, and gave a little more coverage by her neck and waist. I added pure white at the tops of the wrinkles, and then lightly brushed on some of the pearlizing paint on the top and bottom for a little extra shine. The part that was the skirt got full coverage.
On a different project I noticed that Green Stuff World's metallic paint behaved badly if put on top of a gloss black. But gave a terrific two tone metallic if painted over white. So I painted all the jewelry with white and then used a blue and red. The effect turned out pretty well. The parts that I wanted to be gold got the usual gloss black coating.
I painted her lips with
V's Cavalry Brown which is a dark red, added a highlight then to match
up some of the metallic green I used elsewhere on the model, I gave her
green eyes. A little eye shadow and blush from pastels finished off her face.
Then I painted up the column base with V's Dark Sand, and pulled out my Mummy bust to remind myself of what I did with that base, then more of less copied it. The column looked a little thin so I found a 40mm plastic base. I glued the column on, and then filled around it with V's ground texture. A wash of Sepia on the sand, and painted the rim a black brown and I was done. Thanks for looking.