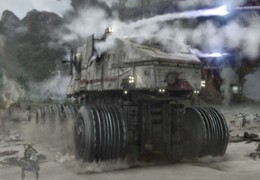
This time around I moved back to the Star Wars genre to build JPG's Juggernaut. The Juggernaut was seen in a number of the Battles in the prequels - -
The model comes in quite a few parts - many of them being the wheels -
Each wheel has a few mm of extra resin from the pour, and this needs to come off. I do have a sanding wheel, but the kit wheels small, and I was afraid of sanding the tips of my fingers off, so I still used the sanding wheel, but sanded with the power off. Its a coarse grit and went pretty quickly, but doing all 20 halves made it into a "wax on, wax off" type of situation. I was glad when they were all done.
But after that, the chassis and the body parts went together almost too easy. All extra parts almost fell in place. What a nicely designed kit.
One little snag was at the end of the main body there were a few series of tiny bubbles, but some Tamiya putty made short work of them - -
Putting the small details on is where I ran into trouble. The problem is the instruction sheet looks like it had been copied 100 times before being copied once more before being put in the kit box. It was too blurry and lacked contrast to where I couldn't see what went where, in which position.
Now I'm not picking on JPG on this. I gotten quite a few kits from different producers, and many have that "10th generation" copy look. I would like them to see them put an original in .jpg or .pdf and put it on their site so the modeler could go and print out a super crisp copy. OK, I'm off my soapbox.
Once I found a good image I was able to put all the details on - -
Then I went to my new way of priming every and painted it all black with the Stynylrez primer -
Next, came out my Vallejo Silver Gray color. This is a good color to use when you want to paint white. If you use white straight away, then you have no where to go to highlight. I did add White to a few panels here and there - -
I also added Vallejo Jet Exhaust metallic paint to the wheels to give them a slightly different look.
Next up is to gloss, decal and weather the vehicle.
I also have to start thinking about basing it...
Thanks for looking.


No comments:
Post a Comment